REASSEMBLY
Removal / installation · Vehicles built from Nov 2006
| 1.
INSTALL STARTER CLUTCH SUB-ASSEMBLY |
 |
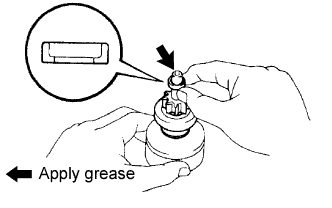
Apply grease to the bushing and spline of the starter clutch and stop collar.
- Place the starter clutch and stop collar on the planetary shaft.
Apply grease to a new snap ring and install it onto the planetary shaft groove.
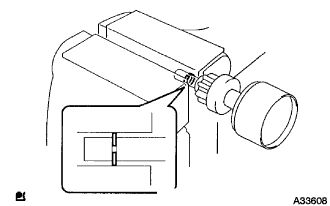
- Using a vise, compress the snap ring.
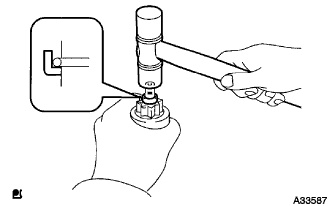
- Hold the starter clutch, tap the planetary shaft, and install the stop collar onto the snap ring with a plastic-faced hammer.
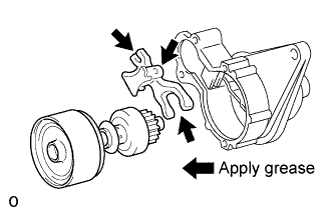
- Apply grease to the drive lever which is in contact with the starter pivot part of the drive lever.
Install the drive lever onto the starter clutch.
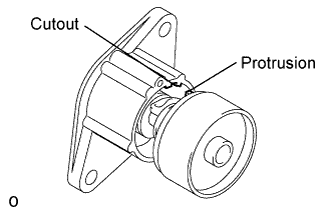
- Align the protrusion of the shock absorber with the cutout of the starter housing.
| 2.
INSTALL STARTER ARMATURE ASSEMBLY |
|
| 3.
INSTALL STARTER BRUSH HOLDER ASSEMBLY |
|
Install the brush holder.
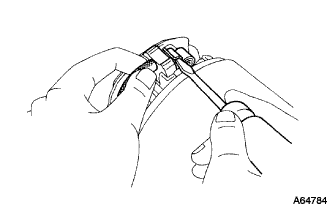
- Using a screwdriver, hold the brush spring back and fit the 4 brushes into the brush holder.
Apply turbine oil with additives to the bearing on the end frame.
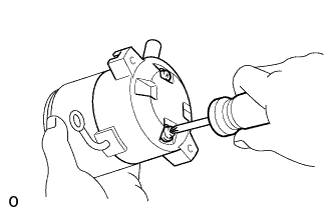
- Install the end frame with 2 new screws.
-
Torque:
- 1.5 N*m{
15 kgf*cm
, 13 in.*lbf
}
- NOTICE:
- To avoid interference between the brush holder and the dust protector, push in the commutator end frame at an angle.
| 4.
INSTALL STARTER YOKE ASSEMBLY |
|
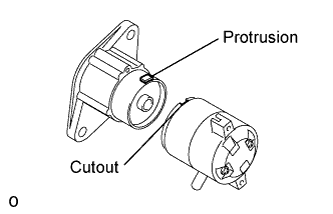
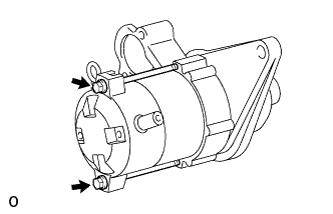
- Align the cutout of the field frame with the protrusion of the shock absorber.
- Install the field frame and the armature assembly with the 2 through bolts.
-
Torque:
- 5.9 N*m{
60 kgf*cm
, 52 in.*lbf
}
| 5.
INSTALL MAGNET STARTER SWITCH ASSEMBLY |
|
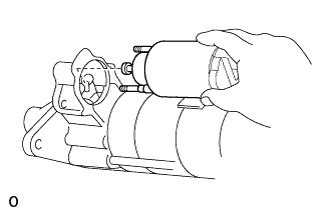
- Hook the magnet starter switch assembly plunger onto the drive lever from the upper side.
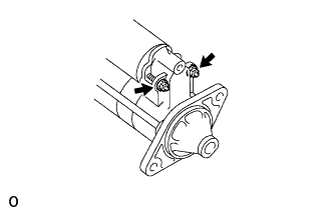
- Install the magnet starter switch assembly with the 2 nuts.
-
Torque:
- 8.3 N*m{
85 kgf*cm
, 73 in.*lbf
}
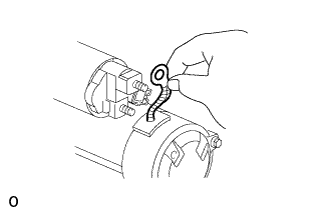
- Connect the lead wire to the terminal with the nut.
-
Torque:
- 9.8 N*m{
100 kgf*cm
, 87 in.*lbf
}