 |
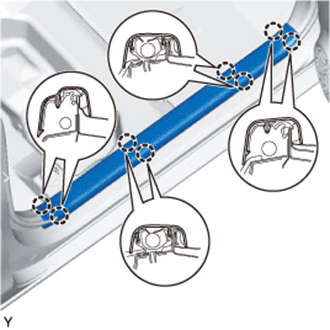
Disengage the 8 claws and remove the front door scuff plate.
QUARTER TRIM SPEAKER > REMOVAL |
| 1. REMOVE REAR SEAT ASSEMBLY (for 60/40 Split Seat Type RH Side) |
| 2. REMOVE REAR SEAT ASSEMBLY (for 60/40 Split Seat Type LH Side) |
| 3. REMOVE REAR SEAT ASSEMBLY (for Fold Down Seat Type) |
| 4. REMOVE FRONT DOOR SCUFF PLATE |
|
Disengage the 8 claws and remove the front door scuff plate.
| 5. SEPARATE FRONT DOOR OPENING TRIM WEATHERSTRIP |
Separate the front door opening trim weatherstrip.
| 6. REMOVE FRONT SEAT OUTER BELT BAR SUB-ASSEMBLY |
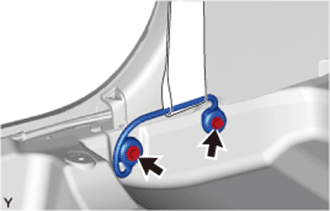 |
Remove the 2 bolts and front seat belt outer bar sub-assembly, disconnect the floor anchor part of the front seat outer belt assembly.
| 7. REMOVE FRONT QUARTER TRIM PANEL ASSEMBLY |
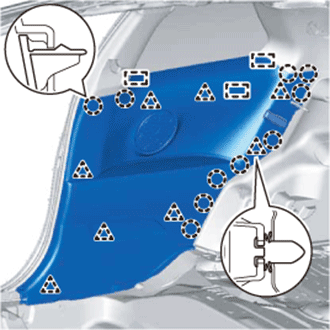 |
Disengage the 8 clips and 10 claws.
Disengage the 3 guides and remove the quarter trim panel.
| 8. REMOVE REAR SPEAKER ASSEMBLY |
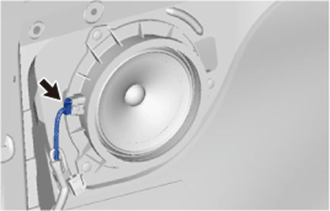 |
Disconnect the connector.
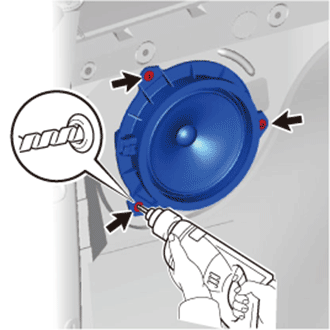 |
Drill out the 3 rivet heads using a drill with a bit diameter of less than 4 mm (0.16 in.), and remove the rear speaker assembly from the quarter panel.
Operate the drill around the rivet head circumference and cut out the flange.
After drilling out the flange, continue drilling to push out the shards on the drill.
Using a vacuum cleaner, remove the rivet fragments and shavings from the inside of the quarter panel.