AUTOMATIC TRANSAXLE ASSEMBLY > REMOVAL |
| 1. DRAIN AUTOMATIC TRANSAXLE FLUID |
Remove the drain plug and gasket, and drain ATF.
Install a new gasket and the drain plug.
| 2. REMOVE BATTERY |
|
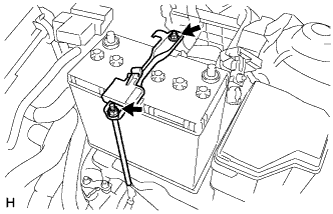
Disconnect the cable from the battery terminal.
Loosen the 2 nuts and remove the battery clamp.
Remove the battery.
| 3. REMOVE BATTERY TRAY |
| 4. REMOVE BATTERY CARRIER (for LHD) |
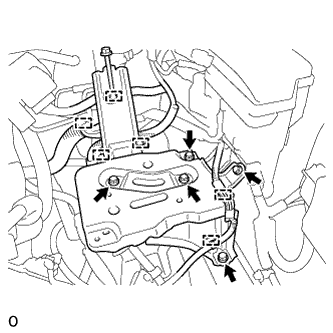 |
Disengage the 6 wire harness clamps and separate the wire harness from the battery carrier.
Remove the 5 bolts and the battery carrier.
| 5. REMOVE BATTERY CARRIER (for RHD) |
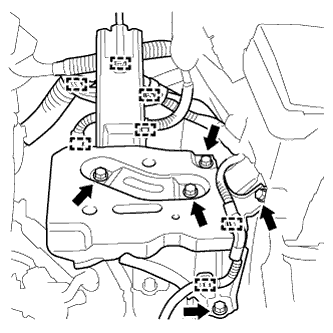 |
Disengage the 7 wire harness clamps and separate the wire harness from the battery carrier.
Remove the 5 bolts and the battery carrier.
| 6. REMOVE AIR CLEANER ASSEMBLY |
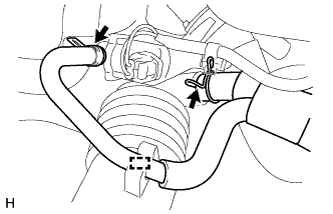 |
Disengage the clamp and disconnect the fuel vapor feed hose assembly from the No. 1 air cleaner hose.
Loosen the 2 hose clamps and disconnect the fuel vapor feed hose assembly from the No. 1 air cleaner hose and vacuum switching valve assembly.
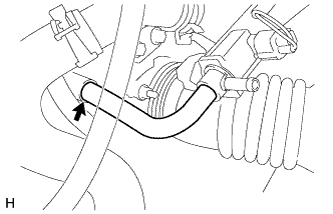 |
Disconnect the No. 2 fuel vapor feed hose from the intake manifold.
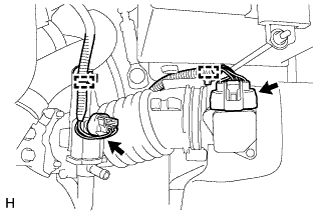 |
Disengage the 2 clamps and disconnect the wire harness from the air cleaner cap sub-assembly and vacuum switching valve assembly.
Disconnect the mass air flow meter connector.
Disconnect the vacuum switching valve connector.
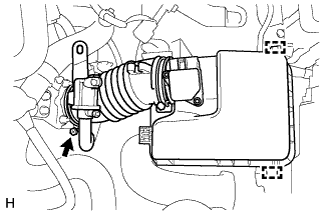 |
Loosen the hose clamp and disconnect the No. 1 air cleaner hose from the throttle with motor body assembly.
Disengage the 2 clamps and remove the air cleaner cap sub-assembly with No. 1 air cleaner hose.
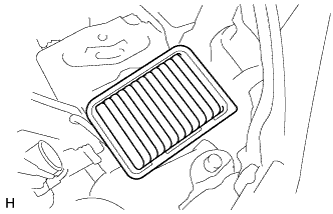 |
Remove the air cleaner element.
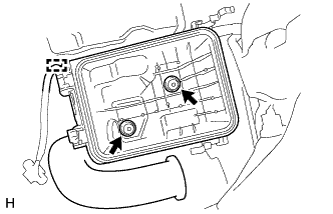 |
Disengage the clamp and disconnect the wire harness from the air cleaner case.
Remove the 2 bolts and the air cleaner case from the air cleaner bracket.
| 7. REMOVE AIR CLEANER BRACKET |
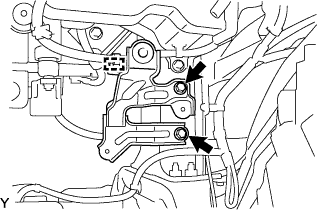 |
Disengage the clamp and disconnect the wire harness from the air cleaner bracket.
Remove the 2 bolts and the air cleaner bracket.
| 8. REMOVE STARTER ASSEMBLY |
| 9. SEPARATE TRANSMISSION CONTROL CABLE ASSEMBLY |
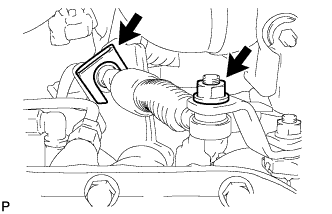 |
Remove the nut and disconnect the transmission control cable assembly from the control shaft lever.
Remove the clip and separate the transmission control cable assembly from the No. 1 transmission control cable bracket.
| 10. SEPARATE WIRE HARNESS |
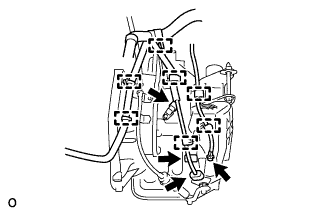 |
Remove the bolt and separate the No. 3 engine wire from the automatic transaxle assembly.
Disconnect the park/neutral position switch connector.
Disconnect the transmission wire connector.
Disconnect the transmission revolution sensor connector.
Disengage the 7 clamps and separate the wire harness.
| 11. DISCONNECT INLET OIL COOLER HOSE |
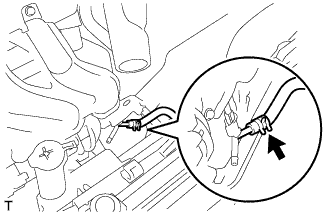 |
Loosen the clip and disconnect the oil cooler inlet hose.
| 12. DISCONNECT OUTLET OIL COOLER HOSE |
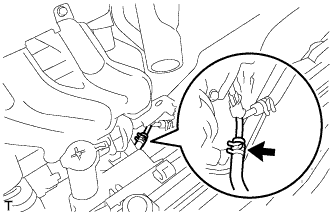 |
Loosen the clip and disconnect the oil cooler outlet hose.
| 13. REMOVE FRONT DRIVE SHAFT ASSEMBLIES |
| 14. REMOVE FRONT SUSPENSION CROSSMEMBER SUB-ASSEMBLY |
| 15. SUPPORT ENGINE ASSEMBLY |
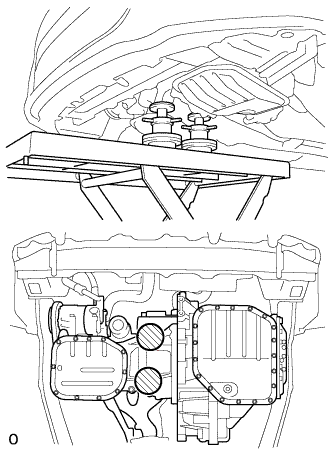 |
Place the wooden blocks or plate lift attachments in the positions shown in the illustration and set an engine lifter underneath the engine assembly.
 | Attachment Placement Positions |
| 16. REMOVE FLYWHEEL HOUSING UNDER COVER |
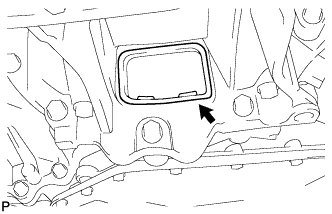 |
Remove the flywheel housing under cover.
| 17. REMOVE TORQUE CONVERTER SETTING BOLT |
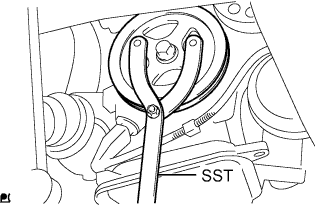 |
Use SST to hold the crankshaft pulley in place.
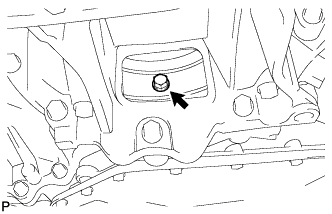 |
Remove the 6 torque converter setting bolts.
| 18. REMOVE ENGINE MOVING CONTROL ROD BRACKET |
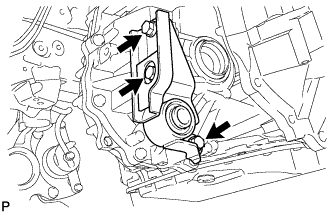 |
Remove the 3 bolts and the engine moving control rod bracket.
| 19. REMOVE ENGINE MOUNTING BRACKET LH |
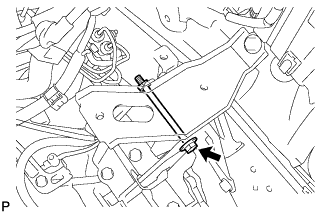 |
Remove the bolt and nut, and separate the engine mounting insulator LH from the engine mounting bracket LH.
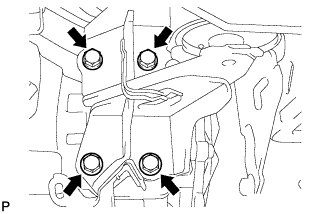 |
Remove the 4 bolts and the engine mounting bracket LH from the automatic transaxle assembly.
| 20. REMOVE AUTOMATIC TRANSAXLE ASSEMBLY |
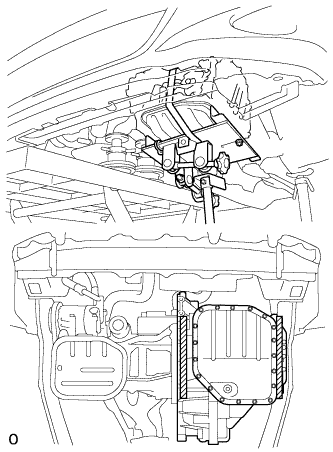 |
On a flat location, set the attachment in the positions shown in the illustration, and set the automatic transaxle assembly.
| Attachment Placement Positions |
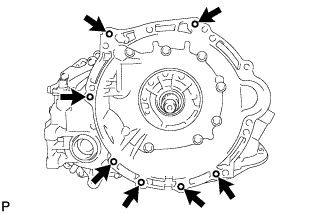 |
Remove the 7 bolts and the automatic transaxle assembly from the engine assembly.
| 21. REMOVE TORQUE CONVERTER ASSEMBLY |
Remove the torque converter assembly from the automatic transaxle assembly.
| 22. REMOVE SPEEDOMETER DRIVEN HOLE COVER SUB-ASSEMBLY |
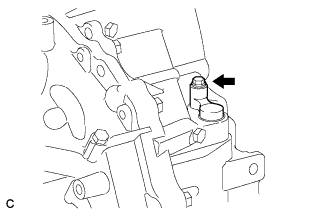 |
Remove the bolt and the speedometer driven hole cover sub-assembly from the automatic transaxle assembly.
Remove the O-ring from the speedometer driven hole cover.
| 23. REMOVE NO. 1 TRANSMISSION CONTROL CABLE BRACKET |
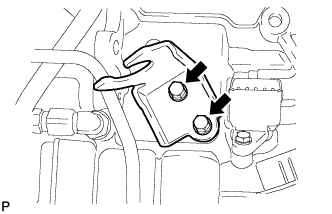 |
Remove the 2 bolts and the No. 1 transmission control cable bracket from the automatic transaxle assembly.
| 24. DISCONNECT INLET NO. 1 OIL COOLER TUBE |
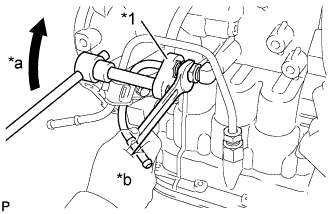 |
Using a union nut wrench 14 mm, disconnect the inlet No. 1 oil cooler tube while holding the oil cooler tube union with a wrench.
| *1 | Union Nut Wrench 14 mm |
| *a | Turn |
| *b | Hold |
| 25. DISCONNECT OUTLET NO. 1 OIL COOLER TUBE |
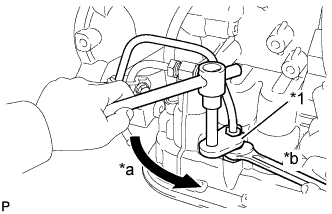 |
Using a union nut wrench 14 mm, disconnect the outlet No. 1 oil cooler tube while holding the oil cooler tube union with a wrench.
| *1 | Union Nut Wrench 14 mm |
| *a | Turn |
| *b | Hold |
| 26. REMOVE NO. 2 OIL COOLER TUBE CLAMP |
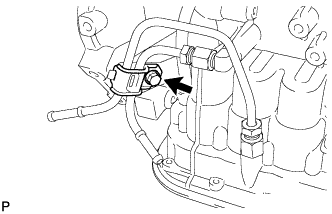 |
Remove the bolt and the No. 2 oil cooler tube clamp from the transmission oil filler tube sub-assembly.
Remove the inlet No. 1 oil cooler tube and the outlet No. 1 oil cooler tube from the automatic transaxle assembly.
| 27. REMOVE TRANSMISSION OIL LEVEL DIPSTICK SUB-ASSEMBLY |
Remove the transmission oil level dipstick sub-assembly from the transmission oil filler tube sub-assembly.
| 28. REMOVE TRANSMISSION OIL FILLER TUBE SUB-ASSEMBLY |
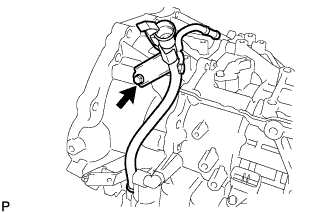 |
Disconnect the breather hose from the transmission oil filler tube sub-assembly.
Remove the bolt and the transmission oil filler tube sub-assembly from the automatic transaxle assembly.
Remove the O-ring from the transmission oil filler tube sub-assembly.
| 29. REMOVE WIRE HARNESS CLAMP BRACKET |
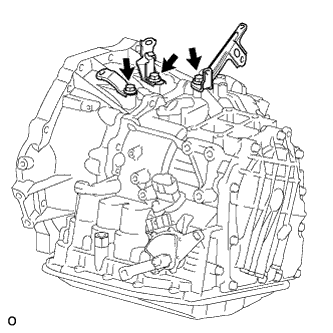 |
Remove the 3 bolts and the 3 wire harness clamp brackets from the automatic transaxle assembly.