for LHD:
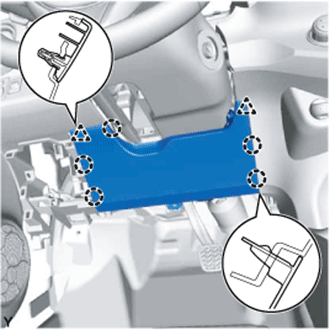
Disengage the 2 clips and the 5 claws and remove the instrument panel finish panel.
 |
CLUTCH MASTER CYLINDER (for RHD) > REMOVAL |
| 1. REMOVE NO. 1 INSTRUMENT PANEL UNDER COVER SUB-ASSEMBLY (w/o Knee Airbag) |
| 2. REMOVE LOWER INSTRUMENT PANEL FINISH PANEL (w/o Knee Airbag) |
for LHD:
|
Disengage the 2 clips and the 5 claws and remove the instrument panel finish panel.
for RHD:
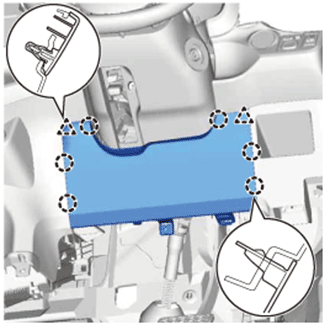 |
Disengage the 2 clips and the 6 claws and remove the instrument panel finish panel.
| 3. REMOVE LOWER NO. 1 INSTRUMENT PANEL AIRBAG ASSEMBLY (w/ Knee Airbag) |
| 4. REMOVE WINDSHIELD WIPER MOTOR AND LINK ASSEMBLY |
| 5. REMOVE FRONT NO. 1 VENTILATOR SEAL |
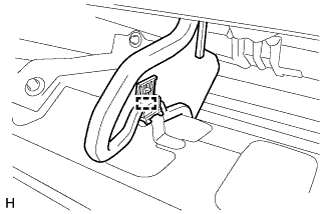 |
Disengage the clamp and remove the front No. 1 ventilator seal.
| 6. REMOVE FRONT AIR SHUTTER SEAL RH |
| 7. REMOVE INNER COWL TOP TO COWL BRACE |
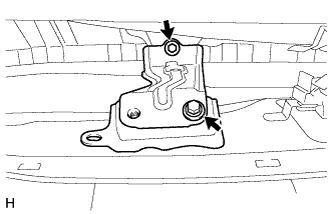 |
Remove the 2 bolts and the inner cowl top to cowl brace.
| 8. REMOVE OUTER COWL TOP PANEL |
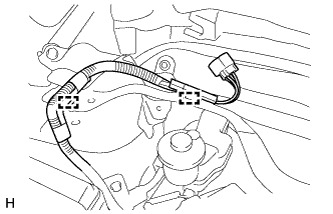 |
Disengage the 2 clamps and separate the wire harness.
Remove the 8 bolts and the outer cowl top panel.
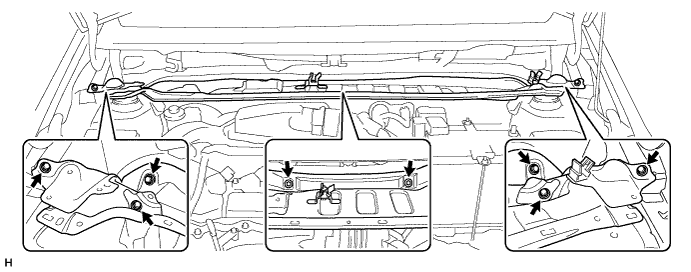
| 9. DRAIN BRAKE FLUID |
| 10. DISCONNECT CLUTCH RESERVOIR TUBE |
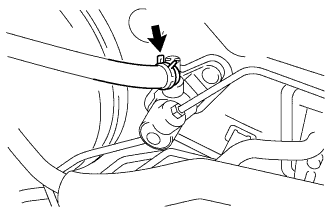 |
Slide the clip and disconnect the clutch reservoir tube from the clutch master cylinder assembly.
| 11. DISCONNECT CLUTCH MASTER CYLINDER TO FLEXIBLE HOSE TUBE |
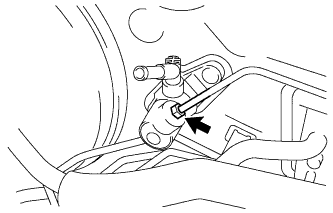 |
Using a union nut wrench (10 mm), disconnect the clutch master cylinder to flexible hose tube from the clutch master cylinder assembly.
| 12. REMOVE CLUTCH MASTER CYLINDER ASSEMBLY |
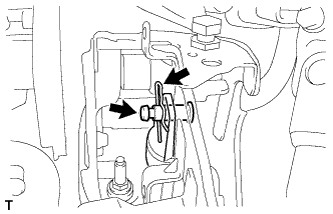 |
Remove the clip and the clevis pin, and separate the clutch master cylinder push rod clevis from the clutch pedal sub-assembly.
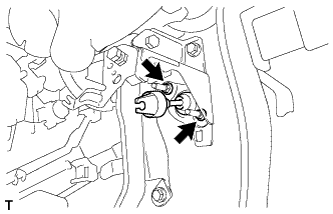 |
Remove the 2 nuts and the clutch master cylinder assembly.
| 13. REMOVE CLUTCH MASTER CYLINDER PUSH ROD CLEVIS |
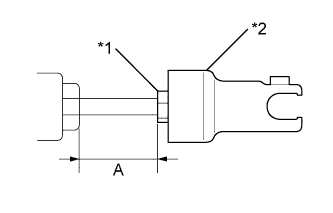 |
Measure the dimension A as shown in the illustration before loosening the lock nut.
| *1 | Lock Nut |
| *2 | Clutch Master Cylinder Push Rod Clevis |
Loosen the lock nut and remove the clutch master cylinder push rod clevis from the push rod.
Remove the lock nut from the push rod.