RADIATOR
- DESCRIPTION
- OPERATION
- DIAGNOSIS AND TESTING - RADIATOR COOLANT FLOW
- REMOVAL
- CLEANING
- INSPECTION
- INSTALLATION
DESCRIPTION
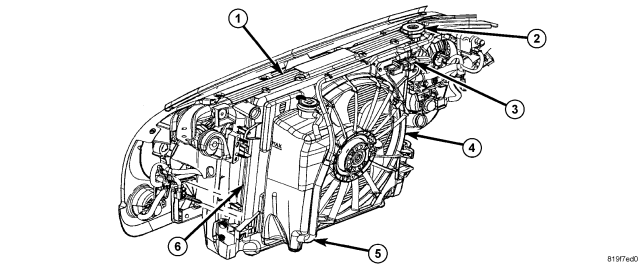
A heavy duty cross-flow aluminum/plastic radiator is used. The radiator consists of an aluminum core and plastic end tanks, which are fastened to the core with clinch tabs and sealed with a high temperature rubber gasket.
Vehicles equipped with automatic transmissions use a combination A/C condenser/transmission oil cooler located on the front of the radiator.
If the plastic tank has been damaged, individual parts are not available, and the radiator must be replaced.
OPERATION
As air passes through the radiator core, the heat within the coolant is dissipated into the ambient air.DIAGNOSIS AND TESTING - RADIATOR COOLANT FLOW
The following procedure will determine if coolant is flowing through the cooling system.
If engine is cold, idle engine until normal operating temperature is reached. Then feel the upper radiator hose. If hose is hot, the thermostat is open and water is circulating through cooling system.
REMOVAL
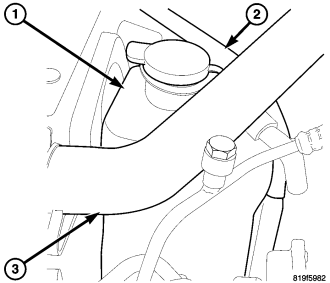
CAUTION: When removing the radiator or A/C condenser for any reason, note the location of all radiator-to-body and radiator-to-A/C condenser rubber air seals. These are used at the top, bottom and sides of the radiator and A/C condenser. To prevent overheating, these seals must be installed to their original positions.
1. Disconnect negative battery cable at battery.
2. Drain cooling system (Refer to 7 - COOLING - STANDARD PROCEDURE) drain coolant into a clean container for reuse.
3. Remove coolant recovery container (Refer to 7 - COOLING/ENGINE/COOLANT RECOVERY CONTAINER - REMOVAL).
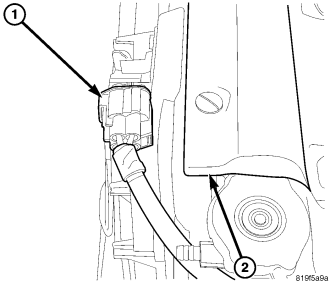
4. Remove radiator upper seal (2).
5. Remove the electric cooling fan (Refer to 7 - COOLING/ENGINE/RADIATOR FAN - REMOVAL)
6. Remove lower radiator seal.
7. Remove lower radiator hose.
8. Remove front grill (Refer to 23 - BODY/EXTERIOR/GRILLE - REMOVAL).
9. Remove two A/C condenser mounting bolts. Lift A/C condenser out of J-clips.
10. Loosen horn mounting bolt. Rotate horn out of the way.
11. Remove A/C tubing mounting bracket bolt.
12. Remove radiator mounting bolts.
13. The lower part of radiator is equipped with two alignment dowel pins. They are located on the bottom of radiator tank and fit into rubber grommets. These rubber grommets are pressed into the radiator lower crossmember.
14. Lift radiator straight up and out of vehicle taking care not to damage radiator fins.
15. When removing radiator, note position of the rubber seals located on the top and bottom of radiator (on certain models only). To prevent possible overheating, these seals must be installed to their original positions.
CLEANING
Clean radiator fins. With the engine cold, apply cold water and compressed air to the back (engine side) of the radiator to flush the radiator and/or A/C condenser of debris.INSPECTION
The radiator cooling fins should be checked for damage or deterioration. Inspect cooling fins to make sure they are not bent or crushed, these areas result in reduced heat exchange causing the cooling system to operate at higher temperatures. Inspect the plastic end tanks for cracks, damage or leaks. Inspect the radiator neck for damage or distortion.INSTALLATION
CAUTION: Before installing the radiator or A/C condenser, be sure the radiator-to-body and radiator-to-A/C condenser rubber air seals are properly fastened to their original positions. These are used at the top, bottom and sides of the radiator and A/C condenser. To prevent overheating, these seals must be installed to their original positions.
1. Guide the two radiator alignment dowels into the rubber grommets located in lower radiator crossmember. Install and tighten mounting bolts to 8 N·m (70 in. lbs.) torque.
2. Position combination A/C condenser/transmission oil cooler in J-clips and install mounting bolts.
3. Tighten bolts to 8 N·m (70 in. lbs.).
4. Position evaporator line tapping block and install mounting bolt. Tighten to 8 N·m (70 in. lbs.).
5. Position horn and tighten mounting bolt to 8 N·m (70 in. lbs.).
6. Install the electric cooling fan (Refer to 7 - COOLING/ENGINE/RADIATOR FAN - INSTALLATION).
7. Position and install the lower radiator seal.
8. Install upper radiator seal.
9. Install front grill (Refer to 23 - BODY/EXTERIOR/GRILLE - INSTALLATION).
10. Connect radiator hoses and install hose clamps.
11. Install coolant recovery container.
12. Fill cooling system with correct coolant (Refer to 7 - COOLING - STANDARD PROCEDURE).
13. Connect battery negative cable.
14. Start engine and check for leaks.