| Last Modified: 11-27-2007 | 1.6 A | |
| Service Category: Vehicle Interior | Section: Heating/Air Conditioning | |
| Model Year: 2008 | Model: LX570 | Doc ID: RM0000017ZR00WX |
| Title: HEATING / AIR CONDITIONING: FRONT AIR CONDITIONING UNIT: REMOVAL (2008 LX570) | ||
REMOVAL
1. REMOVE FRONT FENDER SPLASH SHIELD SUB-ASSEMBLY LH

2. REMOVE FRONT FENDER SPLASH SHIELD SUB-ASSEMBLY RH
3. REMOVE NO. 1 ENGINE UNDER COVER SUB-ASSEMBLY
4. REMOVE ENGINE ROOM SIDE COVER LH
5. REMOVE ENGINE ROOM SIDE COVER RH
6. REMOVE UPPER RADIATOR SUPPORT SEAL
7. DRAIN ENGINE COOLANT
8. RECOVER REFRIGERANT FROM REFRIGERATION SYSTEM
9. DISCONNECT CABLE FROM NEGATIVE BATTERY TERMINAL
CAUTION:
Wait at least 90 seconds after disconnecting the cable from the negative (-) battery terminal to disable the SRS system.
NOTICE:
-
w/ Navigation System:
After the engine switch is turned off, the HDD navigation system requires approximately 6 minutes to record various types of memory and settings. As a result, after turning the engine switch off, wait 6 minutes or more before disconnecting the cable from the negative (-) battery terminal.
-
When disconnecting the cable, some systems need to be initialized after the cable is reconnected
.
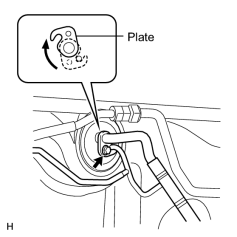
10. DISCONNECT AIR CONDITIONING TUBE ASSEMBLY
|
(a) Remove the bolt. |
(b) Detach the plate as shown in the illustration.
|
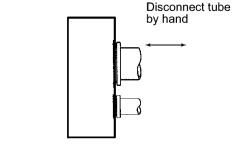
(c) Disconnect the air conditioning tube assembly. NOTICE:
|
(d) Remove the 2 O-rings from the air conditioning tube assembly.
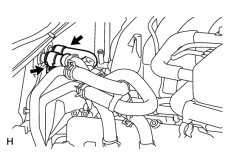
11. DISCONNECT INLET HEATER WATER HOSE AND OUTLET HEATER WATER HOSE
|
(a) Using pliers, grip the claws of the clips and slide the 2 clips. |
(b) Disconnect the 2 heater water hoses.
12. REMOVE FRONT WIPER MOTOR AND BRACKET
(a) Remove the front wiper motor and bracket
.
13. REMOVE INSTRUMENT PANEL SUB-ASSEMBLY
(a) Remove the instrument panel
.
14. REMOVE NO. 3 AIR DUCT SUB-ASSEMBLY
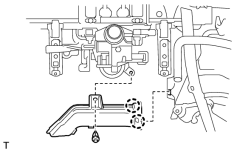
(a) Remove the clip.
(b) Detach the 2 claws and remove the duct.
15. REMOVE STEERING COLUMN ASSEMBLY
(a) Remove the steering column
.
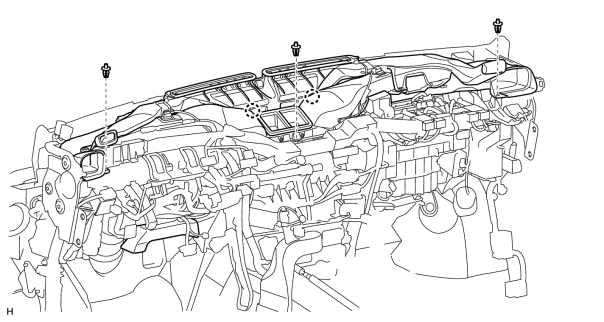
16. REMOVE HEATER TO REGISTER DUCT ASSEMBLY
(a) Remove the 3 clips.
(b) Detach the 2 claws and remove the duct.
17. REMOVE INSTRUMENT PANEL REINFORCEMENT ASSEMBLY
(a) Disconnect the clamps, connectors and wire harness.
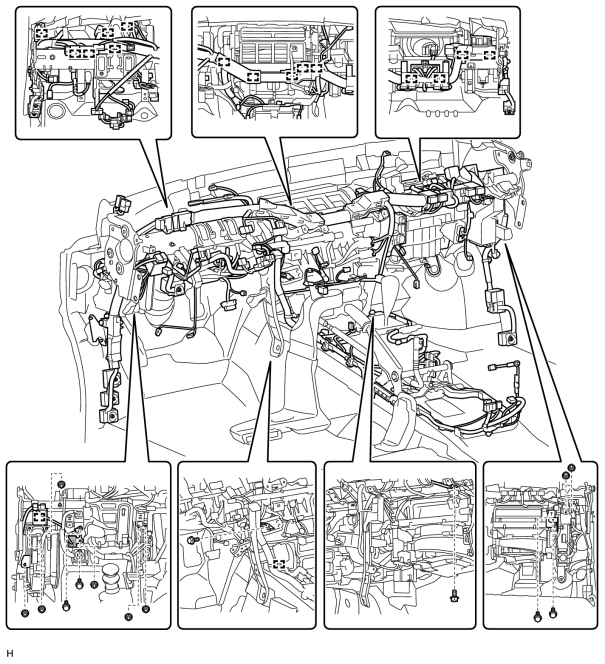
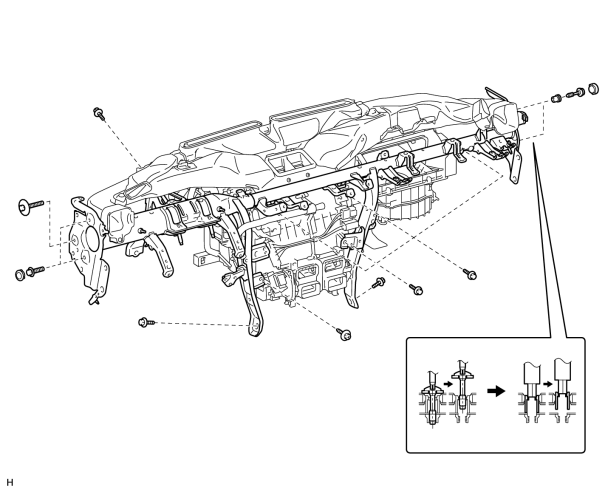
(b) Remove the instrument panel reinforcement.
(1) for Driver Side:
Remove the 3 caps and 3 bolts.
(2) for Passenger Side:
Remove the 2 caps.
(3) for Passenger Side:
Using a T40 "TORX" socket, remove the 2 "TORX" bolts.
HINT:
When removing the bolts, the collars may come off with the bolts.
(4) for Passenger Side:
Using a 12 mm hexagon wrench, remove the 2 collars.
(5) Remove the 7 bolts, screw and instrument panel reinforcement.
18. REMOVE AIR CONDITIONING HOSE AND ACCESSORY (w/ Cool Box)
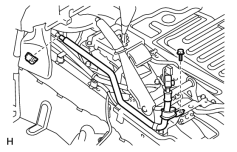
(a) Remove the bolt.
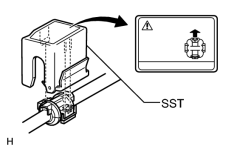
(b) Using SST, remove the piping clamp.
SST: 09870-00025
|
(1) Attach SST to the piping clamp. HINT:
Confirm the direction of the piping clamp claw and SST by referring to the illustration on the caution label. |
|
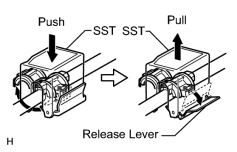
(2) Push down SST and release the clamp lock. NOTICE:
Be careful not to deform the tubes when pushing SST. |
(3) Pull SST slightly and push the release lever, then remove the piping clamp with SST.
(4) Remove the piping clamp from SST.
(c) Disconnect the hose and accessory from the liquid tube to remove it.
NOTICE:
Cap the open fittings immediately to keep moisture or dirt out of the system.
(d) Remove the 2 O-rings from the air conditioning hose and accessory.
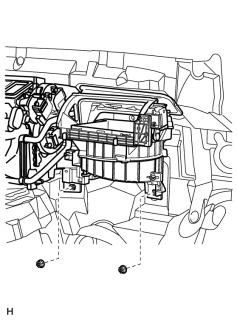
19. REMOVE AIR CONDITIONING UNIT
|
(a) Remove the 2 nuts and air conditioning unit. |

|

|