| Last Modified: 11-27-2007 | 1.6 A | |
| Service Category: Vehicle Exterior | Section: Exterior Panels/Trim | |
| Model Year: 2008 | Model: LX570 | Doc ID: RM0000039Z7002X |
| Title: EXTERIOR PANELS / TRIM: BLACK OUT TAPE (for Rear Door): REMOVAL (2008 LX570) | ||
REMOVAL
HINT:
- Use the same procedures for the RH side and LH side.
- The procedures listed below are for the LH side.
- When removing the black out tape and window frame moulding, heat the vehicle body, black out tape and window frame moulding using a heat light.
Standard:
|
Item |
Temperature |
|---|---|
|
Vehicle Body |
40 to 60°C (104 to 140°F) |
|
Black Out Tape |
20 to 30°C (68 to 86°F) |
|
Window Frame Moulding |
20 to 30°C (68 to 86°F) |
NOTICE:
Do not heat the vehicle body, black out tape and window frame moulding excessively.
1. REMOVE ENGINE ROOM SIDE COVER LH

2. DISCONNECT CABLE FROM NEGATIVE BATTERY TERMINAL
NOTICE:
-
w/ Navigation System:
After the engine switch is turned off, the HDD navigation system requires approximately 6 minutes to record various types of memory and settings. As a result, after turning the engine switch off, wait 6 minutes or more before disconnecting the cable from the negative (-) battery terminal.
-
When disconnecting the cable, some systems need to be initialized after the cable is reconnected
.
3. REMOVE REAR DOOR INSIDE HANDLE BEZEL PLUG LH
4. REMOVE REAR UPPER DOOR ARMREST BASE PANEL LH
5. REMOVE REAR DOOR TRIM BOARD SUB-ASSEMBLY LH
6. REMOVE REAR DOOR TRIM COVER LH
7. REMOVE REAR INNER DOOR GLASS WEATHERSTRIP LH
8. REMOVE REAR DOOR SERVICE HOLE COVER LH
9. REMOVE REAR DOOR GLASS RUN LH
10. REMOVE REAR DOOR REAR LOWER WINDOW FRAME SUB-ASSEMBLY LH
11. REMOVE REAR DOOR QUARTER WINDOW GLASS LH
12. REMOVE REAR DOOR GLASS SUB-ASSEMBLY LH
13. REMOVE REAR DOOR BELT MOULDING ASSEMBLY LH
14. REMOVE REAR DOOR FRONT WINDOW FRAME MOULDING LH
15. REMOVE REAR DOOR FRAME GARNISH LH
16. REMOVE REAR NO. 2 DOOR FRAME GARNISH LH
17. REMOVE REAR DOOR WEATHERSTRIP LH
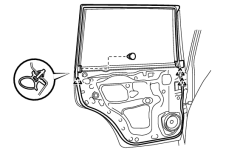
(a) Remove the clip.
(b) Detach the 3 clips, and remove the upper part of the rear door weatherstrip so that the black out tape can be removed.
18. REMOVE NO. 2 BLACK OUT TAPE LH
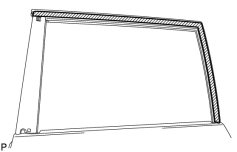
(a) Pull back an edge of the black out tape and pull it parallel to the vehicle body to remove it.
19. REMOVE NO. 6 BLACK OUT TAPE LH
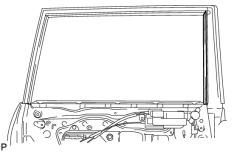
(a) Pull back an edge of the black out tape and pull it parallel to the vehicle body to remove it.
20. REMOVE UPPER INNER BLACK OUT TAPE LH
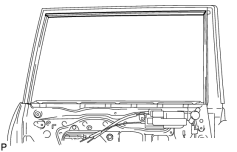
(a) Pull back an edge of the black out tape and pull it parallel to the vehicle body to remove it.
21. REMOVE REAR INNER BLACK OUT TAPE LH
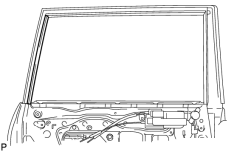
(a) Pull back an edge of the black out tape and pull it parallel to the vehicle body to remove it.

|

|