REMOVAL
Removal / installation
| 1. PRECAUTION |

- CAUTION:
- Be sure to read "PRECAUTION" thoroughly before servicing (Click here).
| 2. DISCONNECT CABLE FROM NEGATIVE BATTERY TERMINAL |
- CAUTION:
- Wait for 90 seconds after disconnecting the cable to prevent the airbag working.
| 3. REMOVE FRONT DOOR SCUFF RH PLATE |
- HINT:
- Use the same procedures for the front door scuff RH plate and the front door scuff LH plate (Click here).
| 4. REMOVE FRONT DOOR OPENING TRIM RH WEATHERSTRIP |
| 5. REMOVE COWL SIDE TRIM SUB-ASSEMBLY RH |
- HINT:
- Use the same procedures for the cowl side trim sub-assembly RH and the cowl side trim sub-assembly LH (Click here).
| 6. REMOVE INSTRUMENT PANEL NO.2 UNDER COVER SUB-ASSEMBLY |
Using a screwdriver, push the 3 claws in the direction indicated by the arrow to disengage and remove the guide on the front of the vehicle.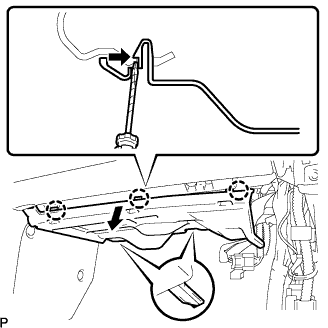

- HINT:
- Tape the screwdriver tip before use.
Disconnect the connectors and remove the instrument panel No.2 under cover sub-assembly.
| 7. REMOVE GLOVE COMPARTMENT DOOR ASSEMBLY |
Remove the 2 bolts <A> and the 2 screws <C>.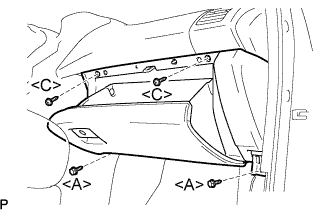
Pull the glove compartment door assembly to the rear to remove it.
Disconnect the connector.
| 8. DISCONNECT FRONT PASSENGER AIRBAG ASSEMBLY CONNECTOR |
Disconnect the 2 connectors from the front passenger airbag assembly.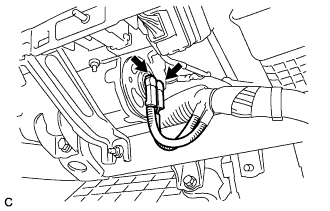
- NOTICE:
- When handling the airbag connector, take care not to damage the airbag wire harness.
| 9. REMOVE INSTRUMENT PANEL ASSEMBLY |
- HINT:
- Refer to the procedures up to "REMOVE INSTRUMENT PANEL ASSEMBLY" (Click here).
| 10. REMOVE INSTRUMENT PANEL BRACKET SUB-ASSEMBLY CENTER |
Remove the screw <C> and the instrument panel bracket sub-assembly center.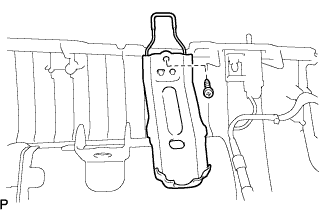
| 11. REMOVE FRONT PASSENGER AIRBAG ASSEMBLY |
Remove the 2 screws.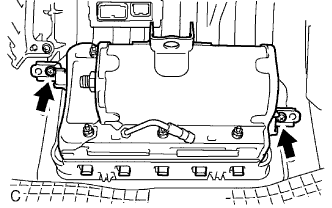
Release the rear side airbag door from the hook by slightly deflecting it and roll the front passenger airbag assembly forward.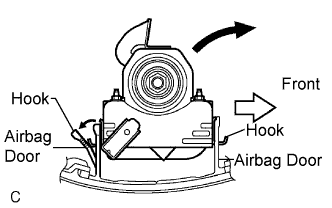
Release the front side airbag door from the other hook and remove the front passenger airbag assembly.