Front Brake Pad Removal and Installation
Precautions: Precautions for Brakes · General safety (00)
NOTICE:
Failure to take proper precautions while servicing front brake caliper and brake pads can result in brake system failure.
•Do not pull or push pad springs i.e. plates (1) and coil springs (2) when removing or installing front brake caliper and brake pads.
•Do not disassemble pad springs i.e. plates (1) and coil springs (2).
•Be careful not to damage the front brake flexible hose during front brake pad removal.
•Avoid depressing the brake pedal during the front brake pad removal procedure to prevent the brake piston from being forced out of the cylinder.
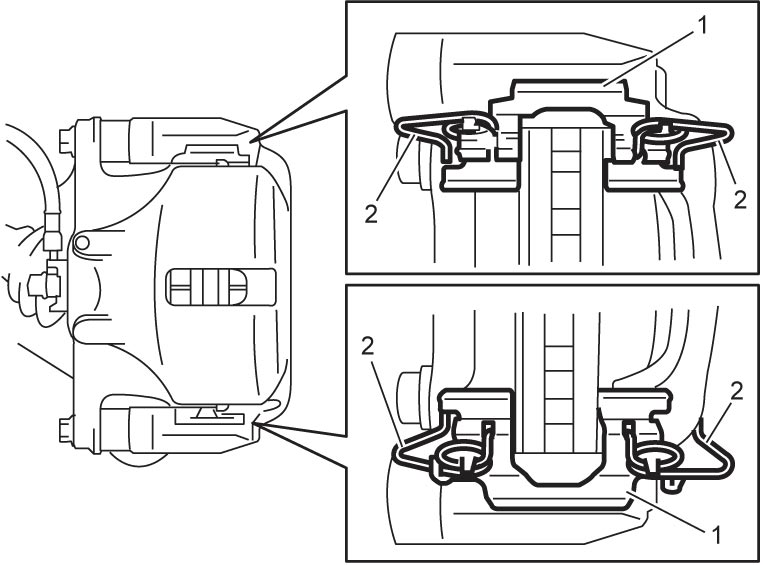

•Do not disassemble pad springs i.e. plates (1) and coil springs (2).
•Be careful not to damage the front brake flexible hose during front brake pad removal.
•Avoid depressing the brake pedal during the front brake pad removal procedure to prevent the brake piston from being forced out of the cylinder.
NOTE:
•Check for leakage of brake fluid when removing front brake pads and repair front brake caliper if leakage is found.
•Replace all brake pads at the same time even if only one pad is defective.
•Replace all brake pads at the same time even if only one pad is defective.
Removal
1)Hoist vehicle and remove front wheel. 
2)Remove front brake caliper pin bolts (1).
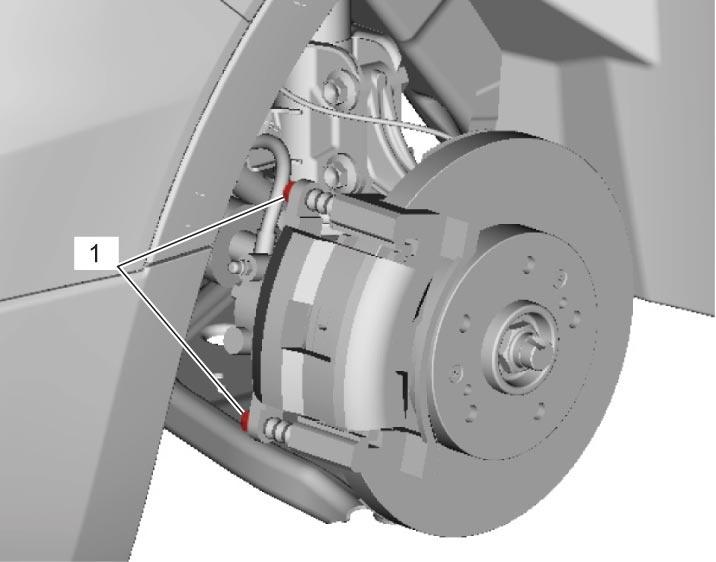
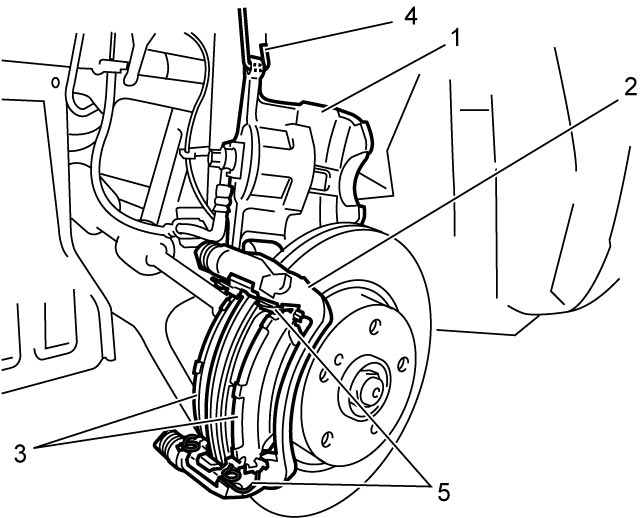
3)Remove front brake caliper (1) from front brake caliper carrier (2).
NOTICE:
If the removed front brake caliper (1) is left hung by the front brake flexible hose, the front brake flexible hose may be damaged due to the tension caused by the caliper’s weight.
Hang a removed front brake caliper with a wire hook (4) or the like to relieve the front brake flexible hose of the tension.
4)Remove front brake pads (3) and pad springs (5) from front brake caliper carrier (2).
Installation
NOTICE:
If the front brake flexible hose is twisted, the hose will be damaged.
If the front brake flexible hose is twisted, reinstall front brake caliper being careful not to let front brake flexible hose get twisted.
NOTE:
There are two types of brake grease included in brake pad set of supply parts.
| Grease color | Applying part |
|---|---|
| Gold |
•Between front brake caliper carrier and pad spring
•Between brake pad and pad springs |
| Black | Between brake pad and brake pad shims |
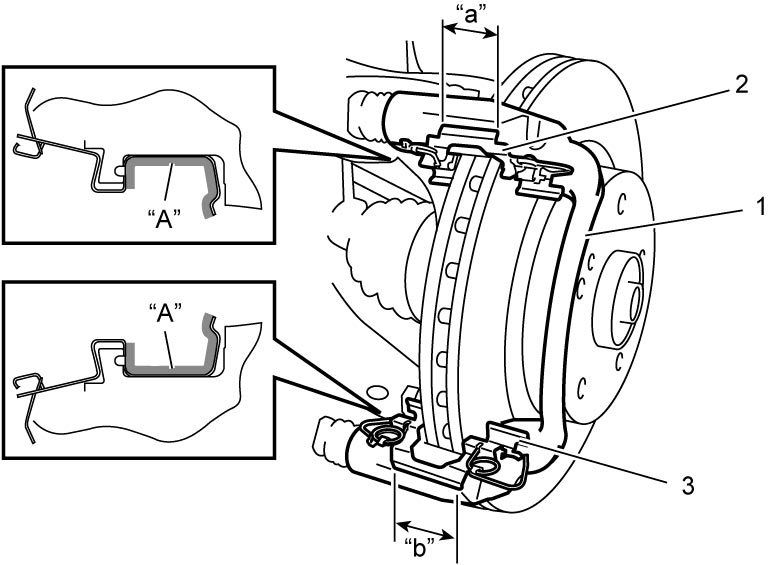
1)Apply brake grease (gold) included in brake pad set to hatched areas “A” of front brake caliper carrier (1).
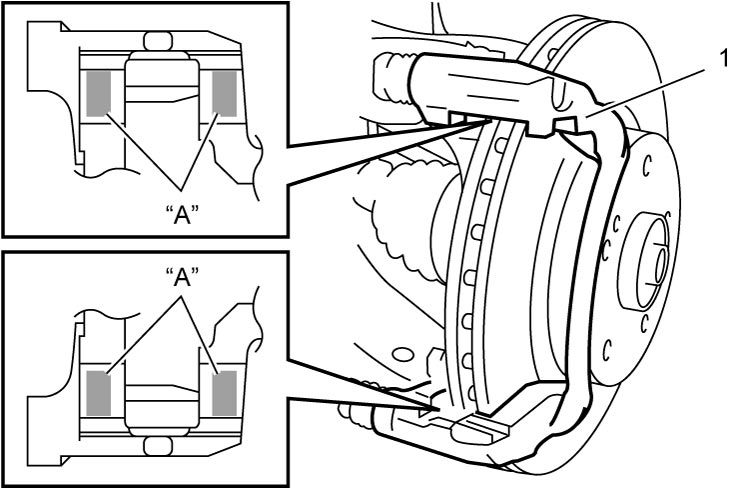
2)Install pad springs to front brake caliper carrier (1) and apply brake grease (gold) included in brake pad set to hatched areas “A” of pad springs.
NOTE:
Distinguish upper pad spring (2) and lower pad spring (3) by the plate width narrow “a” for upper and wide “b” for lower.
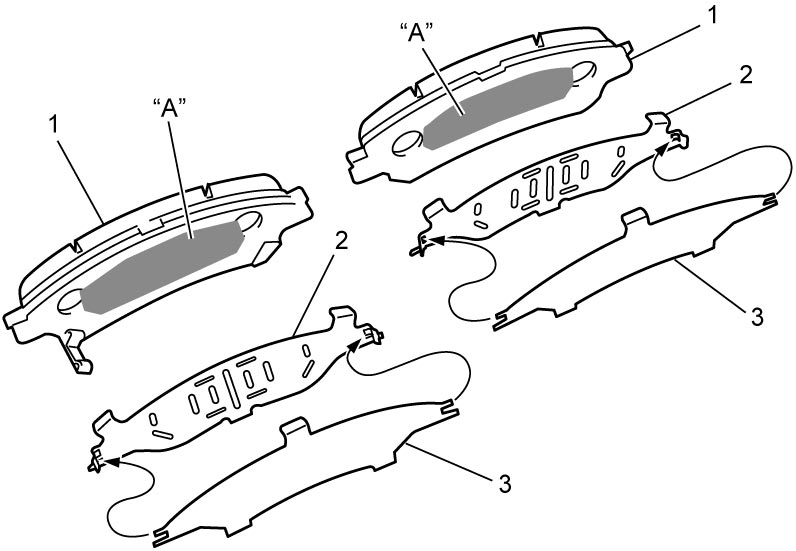
3)Apply brake grease (black) included in brake pad set to each of hatched area “A” between brake pads (1) and anti-noise shims (2).
4)Put each of brake pad shims (3) and anti-noise shims together and fit them to respective brake pad.
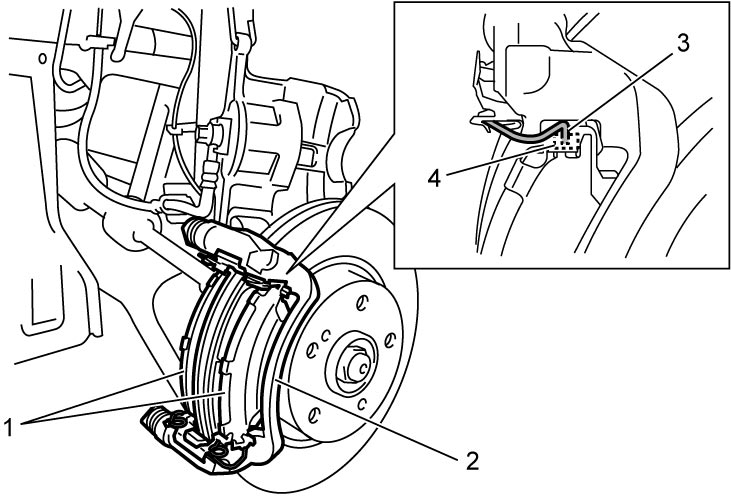
5)Install brake pads (1) to caliper carrier (2) fitting each return spring end (3) into brake pad inside groove (4) at upper side of brake pad first and then lower side next.
NOTE:
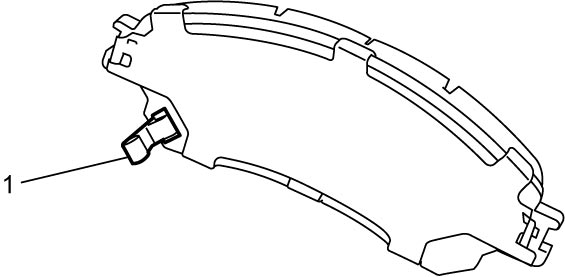
Install inner pad at vehicle center side of caliper carrier with its wear indicator (1) positioned upside.
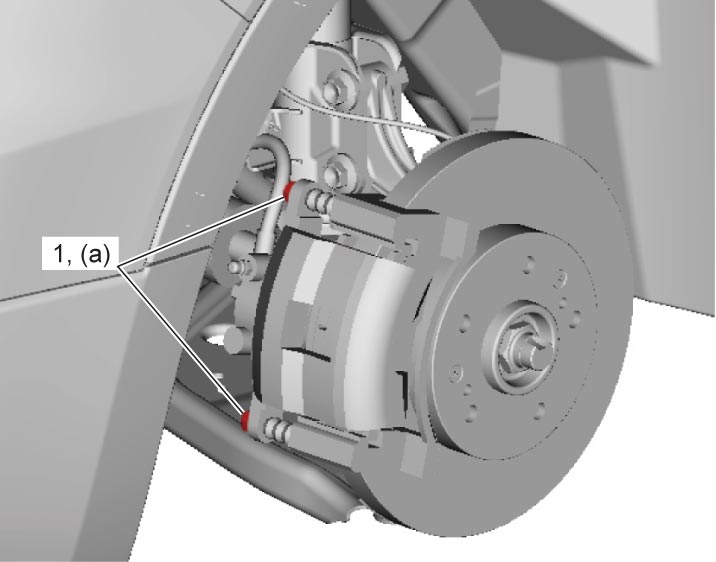
6)Install front brake caliper and tighten caliper pin bolts (1) to specified torque.
7)Install front wheel.
8)Check that brake system operates properly.