Inspection of P/S Control Module and Its Circuits
Precautions: Precautions for Diagnosing Trouble · Precautions for Steering · General safety (00)
P/S control module (1) and its circuits can be checked at P/S control module wiring connectors by measuring voltage and resistance.
NOTICE:
If you connect a voltmeter or an ohmmeter directly to the P/S control module with the P/S control module connectors disconnected, the P/S control module will be damaged.
Never connect a voltmeter or an ohmmeter directly to any terminal on the P/S control module with the P/S control module connectors disconnected.
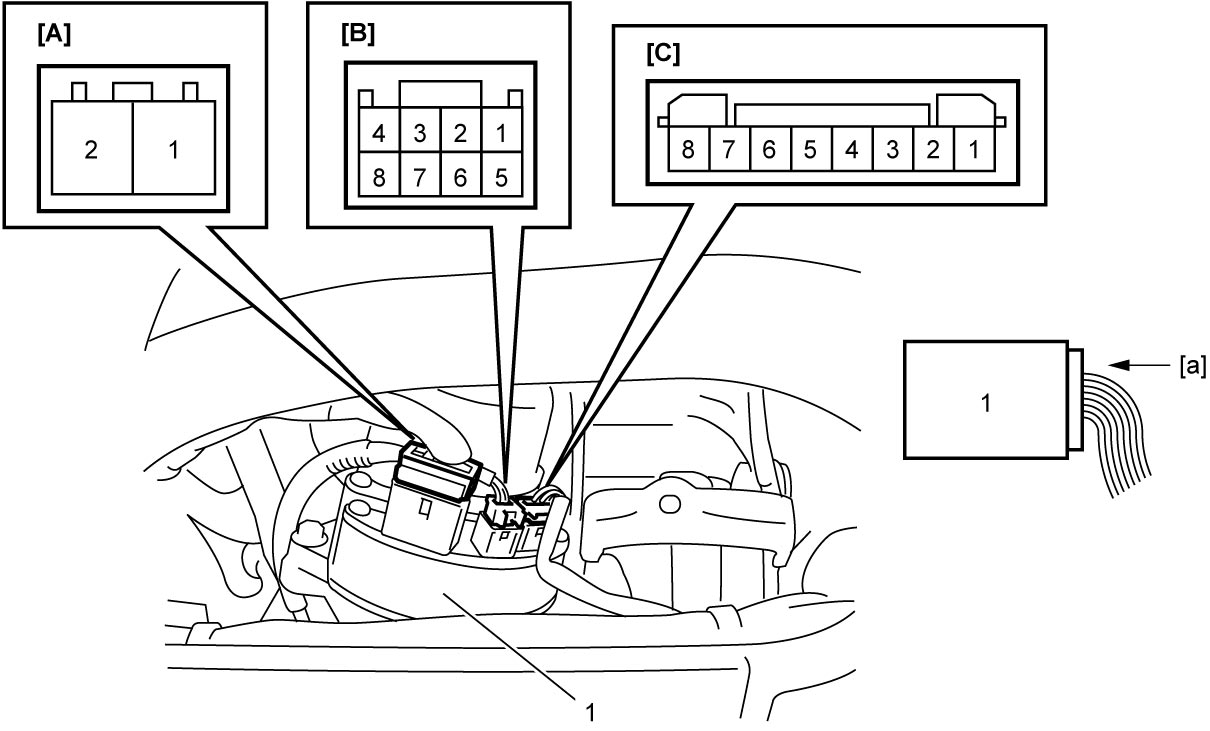
| [A]: | P/S control module connector “G55” (View: [a]) | [B]: | Torque sensor connector “G54” (View: [a]) | [C]: | P/S control module connector “G50” (View: [a]) |
Voltage Check
1)Remove combination meter. 
2)Connect combination meter connector.
3)Measure voltage at each terminal with connectors connected to the P/S control module.
NOTE:
•As each terminal voltage is affected by the battery voltage, check that the battery voltage is 12 V or more when ignition is “ON”.
•*1: Turn steering wheel fully and hold it with force applied.
•*1: Turn steering wheel fully and hold it with force applied.
“G55” connector
| Terminal | Circuit | Wire color | Normal voltage | Condition |
|---|---|---|---|---|
| G55-1 | Main power supply for P/S control module | WHT | Approx. 12 V | Ignition in any position / mode |
| G55-2 | Ground for P/S control module | BLK | 0 V | Ignition in any position / mode |
“G50” connector
| Terminal | Circuit | Wire color | Normal voltage | Condition |
|---|---|---|---|---|
| G55-3 | IG1 power supply for P/S control module | GRN | Approx. 12 V | Ignition “ON” |
| G55-5 | CAN (HI1) communication circuit | RED | Refer to Oscilloscope Display. CAN communication signal |
|
| G55-6 | CAN (LO1) communication circuit | WHT | Refer to Oscilloscope Display. CAN communication signal |
|
| G55-7 | CAN (HI2) communication circuit | RED | Refer to Oscilloscope Display. CAN communication signal |
|
| G55-8 | CAN (LO2) communication circuit | WHT | Refer to Oscilloscope Display. CAN communication signal |
|
“G54” connector
| Terminal | Circuit | Wire color | Normal voltage | Condition |
|---|---|---|---|---|
| G54-1 | 3 V reference power supply for torque sensor | WHT | Approx. 3.3 V | Ignition “ON” |
| G54-2 | Shield ground circuit | BLU | 0 V | Ignition in any position / mode |
| G54-5 | Ground for torque sensor | BLK | 0 V | Ignition in any position / mode |
| G54-6 | Torque sensor signal (Sub) | YEL | Approx. 2.5 V | Engine: Idle speed Steering wheel at neutral |
| Approx. 1.1 V | Engine: Idle speed Vehicle stationary and steering wheel turned fully to right *1 |
|||
| Approx. 3.9 V | Engine: Idle speed Vehicle stationary and steering wheel turned fully to left *1 |
|||
| G54-7 | 9 V reference power supply for torque sensor | RED | Approx. 9 V | Engine: Idle speed |
| G54-8 | Torque sensor signal (Main) | GRN | Approx. 2.5 V | Engine: Idle speed Steering wheel at neutral |
| Approx. 3.9 V | Engine: Idle speed Vehicle stationary and steering wheel turned fully to right *1 |
|||
| Approx. 1.1 V | Engine: Idle speed Vehicle stationary and steering wheel turned fully to left *1 |
Reference Waveform
Oscilloscope display
Shown below is typical waveform display provided by oscilloscope.
NOTE:
•Display includes the following types of data:
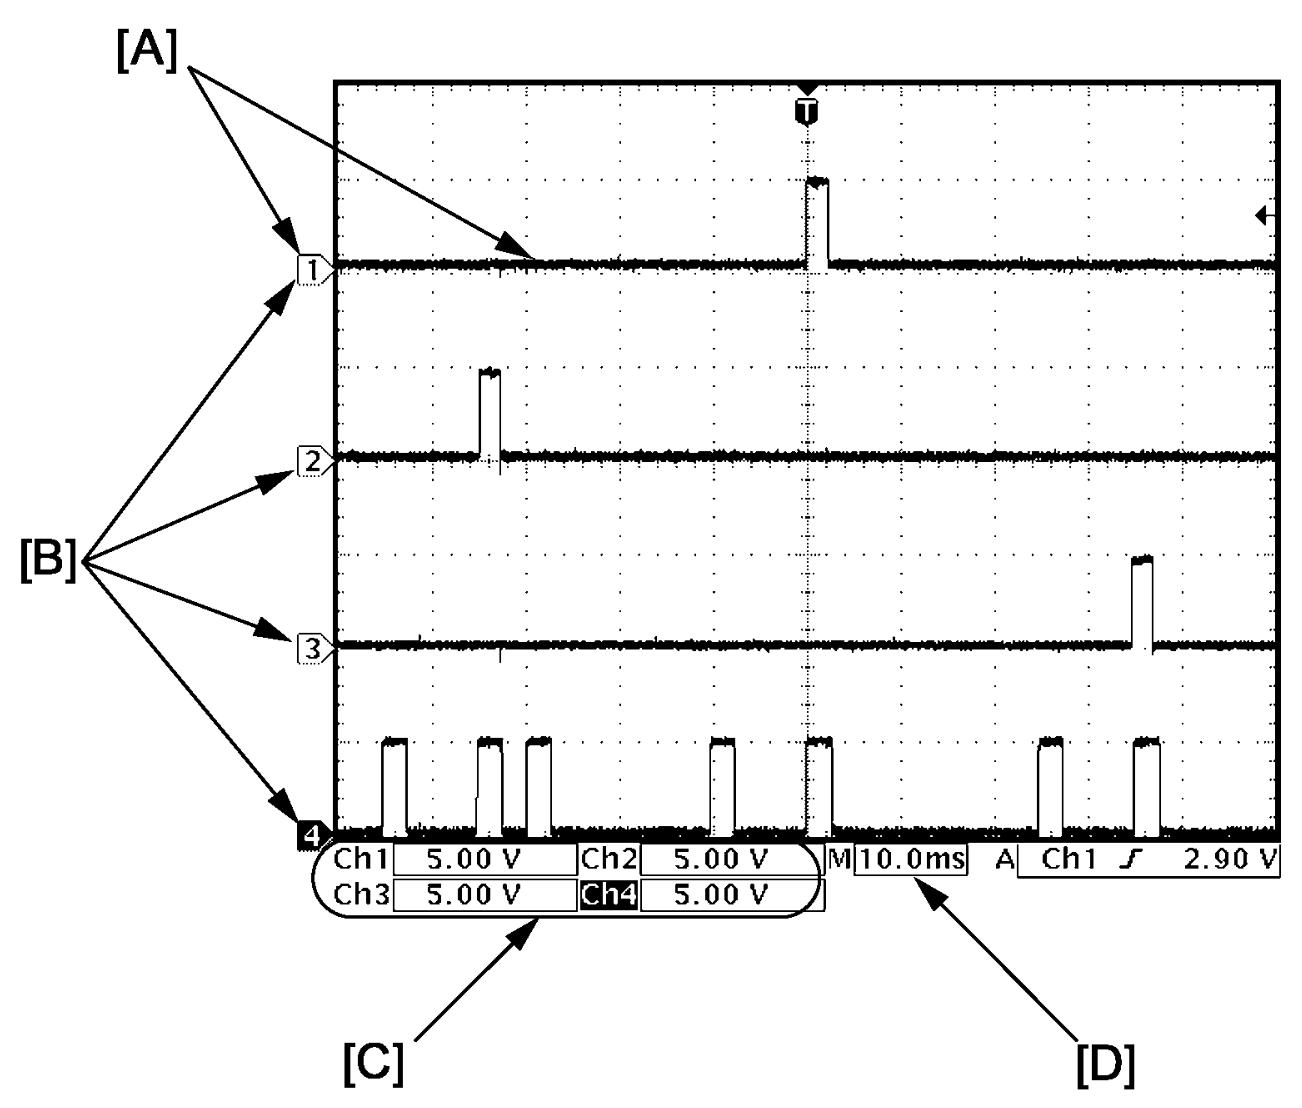

•Waveform varies depending on measurement condition and vehicle spec.
| [A]: | Waveform of channel 1 | [C]: | VOLT/DIV of each channel |
| [B]: | Ground level of each channel | [D]: | TIME/DIV |
CAN communication signal
| Channel | Probe | Terminal No. |
|---|---|---|
| CH1 | + | G50-5 G50-7 |
| – | Ground | |
| CH2 | + | G50-6 G50-8 |
| – | Ground |
Measurement condition
•Ignition mode: “ON”
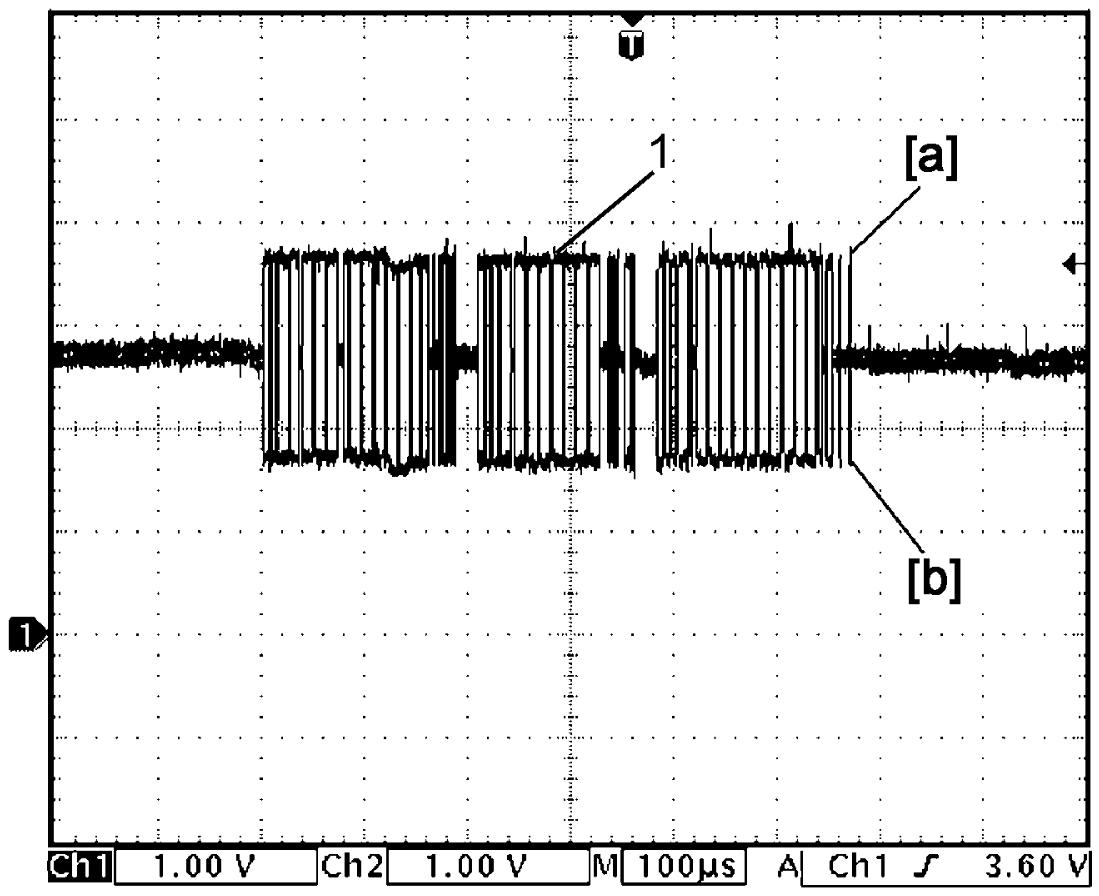
| [a]: | CH1 | 1. | CAN communication signal |
| [b]: | CH2 |