Condenser Assembly Removal and Installation
Precautions: Precautions for Diagnosing Trouble · General safety (00)
M16A Model and D16AA Model
K14C Model
NOTICE:
Condenser and radiator fins can easily be bent during removal of the condenser assembly.
Remove the condenser assembly carefully not to damage the condenser and radiator fins. If any of them is bent, straighten it using a flat-bladed screwdriver or pliers.
Removal
1)Recover refrigerant from A/C system referring to “Recovery” in Operation Procedure for Refrigerant Charge:Automatic Type.
NOTE:
Measure the amount of removed compressor oil to determine how much compressor oil is required for replenishment.
2)Hoist vehicle.
3)Remove front bumper. 
4)Remove intercooler.
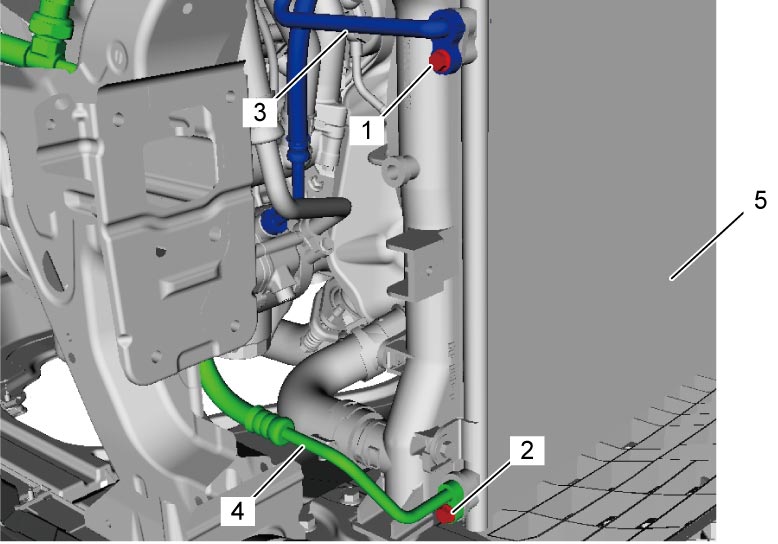
5)Remove discharge hose bolt (1) and liquid pipe bolt (2).
6)Disconnect discharge hose (3) and liquid pipe (4) from condenser assembly (5).

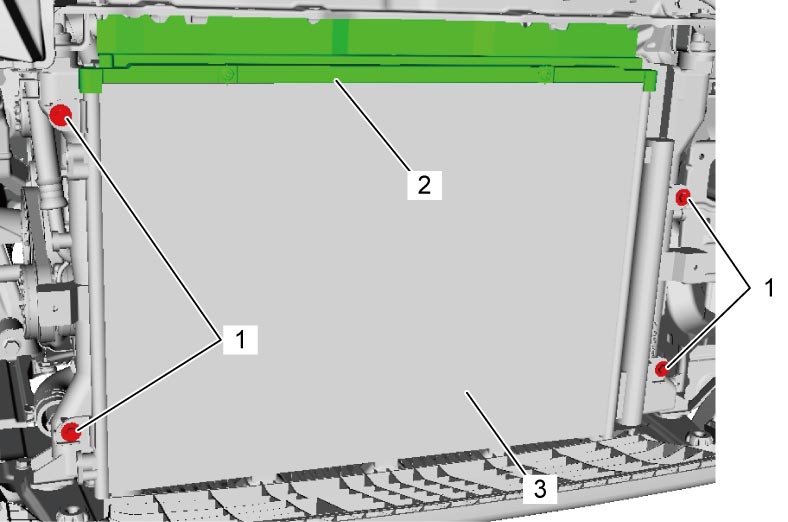
7)Remove condenser bolts (1).
8)Remove upper shroud (2), and remove condenser assembly (3).
Installation
Reverse removal procedure noting the following points.
•Apply compressor oil to new O-rings of discharge hose and liquid pipe.
•Replenish compressor with specified amount of compressor oil from compressor suction side referring to “Replenishing Compressor Oil” in Operation Procedure for Refrigerant Charge:Automatic Type.
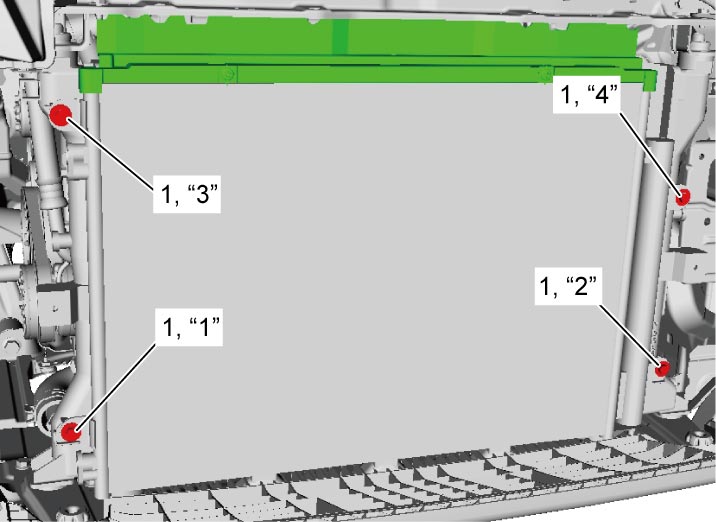
•Tighten condenser bolts (1) in numerical order (“1” – “4”).
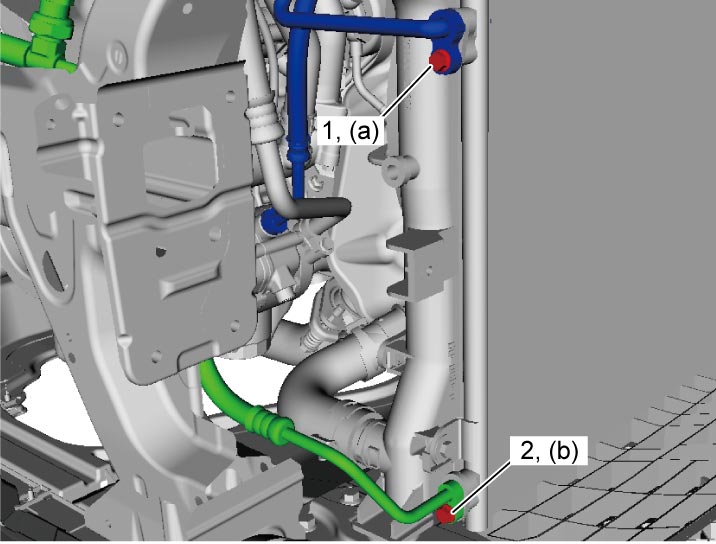
 •Tighten discharge hose bolt (1) and liquid pipe bolt (2) to specified torque.
Liquid pipe bolt (b): 11 N·m (1.1 kgf-m, 8.5 lbf-ft)
 •Evacuate and charge A/C system referring to “Evacuation” and “Charge” in Operation Procedure for Refrigerant Charge:Automatic Type.
•Tighten condenser bolts (1) in numerical order (“1” – “4”).
Tightening torque
Discharge hose bolt (a): 11 N·m (1.1 kgf-m, 8.5 lbf-ft)Liquid pipe bolt (b): 11 N·m (1.1 kgf-m, 8.5 lbf-ft)