Roof Panel Removal and Installation
Precautions: Precautions for Body Structure · Precautions for Body, Cab and Accessories · General safety (00)
NOTE:
The figure below shows condition where the following parts are removed.
•Front fender 
•Fuel filler door panel
•Fuel filler door panel
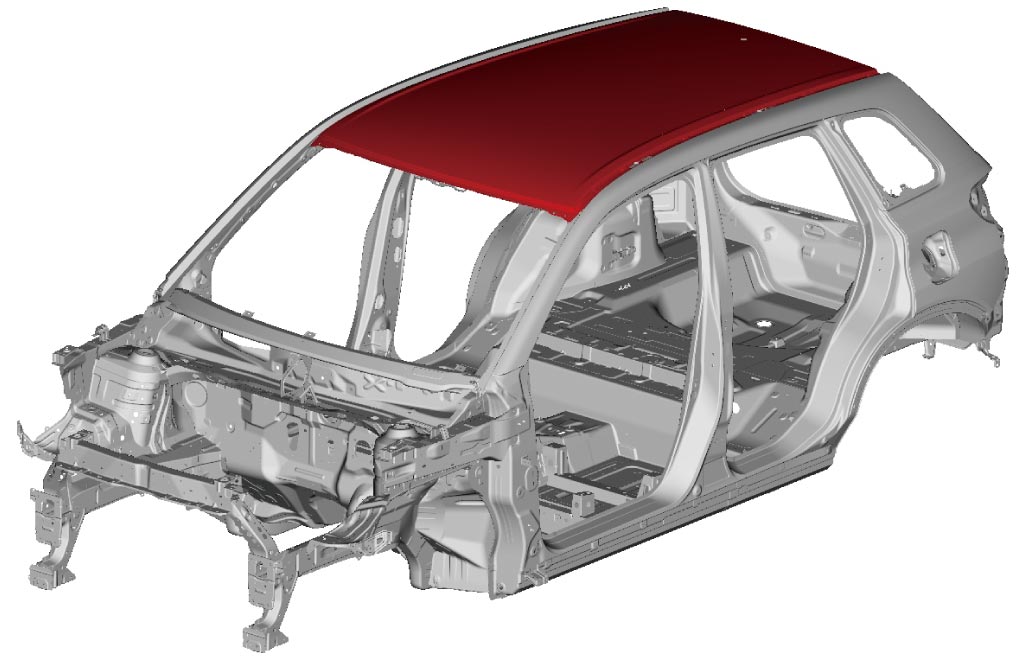
General Notes
Roof carrier brackets are to be reused.
Removal
1)Drill out welding spots and remove 4 roof carrier brackets and roof panel.
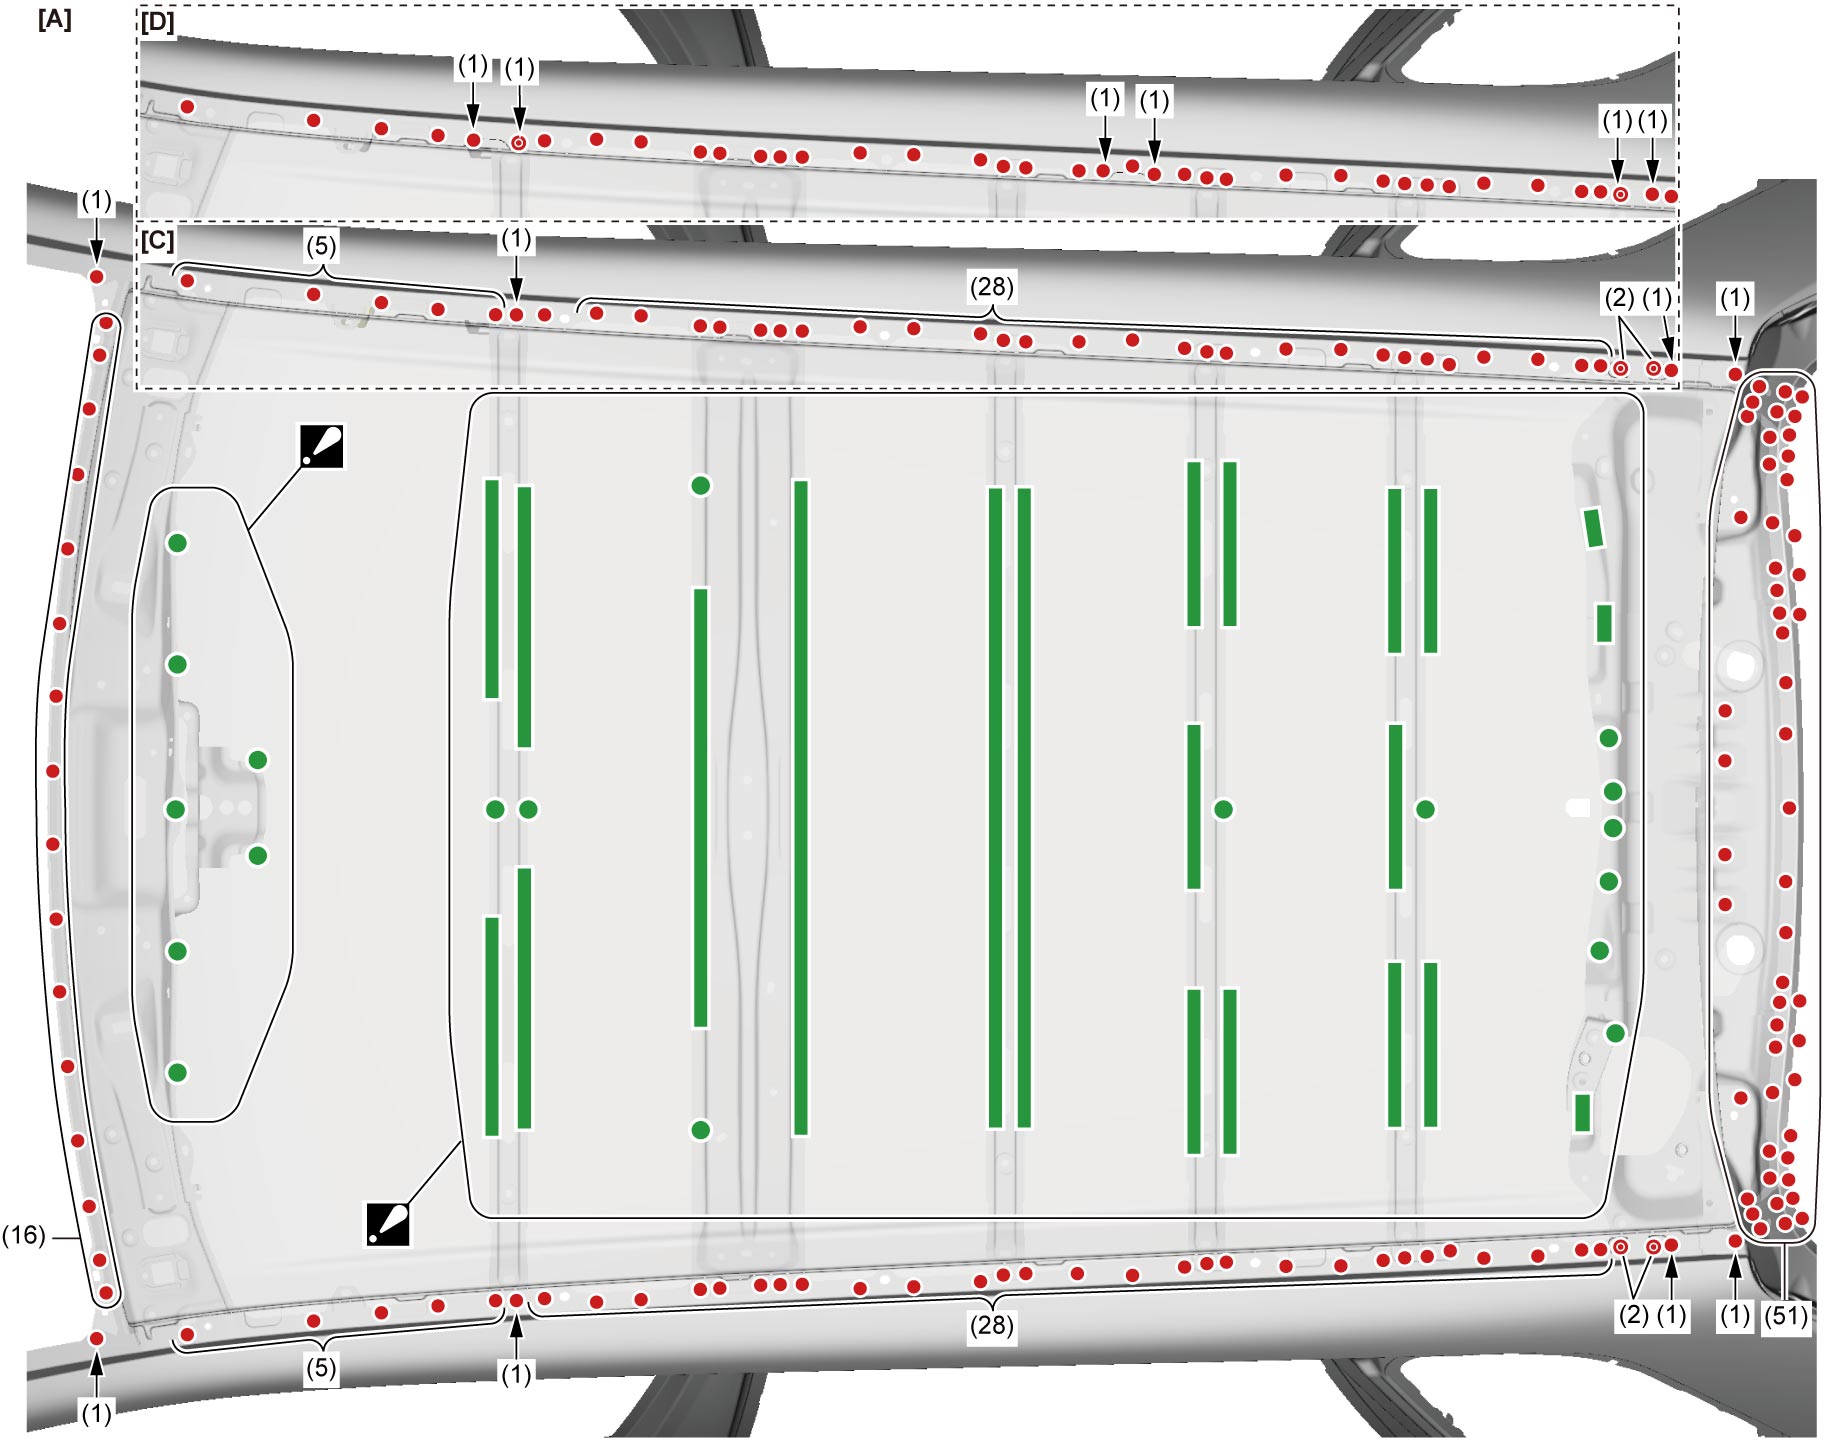
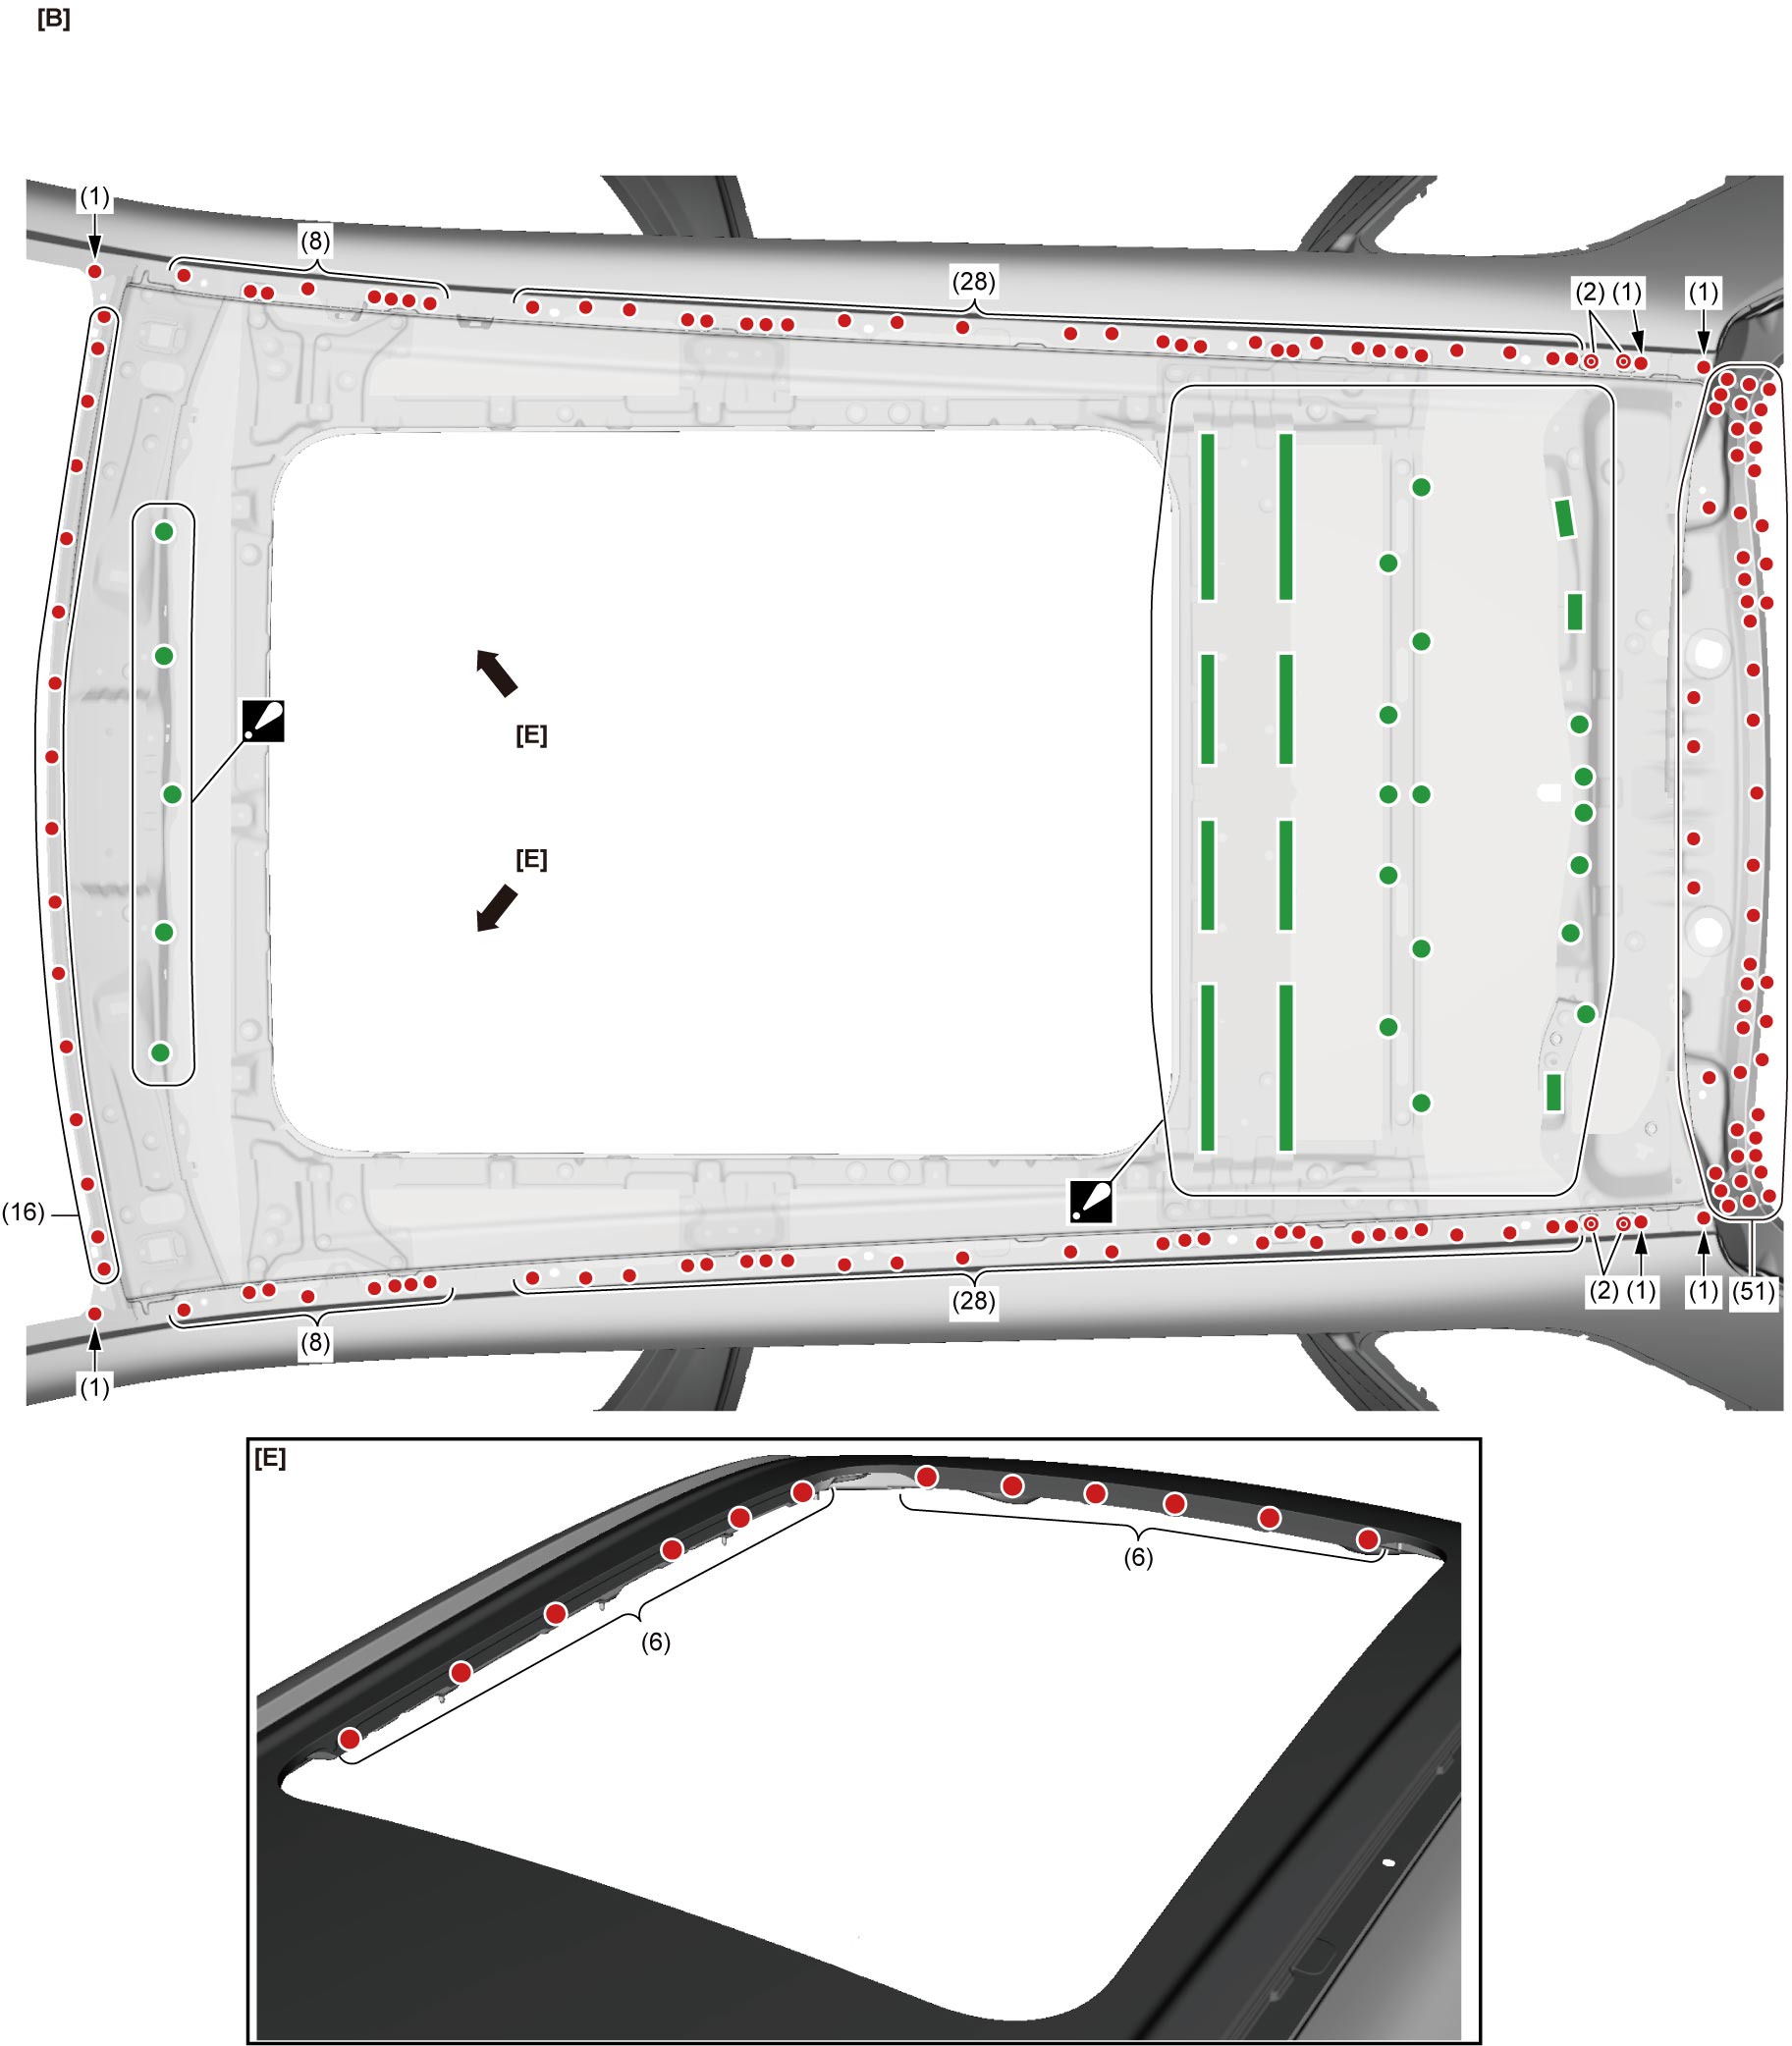
| [A]: | Without sun roof model | [D]: | Roof carrier bracket model |
| [B]: | With sun roof model |
 : : |
When heating around sealer application portion to detach body sealer, be sure that temperature of said portion does not reach 170 °C (338 °F). |
| [C]: | Roof rail model |
Installation
NOTE:
Before conducting any weld, check installation position and condition for installation part(s).
•Rear end door:
•Windshield:
•Windshield:
1)Without sun roof model, conduct tack welding to roof panel No.1 member, roof panel No.2 member, roof panel No.3 member and roof panel No.4 member.
2)Apply body sealer.
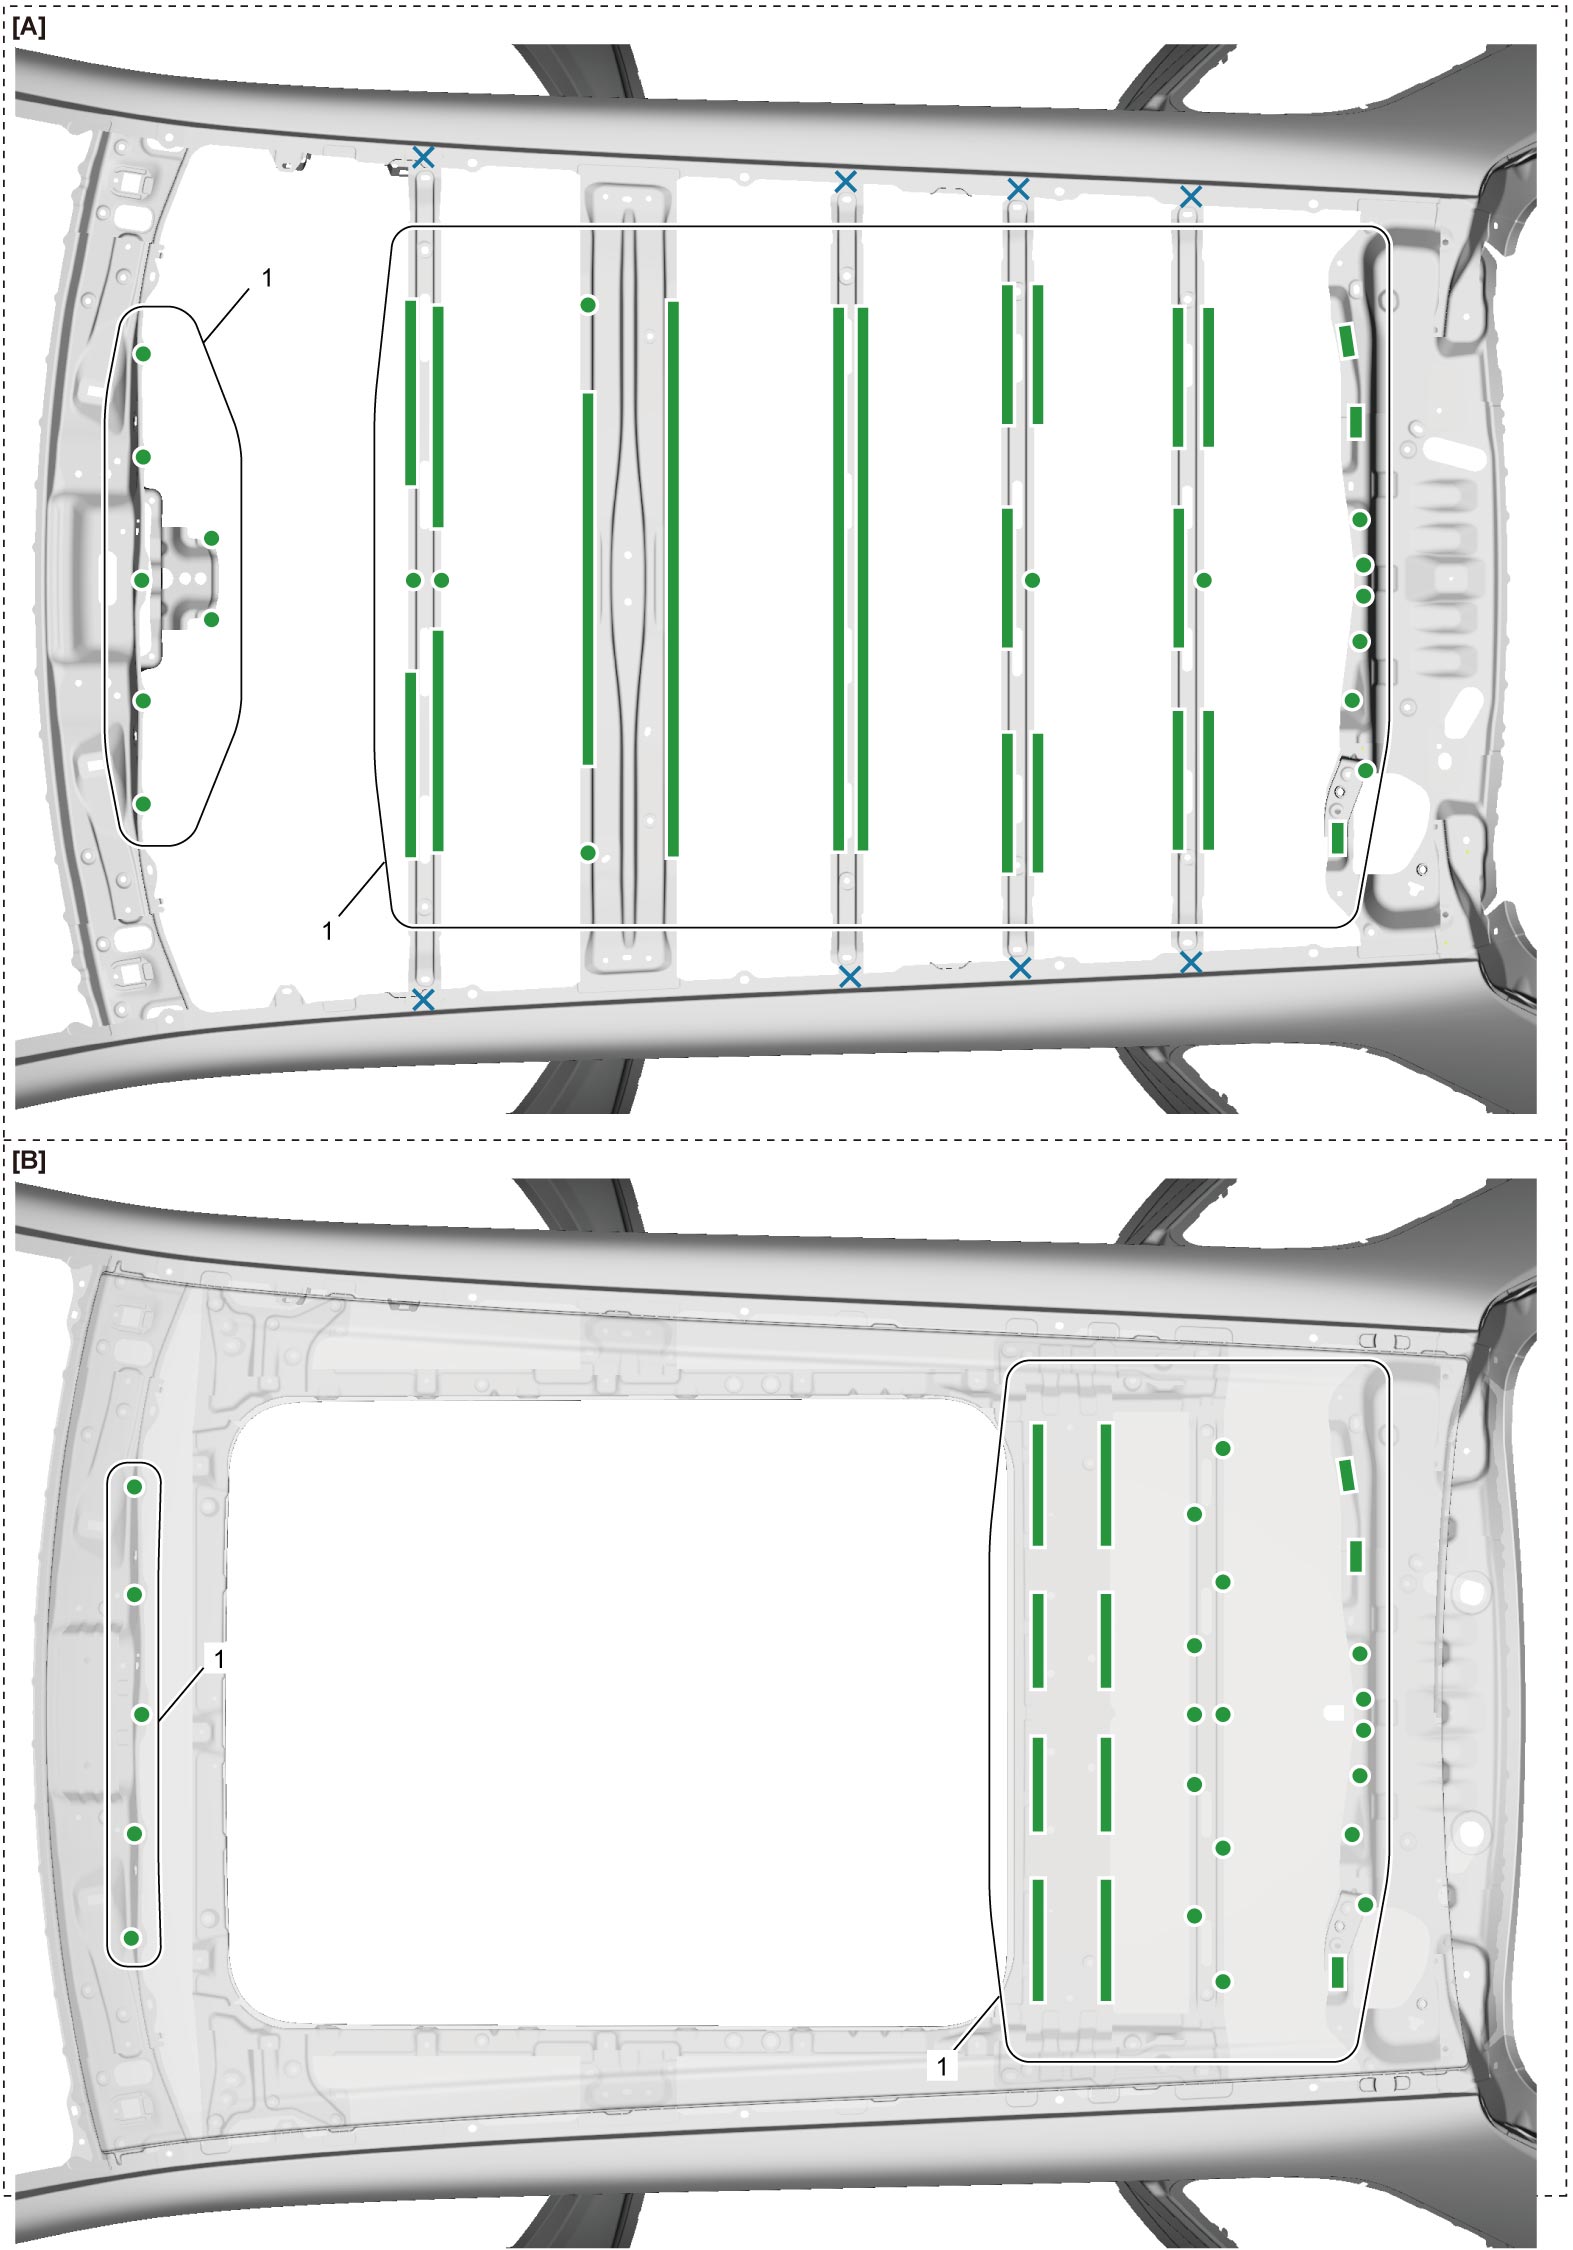

| [A]: | Without sun roof model | [B]: | With sun roof model | 1. | Applied part of body sealer. |
3)Install roof panel and 4 roof carrier brackets (roof carrier bracket model) or roof rail bracket (roof rail model).
4)Conduct resistance spot weld and plug weld.
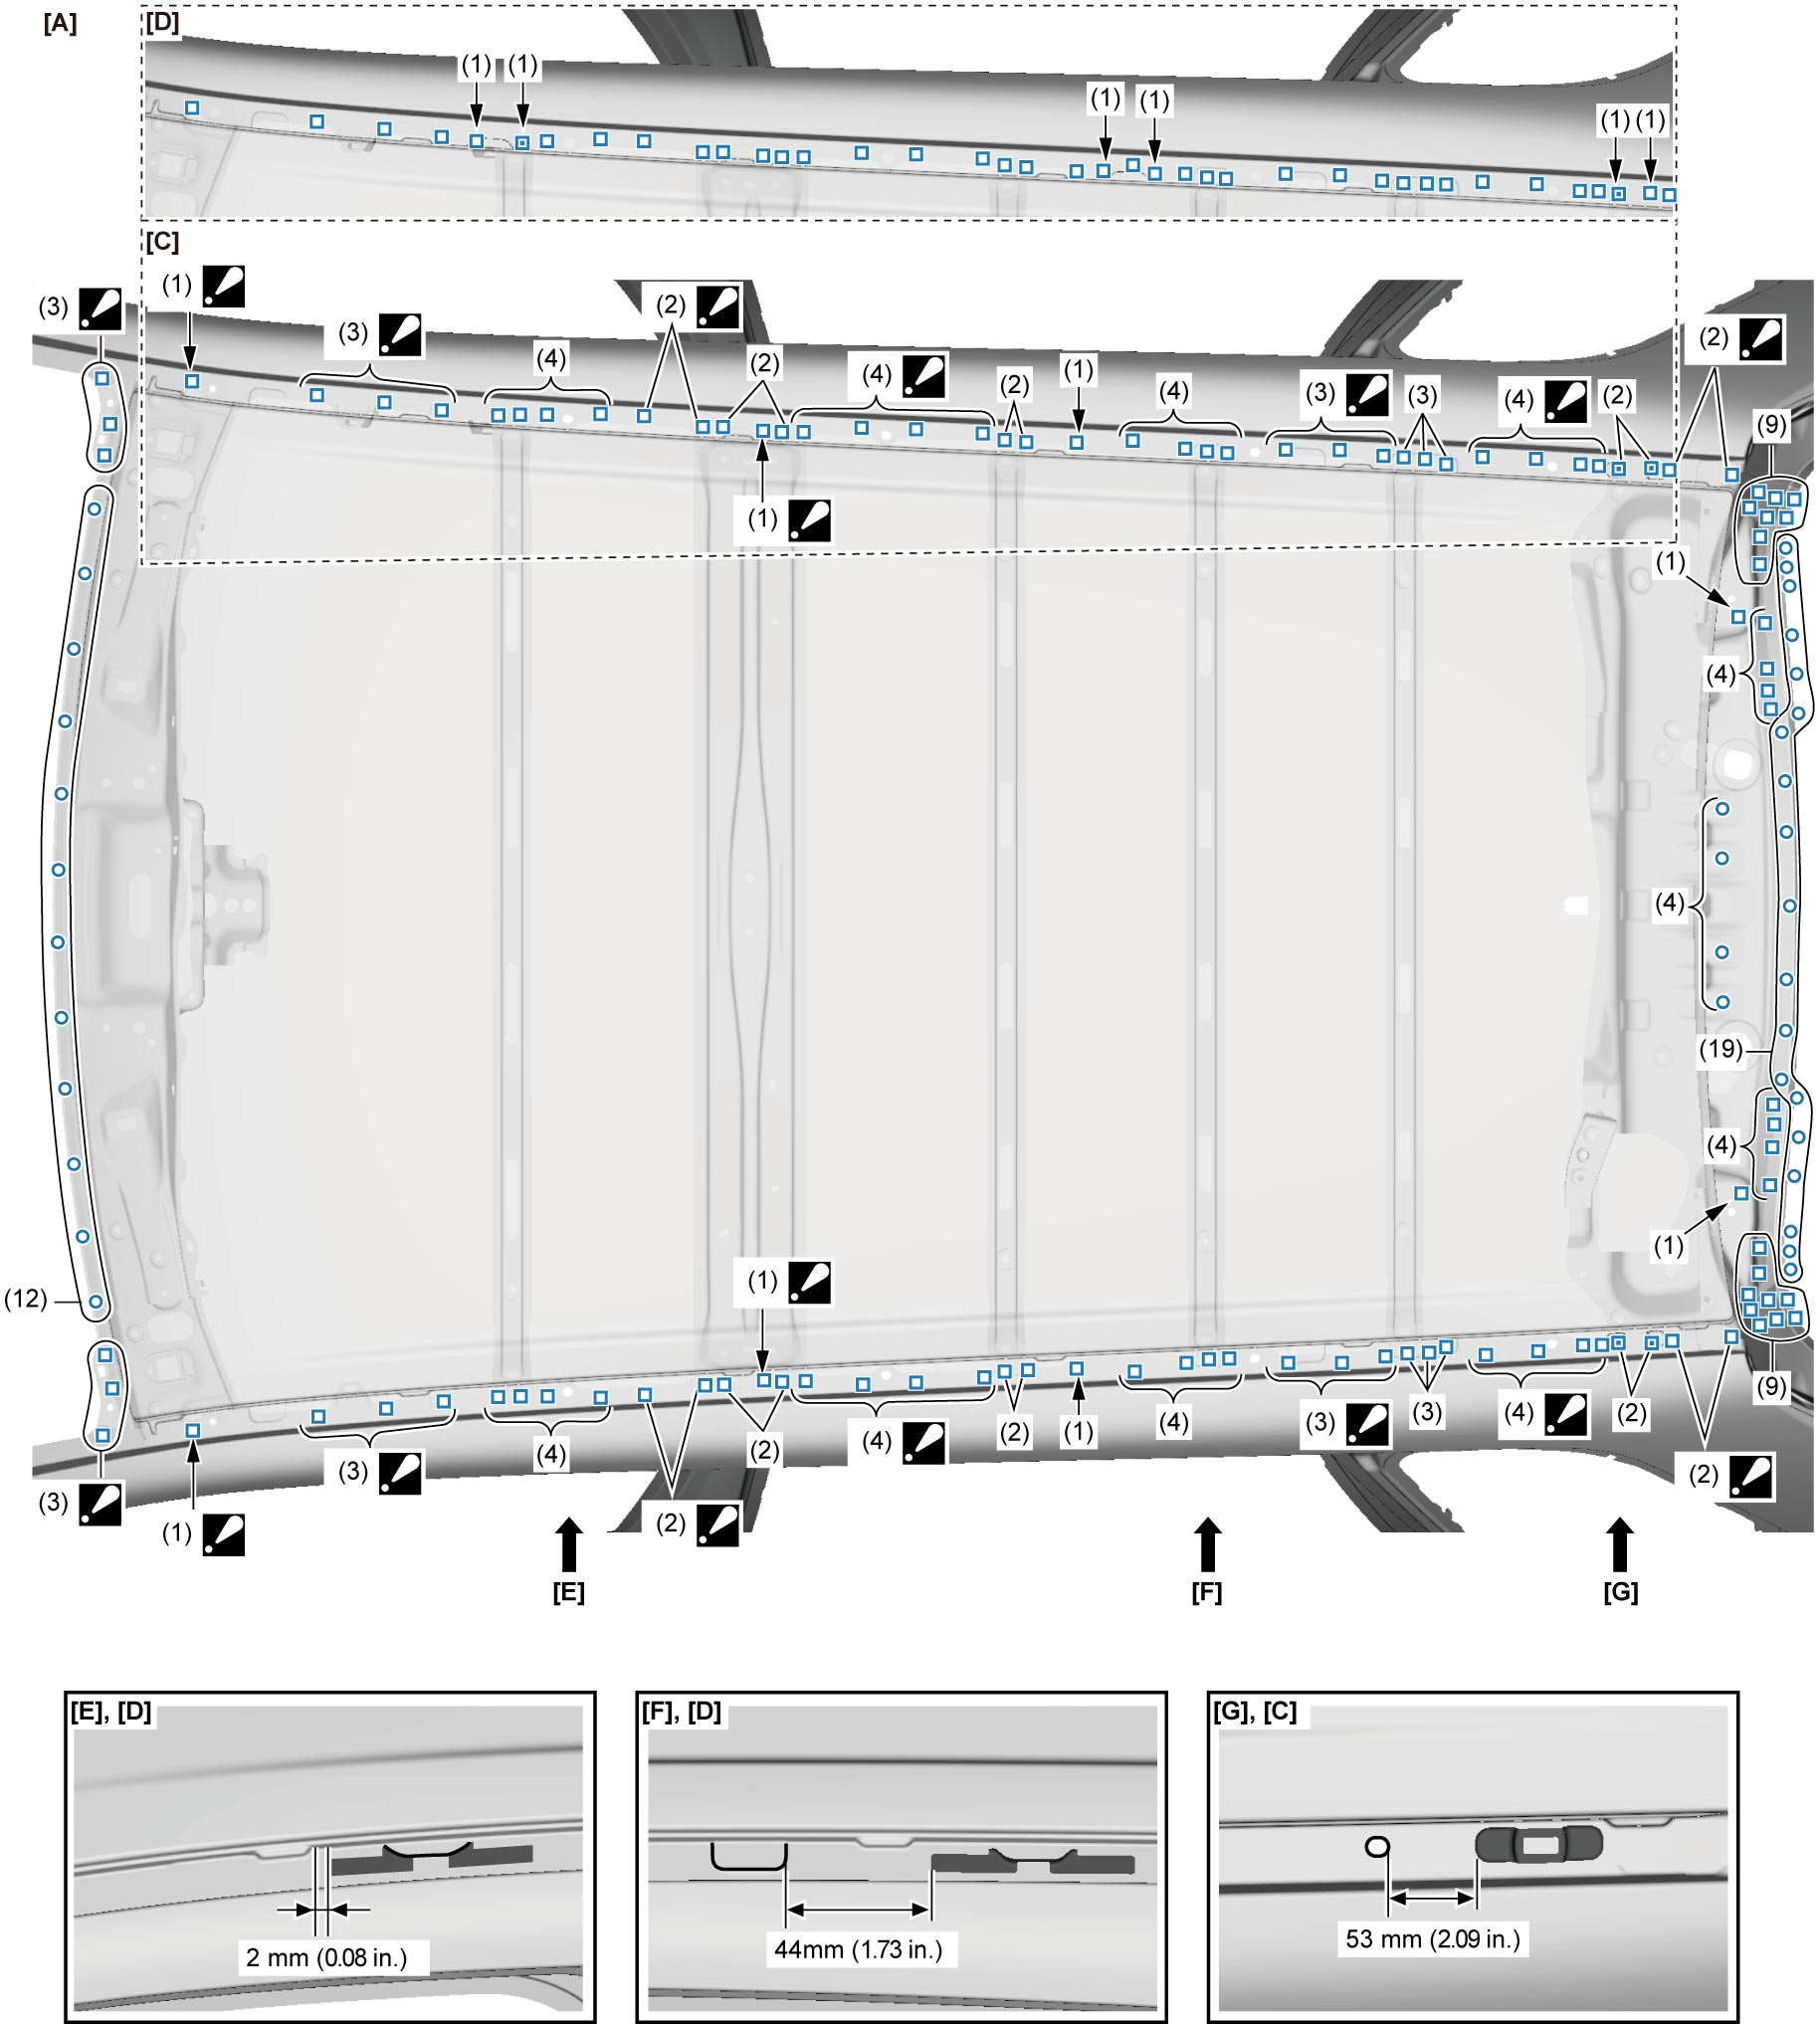
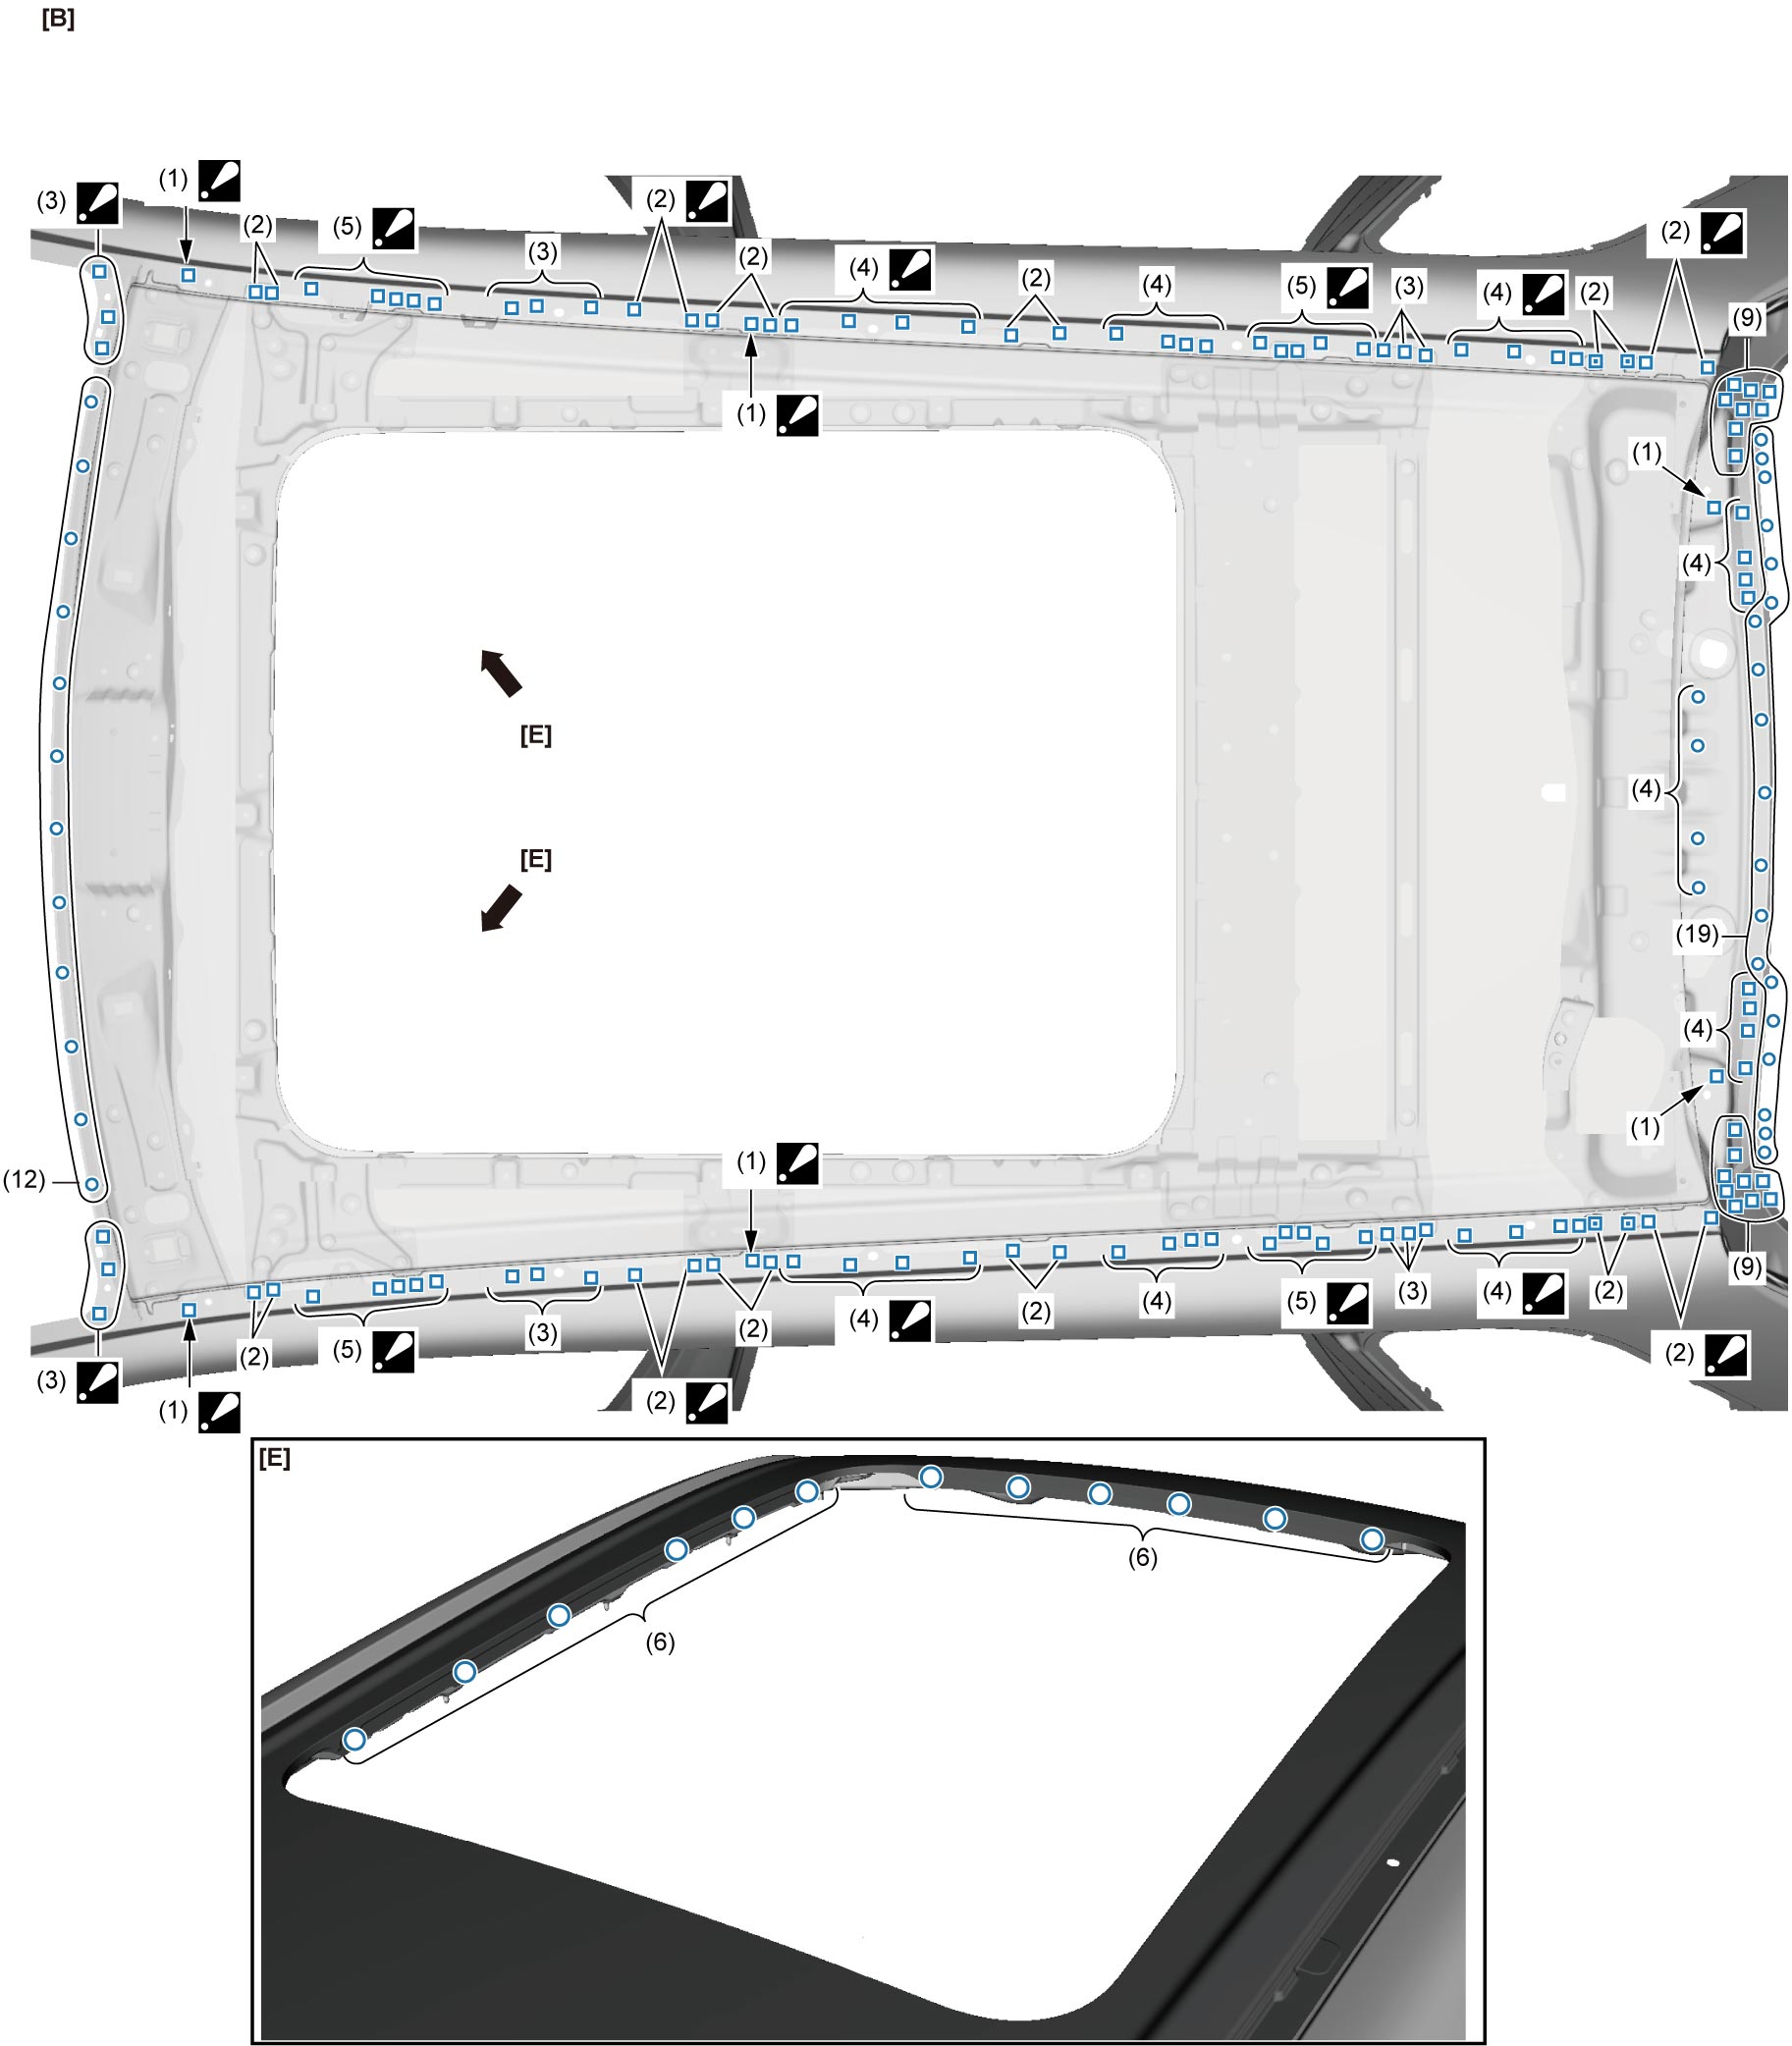
|
: |
Conduct resistance spot weld as three panel thickness. | [B]: | With sun roof model | [D]: | Roof carrier bracket model |
| [A]: | Without sun roof model | [C]: | Roof rail model | 1. | Press line |
5)From cabin inside, drill ø 6.5 holes(1) and 9 x 10.5 oblong holes (2) to roof panel 10 places in total.
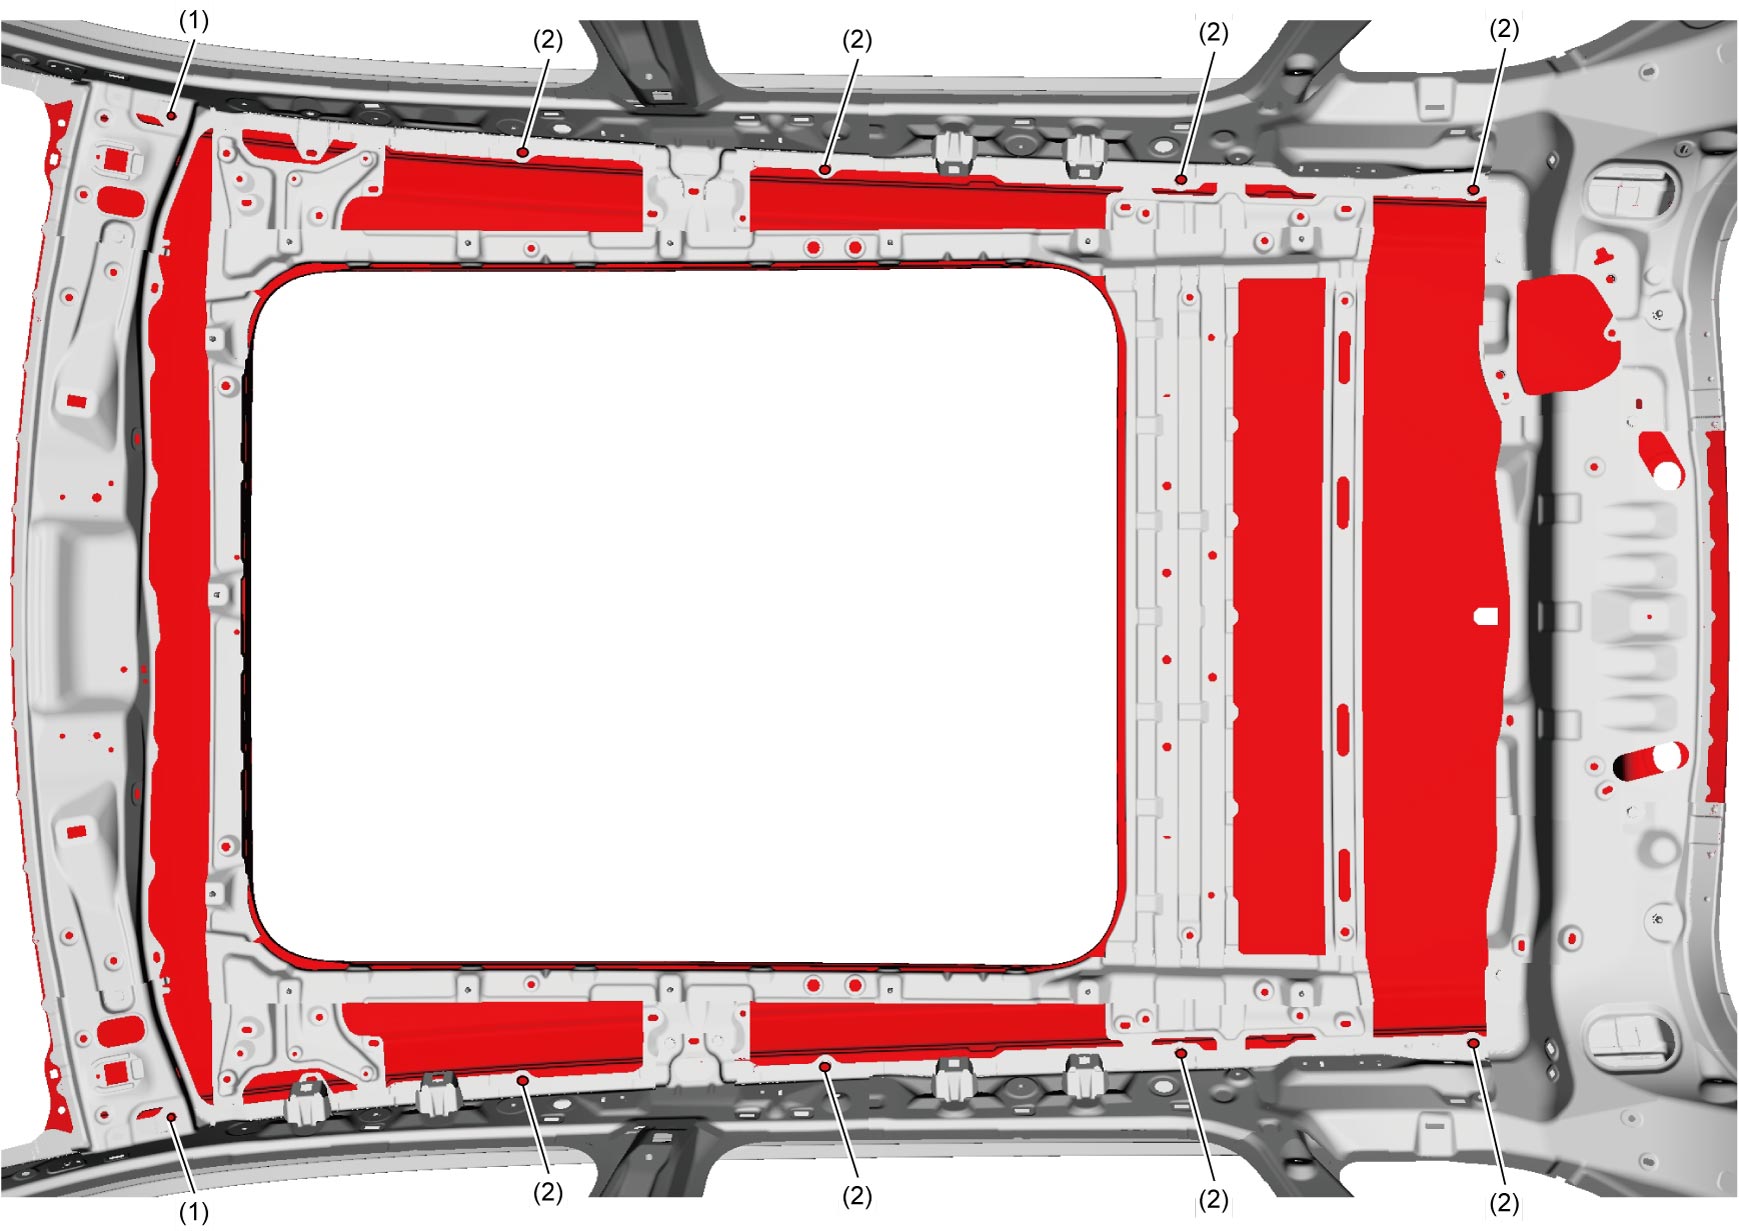
NOTE:
•As datum points, use existing holes in panels under the roof panel.
•While drilling, prevent iron powder from scattering.
•To make oblong hole, drill ø 9 hole first and process it to oval shape.
•After making holes, remove iron powder and burrs thoroughly.
•Rustproof holes.
•While drilling, prevent iron powder from scattering.
•To make oblong hole, drill ø 9 hole first and process it to oval shape.
•After making holes, remove iron powder and burrs thoroughly.
•Rustproof holes.