HEATING / AIR CONDITIONING AIR CONDITIONING AMPLIFIER REMOVAL
PROCEDURE

 1.DISCONNECT CABLE FROM NEGATIVE BATTERY TERMINAL
- NOTICE:
-
When disconnecting the cable, some systems need to be initialized after the cable is reconnected (See page General>INTRODUCTION>REPAIR INSTRUCTION>INITIALIZATION).
67910
2.REMOVE DOOR SCUFF PLATE ASSEMBLY RH
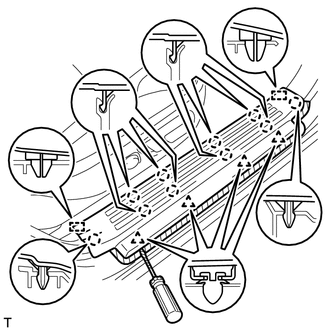
Put protective tape around the door scuff plate.
| *1 | Protective Tape |
Using a screwdriver, detach the 4 clips, 10 claws and 2 guides and remove the door scuff plate.
- HINT:
-
Tape the screwdriver tip before use.
62111C
3.REMOVE COWL SIDE TRIM BOARD RH
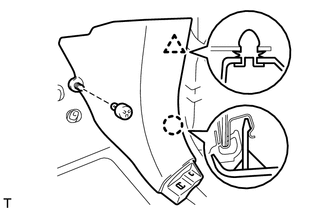
Remove the clip.
Detach the clip and claw and remove the cowl side trim board.
55475A
4.REMOVE NO. 2 INSTRUMENT CLUSTER FINISH PANEL GARNISH
Open the instrument cluster finish panel lid.
Put protective tape around the No. 1 instrument cluster finish panel garnish.
Grip the No. 1 instrument cluster finish panel garnish and pull it diagonally upward toward the rear to detach the 5 clips and remove the No. 1 instrument cluster finish panel garnish.
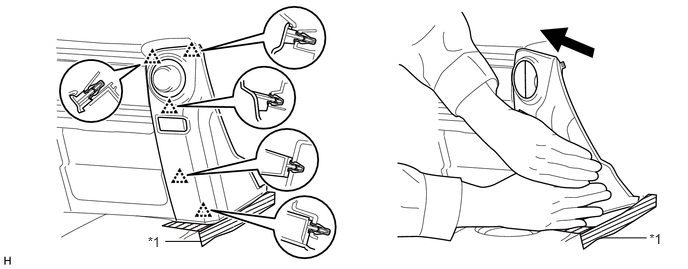
| *1 | Protective Tape | - | - |
55607
5.REMOVE NO. 2 INSTRUMENT PANEL UNDER COVER SUB-ASSEMBLY
55312
6.REMOVE LOWER INSTRUMENT PANEL
55443A
7.REMOVE INSTRUMENT PANEL BOX DOOR COVER
55303B
8.REMOVE LOWER INSTRUMENT PANEL SUB-ASSEMBLY
87201B
9.REMOVE NO. 2 AIR DUCT SUB-ASSEMBLY
82877
10.REMOVE ECU INTEGRATION BOX RH
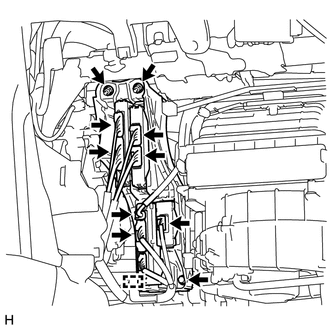
Disconnect the connectors and detach the clamp.
Remove the 2 nuts, bolt and ECU integration box RH.
88650N
11.REMOVE AIR CONDITIONING AMPLIFIER ASSEMBLY
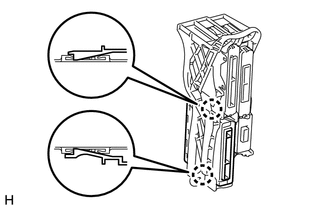
Detach the 2 claws and remove the air conditioning amplifier assembly.