 |
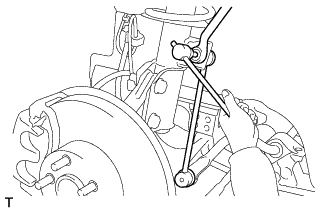
Remove the nut and separate the front stabilizer link assembly LH from the front shock absorber with coil spring.
If the ball joint turns together with the nut, use a hexagon wrench to hold the stud bolt.
FRONT SUSPENSION MEMBER > REMOVAL |
| 1. REMOVE ENGINE ASSEMBLY |
| 2. REMOVE FRONT LOWER SUSPENSION ARM ASSEMBLY LH |
| 3. REMOVE FRONT LOWER SUSPENSION ARM ASSEMBLY RH |
| 4. SEPARATE FRONT STABILIZER LINK ASSEMBLY LH |
|
Remove the nut and separate the front stabilizer link assembly LH from the front shock absorber with coil spring.
If the ball joint turns together with the nut, use a hexagon wrench to hold the stud bolt.
| 5. SEPARATE FRONT STABILIZER LINK ASSEMBLY RH |
| 6. REMOVE REAR BODY MOUNTING CUSHION SUB-ASSEMBLY LH |
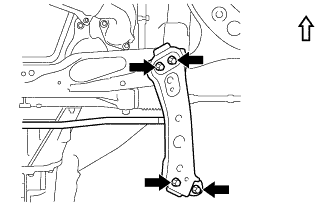 |
Remove the 4 bolts, and remove the front stabilizer bar and the body mounting cushion sub-assembly LH together.
 | Bolt |
 | Vehicle for Front Side |
| 7. REMOVE REAR BODY MOUNTING CUSHION SUB-ASSEMBLY RH |
| 8. REMOVE RACK AND PINION POWER STEERING GEAR ASSEMBLY |
| 9. REMOVE FRONT CROSS MEMBER SUB-ASSEMBLY |
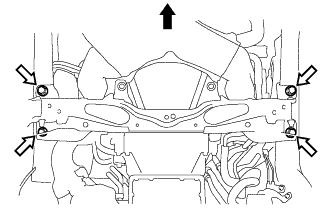 |
Remove the 4 bolts and front cross member sub-assembly.
| Vehicle of Front Side |
| Bolt |