FA20 ENGINE MECHANICAL ENGINE UNIT DISASSEMBLY
PROCEDURE

 1.REMOVE OIL FILLER CAP
Remove the oil filler cap.
15601
2.REMOVE OIL FILTER SUB-ASSEMBLY
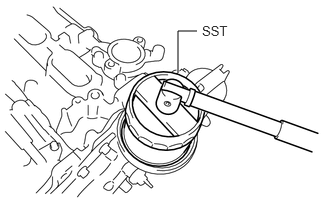
Using SST, remove the oil filter sub-assembly.
- SST
- 09228-22020
15600A
3.REMOVE OIL FILTER UNION
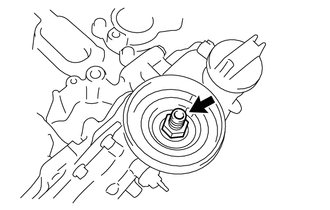
Remove the oil filter union.
89422
4.REMOVE E.F.I. ENGINE COOLANT TEMPERATURE SENSOR
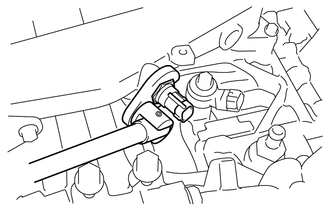
Using a 19 mm union nut wrench, remove the E.F.I. engine coolant temperature sensor.
89615
5.REMOVE KNOCK CONTROL SENSOR
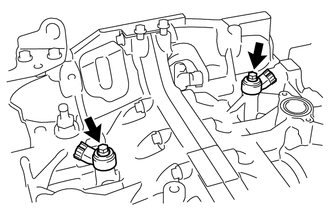
Remove the 2 bolts and 2 knock control sensors.
11401G
6.REMOVE CRANK POSITION SENSOR
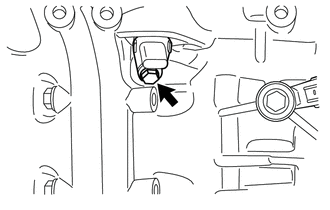
Remove the bolt and crank position sensor.
11102A
7.REMOVE VVT SENSOR
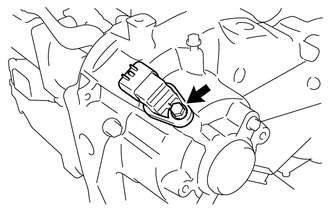
Remove the bolt and VVT sensor (for intake side of bank 1).
Remove the O-ring from the VVT sensor.
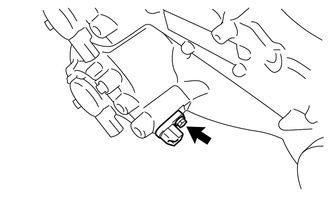
Remove the bolt and VVT sensor (for exhaust side of bank 1).
Remove the O-ring from the VVT sensor.
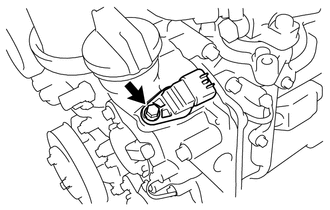
Remove the bolt and VVT sensor (for intake side of bank 2).
Remove the O-ring from the VVT sensor.
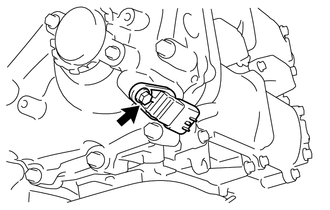
Remove the bolt and VVT sensor (for exhaust side of bank 2).
Remove the O-ring from the VVT sensor.
15330
8.REMOVE CAMSHAFT TIMING OIL CONTROL VALVE
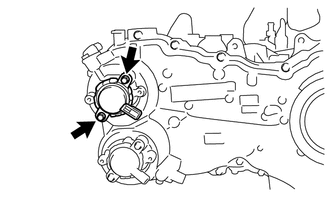
Remove the 2 bolts and camshaft timing oil control valve (for intake side of bank 1).
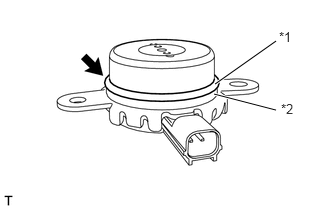
Remove the O-ring from the camshaft timing oil control valve.
Remove the back-up ring from the camshaft timing oil control valve.
| *1 | O-ring |
| *2 | Back-up Ring |
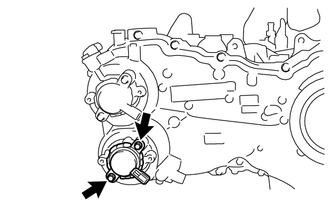
Remove the 2 bolts and camshaft timing oil control valve (for exhaust side of bank 1).
Remove the O-ring from the camshaft timing oil control valve.
Remove the back-up ring from the camshaft timing oil control valve.
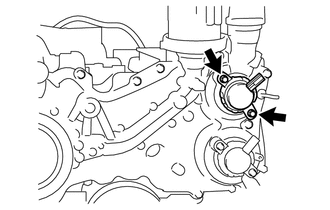
Remove the 2 bolts and camshaft timing oil control valve (for intake side of bank 2).
Remove the O-ring from the camshaft timing oil control valve.
Remove the back-up ring from the camshaft timing oil control valve.
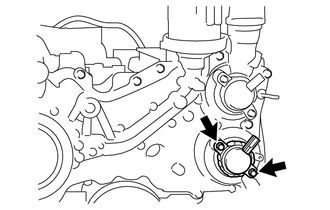
Remove the 2 bolts and camshaft timing oil control valve (for exhaust side of bank 2).
Remove the O-ring from the camshaft timing oil control valve.
Remove the back-up ring from the camshaft timing oil control valve.
9.REMOVE ENGINE OIL TEMPERATURE SENSOR
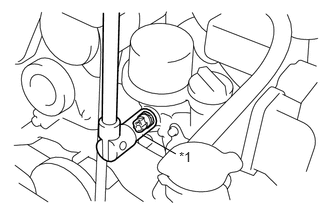
Using a 19 mm deep socket wrench, remove the engine oil temperature sensor.
- NOTICE:
-
Use a cloth or the like to prevent engine oil from splashing.
| *1 | 19 mm Deep Socket Wrench |
83530
10.REMOVE ENGINE OIL PRESSURE SWITCH ASSEMBLY
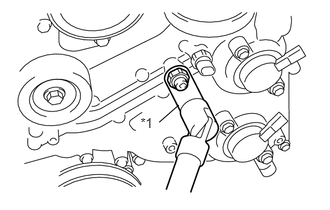
Using a 24 mm deep socket wrench, remove the engine oil pressure switch assembly.
- NOTICE:
-
Use a cloth or the like to prevent engine oil from splashing.
| *1 | 24 mm deep socket wrench |
11401S
11.REMOVE PCV HOSE CONNECTOR
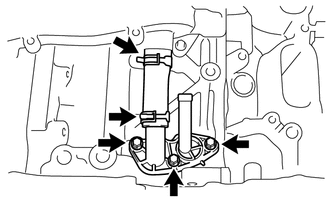
Remove the 3 bolts and PCV hose connector.
Loosen the 2 clips and remove the No. 2 water by-pass hose from the PCV hose connector.
29300
12.REMOVE VACUUM PUMP ASSEMBLY (for Automatic Transmission)
11181
13.REMOVE REAR CYLINDER HEAD PLATE (for Manual Transmission)
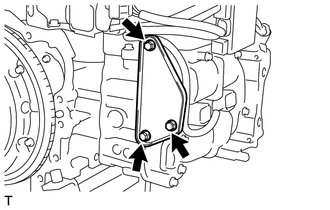
Remove the 3 bolts and rear cylinder head plate.
16322
14.REMOVE WATER INLET PIPE
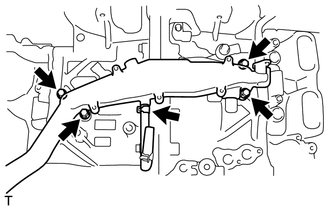
Disconnect the No. 3 water by-pass hose.
Remove the 4 bolts and water inlet pipe.
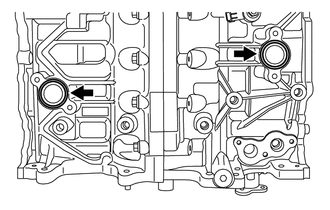
Remove the 2 O-rings from the cylinder block.
12204
15.REMOVE PCV VALVE SUB-ASSEMBLY
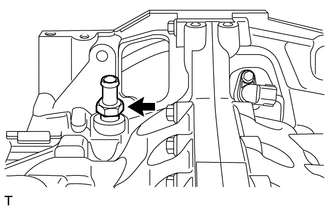
Using a 19 mm deep socket wrench, remove the PCV valve sub-assembly.
16603
16.REMOVE NO. 1 IDLER PULLEY SUB-ASSEMBLY
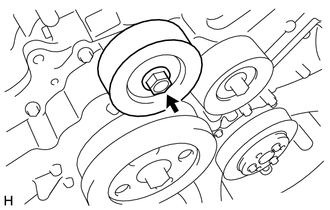
Remove the bolt, No. 1 idler pulley sub-assembly and idler pulley cover.
16603
17.REMOVE NO. 1 IDLER PULLEY SUB-ASSEMBLY
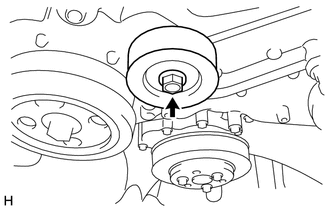
Remove the bolt, No. 1 idler pulley sub-assembly and idler pulley cover.
16173
18.REMOVE WATER PUMP PULLEY
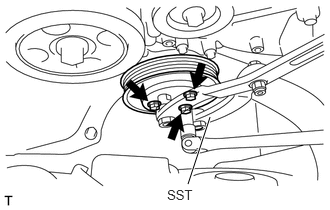
Using SST, hold the water pump pulley.
- SST
- 09960-10010 (09962-01000, 09963-00700)
Remove the 3 bolts and water pump pulley.
16100
19.REMOVE ENGINE WATER PUMP ASSEMBLY
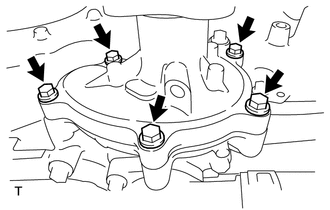
Remove the 5 bolts, engine water pump assembly and gasket.
16331
20.REMOVE WATER OUTLET
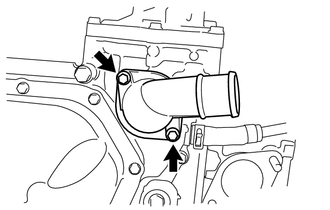
Remove the 2 bolts and water outlet.
16331A
21.REMOVE THERMOSTAT
Remove the thermostat.
Remove the gasket from the thermostat.
13471
22.REMOVE CRANKSHAFT PULLEY
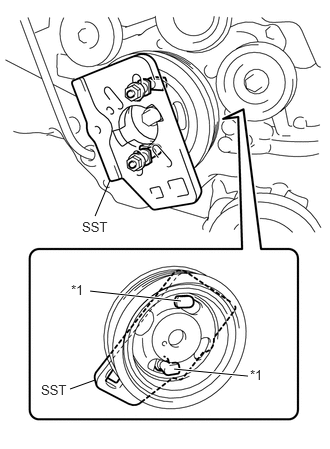
Install SST to the crankshaft pulley.
- SST
- 09213-80010 (90179-10016, 09213-08010, 09213-08110)
- HINT:
-
Position the projections on SST in the direction as shown in the illustration to prevent SST from separating from the crankshaft pulley.
| *1 | Claw |
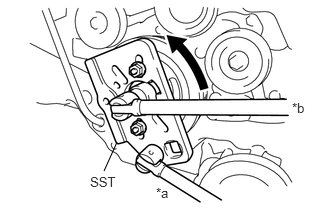
Using SST, hold the crankshaft pulley and loosen the crankshaft pulley set bolt.
- SST
- 09213-80010 (90179-10016, 09213-08010, 09213-08110)
| *a | Hold |
| *b | Turn |
Remove the crankshaft pulley.
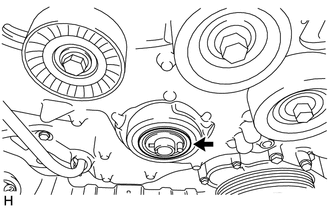
Remove the O-ring and crankshaft pulley spacer.
11302A
23.REMOVE TIMING CHAIN OR BELT COVER OIL SEAL
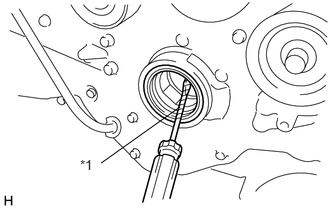
Using a screwdriver with its tip wrapped in protective tape, pry out the timing chain or belt cover oil seal.
| *1 | Protective Tape |
- NOTICE:
-
After the removal, check the crankshaft for damage. If it is damaged, smooth the surface with 400-grit sandpaper.
- HINT:
-
Tape the screwdriver tip before use.
11302
24.REMOVE TIMING CHAIN OR BELT COVER SUB-ASSEMBLY
Remove the 32 bolts.
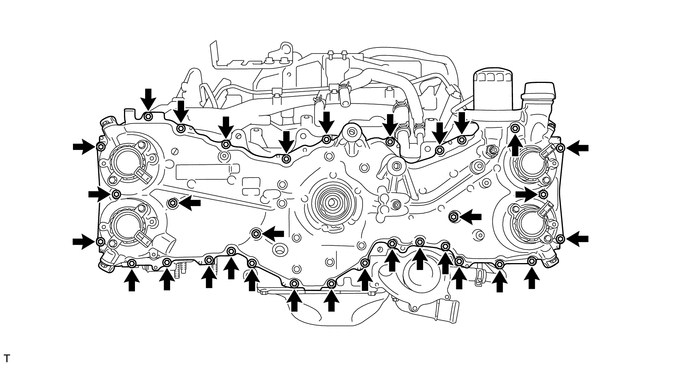
Using a screwdriver with its tip wrapped in protective tape, remove the timing chain or belt cover sub-assembly by prying between the timing chain or belt cover sub-assembly and cylinder head or cylinder block.
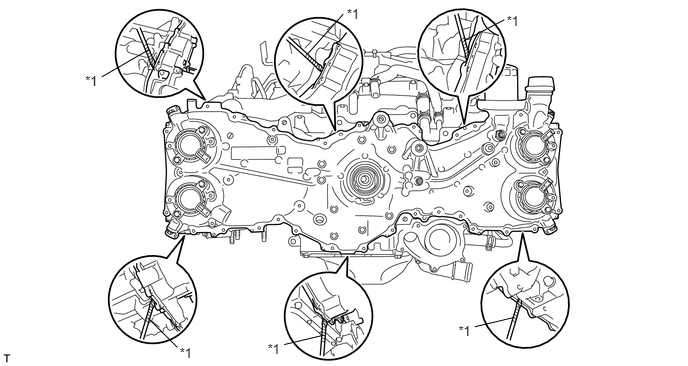
| *1 | Protective Tape | - | - |
- NOTICE:
-
Be careful not to damage the contact surfaces of the cylinder head, cylinder block or chain cover.
Remove the 4 O-rings.
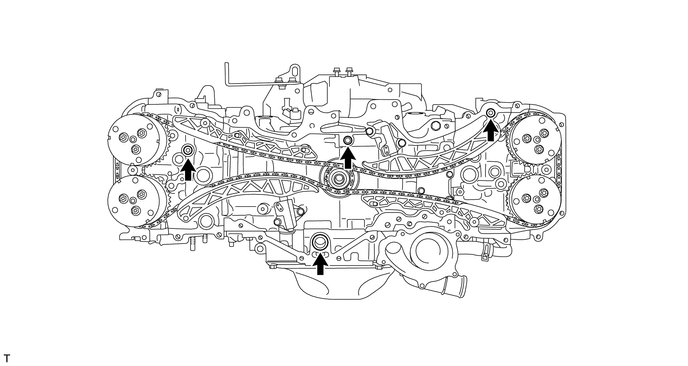
25.MAKE PAINT MARKS
- HINT:
-
If the alignment marks are difficult to identify during the work, mark the alignment marks with paint at the positions shown in the illustration, for easier recognition.
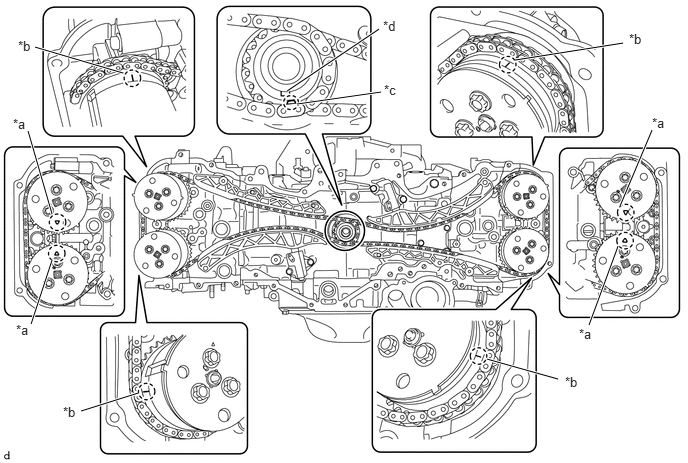
| *a | Triangular Mark | *b | Engraved Line |
| *c | Oval Mark | *d | Crankshaft Timing Gear key |
13506
26.REMOVE CHAIN SUB-ASSEMBLY (for Bank 1)
- CAUTION:
-
Do not remove the chain sub-assembly from bank 2 at the same time as the chain sub-assembly is being removed from bank 1. Otherwise, the camshaft on bank 2 may turn suddenly, which is dangerous.
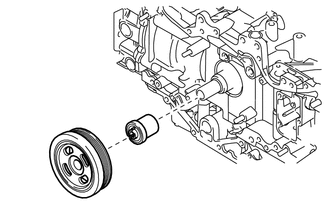
Temporarily install the crankshaft pulley spacer and crankshaft pulley.
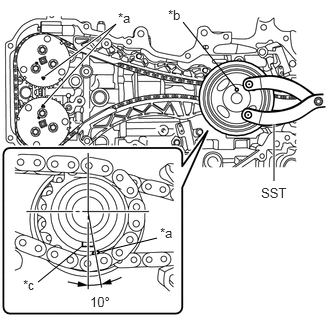
Using SST, turn the crankshaft pulley clockwise until the alignment marks on the camshaft timing intake gear assembly RH and the camshaft timing exhaust gear assembly RH, and the crankshaft pulley pin hole are aligned at the positions shown in the illustration.
- SST
- 09960-10010 (09962-01000, 09963-01000)
| *a | Alignment Mark |
| *b | Crankshaft Pulley Pin Hole |
| *c | Crankshaft Timing Gear key |
- HINT:
-
At this time, the alignment mark on the crankshaft timing gear or sprocket and the crankshaft timing gear key are at the positions shown in the illustration.
Remove the crankshaft pulley and crankshaft pulley spacer.
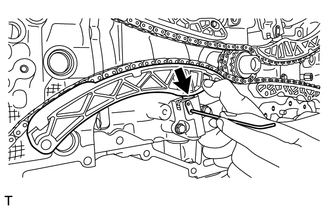
Push down the chain tensioner slipper and retain the plunger by inserting a 2.5 mm (0.098 in.) diameter hexagonal wrench into the No. 1 chain tensioner assembly through the stopper plate.
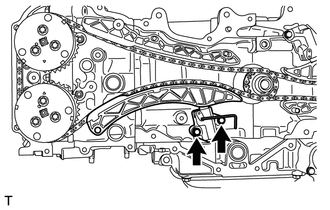
Remove the 2 bolts and No. 1 chain tensioner assembly.
Remove the chain tensioner slipper.
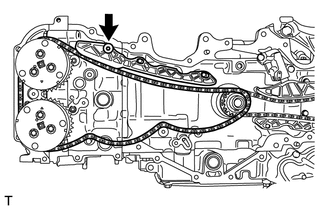
Using a 5 mm hexagonal wrench, remove the bolt and No. 1 chain vibration damper.
Remove the chain sub- assembly (for bank 1).
- NOTICE:
- ·
With the chain sub- assembly (for bank 1) removed, the valve heads may contact each other if the camshafts are turned, causing the valve stems to bend.
·To avoid this, do not turn the intake camshaft RH and the exhaust camshaft RH more than zero-lift range (The range where camshafts can be turned lightly by hand).
- HINT:
-
Arrange the removed parts in the correct order.
13506
27.REMOVE CHAIN SUB-ASSEMBLY (for Bank 2)
Temporarily install the crankshaft pulley spacer and crankshaft pulley.
Using SST, turn the crankshaft pulley clockwise until the alignment marks on the camshaft timing intake gear assembly LH and the camshaft timing exhaust gear assembly LH, and the crankshaft pulley pin hole are aligned at the positions shown in the illustration.
- SST
- 09960-10010 (09962-01000, 09963-01000)
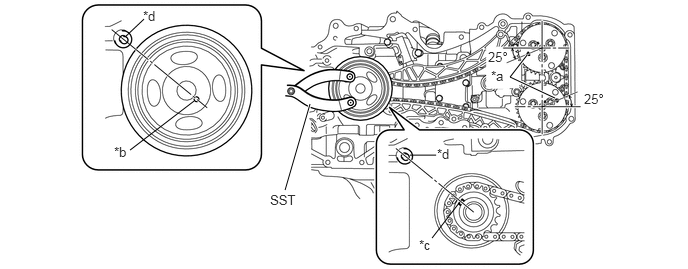
| *a | Alignment Mark | *b | Crankshaft Pulley Pin Hole |
| *c | Crankshaft Timing Gear key | *d | Cylinder Block Guide Pin |
- HINT:
-
At this time, the crankshaft timing gear key is at the position shown in the illustration.
Remove the crankshaft pulley and crankshaft pulley spacer.
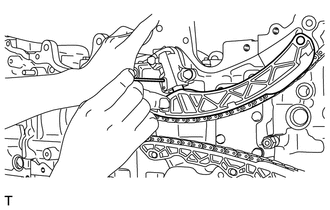
Push the chain tensioner slipper and retain the plunger by inserting an approximately 1 mm (0.039 in.) diameter wire into the No. 2 chain tensioner assembly through the stopper plate .
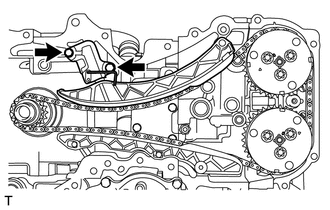
Remove the 2 bolts and No. 2 chain tensioner assembly.
Remove the chain tensioner slipper.
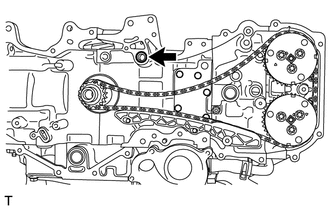
Remove the O-ring from the cylinder block.
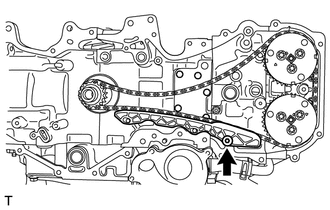
Using a 5 mm socket hexagon wrench, remove the bolt and No. 1 chain vibration damper.
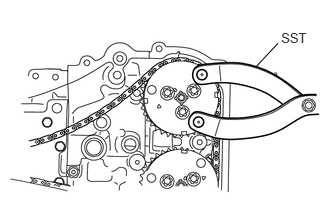
While releasing the tension of chain sub-assembly using SST, remove the chain sub-assembly.
- SST
- 09960-10010 (09962-01000, 09963-00700)
- CAUTION:
-
Make sure to use SST. Never carry out the work using only your hands.
- NOTICE:
- ·
With the chain sub-assembly (for bank 2) removed, the valve heads may contact each other if the camshafts are turned, causing the valve stems to bend. To avoid this, do not turn the exhaust camshaft LH more than zero-lift rang (The range where the camshaft can be turned lightly by hand).
·At this time, No. 1 and No. 4 pistons are located near TDC. If the intake camshaft is turned, the valves may come into contact with the piston, causing the valve stems to bend. To avoid this, do not turn the intake camshaft LH.
- HINT:
-
Arrange the removed parts in the correct order.
28. ROTATE CRANK SHAFT AND CAMSHAFT
13521
29.REMOVE CRANKSHAFT TIMING GEAR OR SPROCKET
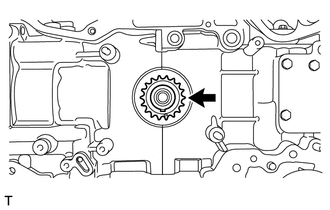
Remove the crankshaft timing gear or sprocket.
13050B
30.REMOVE CAMSHAFT TIMING INTAKE GEAR ASSEMBLY RH
13070
31.REMOVE CAMSHAFT TIMING EXHAUST GEAR ASSEMBLY RH
13060B
32.REMOVE CAMSHAFT TIMING INTAKE GEAR ASSEMBLY LH
13080
33.REMOVE CAMSHAFT TIMING EXHAUST GEAR ASSEMBLY LH
19100P
34.REMOVE SPARK PLUG
Using a 14 mm spark plug wrench, remove the 4 spark plugs.
89879
35.REMOVE INJECTOR DRIVER BRACKET
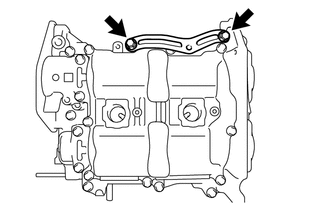
Remove the 2 bolts and injector driver bracket.
11201
36.REMOVE CYLINDER HEAD COVER SUB-ASSEMBLY RH
Operate the engine stand so that the bank 1 side faces upward.
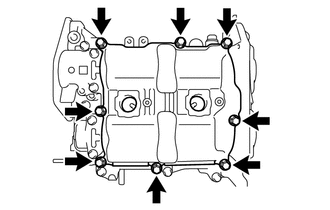
Remove the 8 bolts.
Using a screwdriver with its tip wrapped in protective tape, remove the cylinder head cover sub-assembly RH.
- NOTICE:
-
Do not damage the camshaft housing sub-assembly RH, cam caps and cylinder head cover sub-assembly RH.
Remove the cylinder head cover gasket.
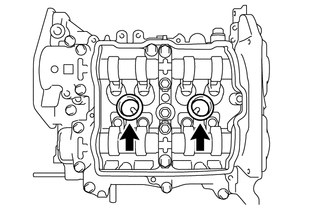
Remove the 2 spark plug tube gaskets.
- NOTICE:
-
When removing the seal packing left on the camshaft housing sub-assembly RH using a scraper, use special care not to damage the camshafts.
11103C
37.REMOVE CAMSHAFT HOUSING SUB-ASSEMBLY RH
- NOTICE:
-
Do not remove the intake and exhaust camshafts first as it may cause a deformation of the cylinder head sub-assembly.
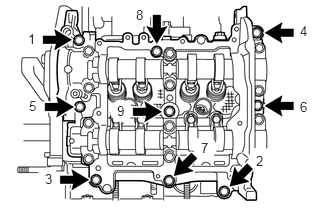
Loosen the 9 bolts in the order shown in the illustration and remove them.
Using a screwdriver with its tip wrapped in protective tape, remove the camshaft housing sub-assembly RH.
- NOTICE:
-
Do not damage the cylinder head sub-assembly RH and camshaft housing sub-assembly RH.
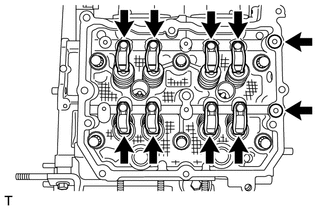
Remove the 2 O-rings and 8 No. 1 valve rocker arm sub-assemblies from the cylinder head sub-assembly.
- HINT:
-
Arrange the removed parts in the correct order.
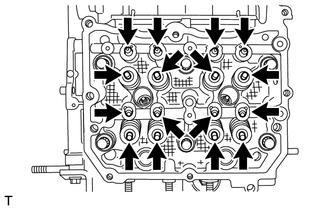
Remove the 8 valve adjusting shims and 8 roller rocker arm pivots from the cylinder head sub-assembly.
- HINT:
- ·
Arrange the removed parts in the correct order.
·When installing, be sure to install the removed parts in their original locations.
11101
38.REMOVE CYLINDER HEAD SUB-ASSEMBLY RH
11115
39.REMOVE CYLINDER HEAD GASKET
11202
40.REMOVE CYLINDER HEAD COVER SUB-ASSEMBLY LH
Operate the engine stand so that the bank 2 side faces upward.
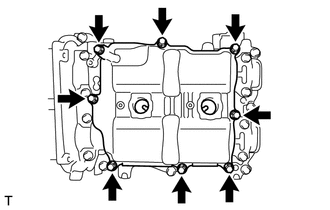
Remove the 8 bolts.
Using a screwdriver with its tip wrapped in protective tape, remove the cylinder head cover sub-assembly LH.
- NOTICE:
-
Do not damage the camshaft housing sub-assembly LH, cam caps and cylinder head cover sub-assembly LH.
Remove the cylinder head cover gasket.
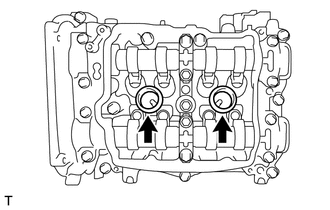
Remove the 2 spark plug tube gaskets.
- NOTICE:
-
When removing the seal packing left on the camshaft housing sub-assembly LH using a scraper, use special care not to damage the camshafts.
11104A
41.REMOVE CAMSHAFT HOUSING SUB-ASSEMBLY LH
- NOTICE:
-
Do not remove the intake and exhaust camshafts first as it may cause a deformation of the camshaft housing sub-assembly LH.
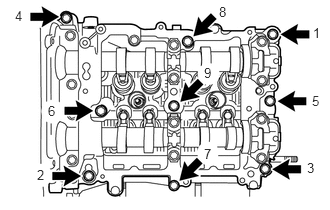
Loosen the 9 bolts in the order shown in the illustration and remove them.
Using a screwdriver with its tip wrapped in protective tape, remove the camshaft housing sub-assembly LH.
- NOTICE:
-
Do not damage the cylinder head sub-assembly LH and camshaft housing sub-assembly LH.
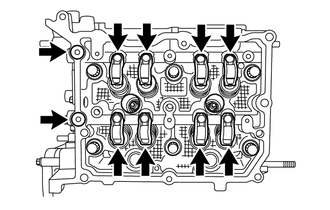
Remove the 2 O-rings and 8 No. 1 valve rocker arm sub-assemblies from the cylinder head sub-assembly LH.
- HINT:
-
Arrange the removed parts in the correct order.
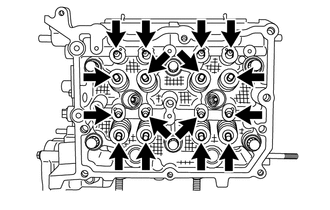
Remove the 8 valve adjusting shims and 8 roller rocker arm pivots from the cylinder head sub-assembly LH.
- HINT:
- ·
Arrange the removed parts in the correct order.
·When installing, be sure to install the removed parts in their original locations.
11102
42.REMOVE CYLINDER HEAD SUB-ASSEMBLY LH
11116
43.REMOVE NO. 2 CYLINDER HEAD GASKET
008202
44.REMOVE NO. 2 ENGINE HANGER
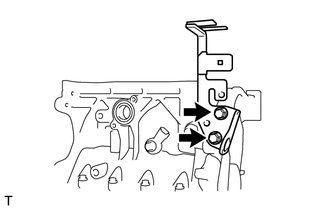
Remove the 2 bolts and No. 2 engine hanger from the cylinder block (for bank 1).
12102A
45.REMOVE NO. 2 OIL PAN SUB-ASSEMBLY
Remove the drain plug and gasket.
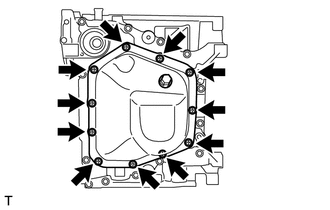
Remove the 11 bolts.
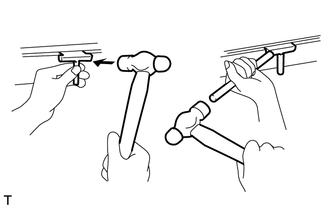
Using an oil pan seal cutter, remove the No. 2 oil pan sub-assembly.
- NOTICE:
-
Do not damage the contact surface and flange part of the No. 2 oil pan sub-assembly.
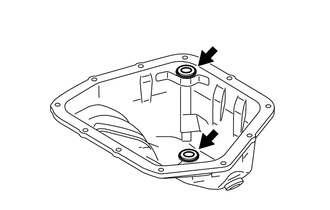
Remove the 2 seal rings from the No. 2 oil pan sub-assembly.
15104
46.REMOVE OIL STRAINER SUB-ASSEMBLY
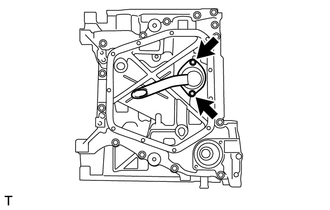
Remove the 2 bolts and oil strainer sub-assembly.
Remove the O-ring.
12101
47.REMOVE OIL PAN SUB-ASSEMBLY
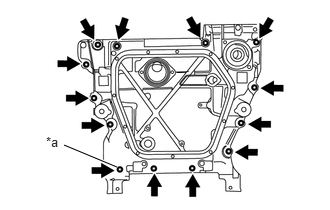
Remove the 13 bolts.
| *a | Use a TORX Socket Wrench T45 |
Using a screwdriver with its tip wrapped in protective tape, remove the oil pan sub-assembly.
- NOTICE:
-
Do not damage the cylinder block and oil pan sub-assembly.
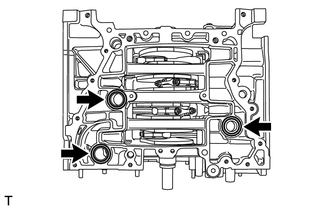
Remove the 3 O-rings from the cylinder block.
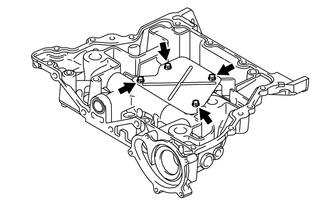
Remove the 4 bolts and baffle plate from the oil pan sub-assembly.
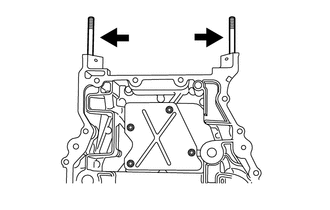
Remove the 2 stud bolts from the oil pan sub-assembly.
48.REMOVE CAMSHAFT BEARING CAP (for Bank 1)
49.REMOVE CAMSHAFT (for Bank 1)
15678D
50.REMOVE OIL CONTROL VALVE FILTER (for Bank 1)
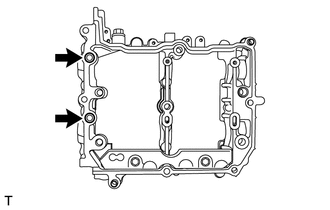
Remove the 2 oil control valve filters from the camshaft housing sub-assembly RH.
11103G
51.REMOVE OIL SPACER RH
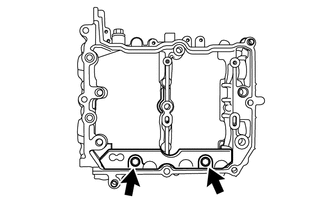
Remove the 2 bolts and oil spacer RH.
15044
52.REMOVE CAMSHAFT OIL FEED PIPE SUB-ASSEMBLY (for Automatic Transmission)
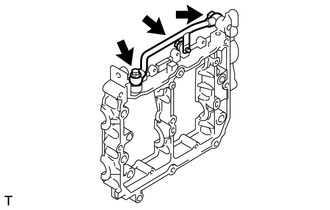
Remove the 2 union bolts, the bolt, camshaft oil feed pipe sub-assembly and 2 gaskets from the camshaft housing sub-assembly RH.
001104
53.REMOVE HOLE PLUG (for Manual Transmission)
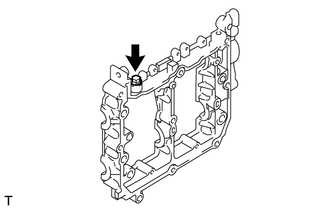
Remove the hole plug and gasket from the camshaft housing sub-assembly RH.
54.REMOVE CAMSHAFT BEARING CAP (for Bank 2)
55.REMOVE CAMSHAFT (for Bank 2)
15678E
56.REMOVE OIL CONTROL VALVE FILTER (for Bank 2)
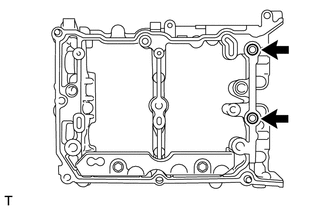
Remove the 2 oil control valve filters from the camshaft housing sub-assembly LH.
11104F
57.REMOVE OIL SPACER LH
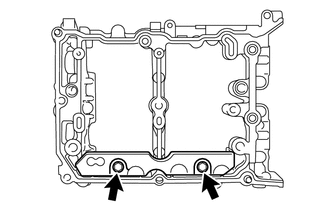
Remove the 2 bolts and oil spacer LH.