TX6A AUTOMATIC TRANSMISSION / TRANSAXLE SHIFT LEVER INSTALLATION
PROCEDURE

 1.INSTALL SHIFT LEVER ASSEMBLY
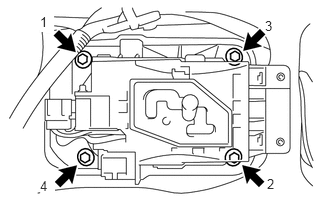
Install and tighten the 4 bolts in the sequence shown in the illustration.
- Torque:
- 18 N*m (184 kgf*cm, 13 ft.*lbf)
Engage the wire harness clamp.
Connect the 2 connectors.
58810J
2.INSTALL CONSOLE BOX ASSEMBLY
33702B
3.CONNECT FLOOR SHIFT GEAR SHIFTING ROD SUB-ASSEMBLY
While pushing the shift lock release button, move the shift lever to N.
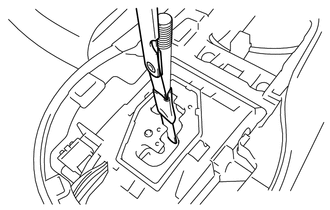
Using tape, hold a 0.3 mm feeler gauge on the floor shift control select lever.
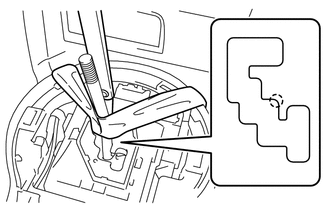
Using tape, attach the floor shift control select lever to the console box assembly.
- NOTICE:
-
Make sure that the feeler gauge is not on the area shown in the illustration.
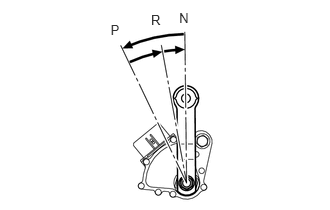
Turn the transmission control shaft lever RH of the park/neutral position switch assembly counterclockwise until it stops, and turn it clockwise 2 notches to set it to the N position.
Temporarily install the floor shift gear shifting rod sub-assembly with the nut.
Tighten the nut while lightly pushing the lever rearward.
- Torque:
- 18 N*m (184 kgf*cm, 13 ft.*lbf)
- NOTICE:
-
Do not push the lever too hard.
4.INSPECT SHIFT LEVER POSITION
51442E
5.INSTALL NO. 2 ENGINE UNDER COVER
51441
6.INSTALL NO. 1 ENGINE UNDER COVER