TELEMATICS TELEPHONE ANTENNA CORD REMOVAL
CAUTION / NOTICE / HINT
The necessary procedures (adjustment, calibration, initialization, or registration) that must be performed after parts are removed, installed, or replaced during the antenna cord sub-assembly removal/installation are shown below.
| Replacement Part or Procedure | Necessary Procedure | Effect/Inoperative Function when Necessary Procedures not Performed | Link |
|---|---|---|---|
|
*1: When performing learning using the GTS. Click here( |
|||
| Disconnect cable from negative auxiliary battery terminal | Perform steering sensor zero point calibration | Lane departure alert system (w/ Steering Control) | ( ) |
| Toyota parking assist-sensor system*1 | |||
| Parking support brake system*1 | |||
| Simple intelligent parking assist system*1 | |||
| Pre-collision system | |||
| Memorize steering angle neutral point | Panoramic view monitor system | ()
|
|
| Initialize back door lock | Power door lock control system | ()
|
|
- NOTICE:
-
After the power switch is turned off, the radio and display receiver assembly records various types of memory and settings. As a result, after turning the power switch off, make sure to wait at least 120 seconds before disconnecting the cable from the negative (-) auxiliary battery terminal.
PROCEDURE

 55401E
1.REMOVE INSTRUMENT PANEL SAFETY PAD SUB-ASSEMBLY
55086
2.REMOVE NO. 3 HEATER TO REGISTER DUCT SUB-ASSEMBLY
86101
3.REMOVE ANTENNA CORD SUB-ASSEMBLY
Disengage the clamps to remove the antenna cord sub-assembly.
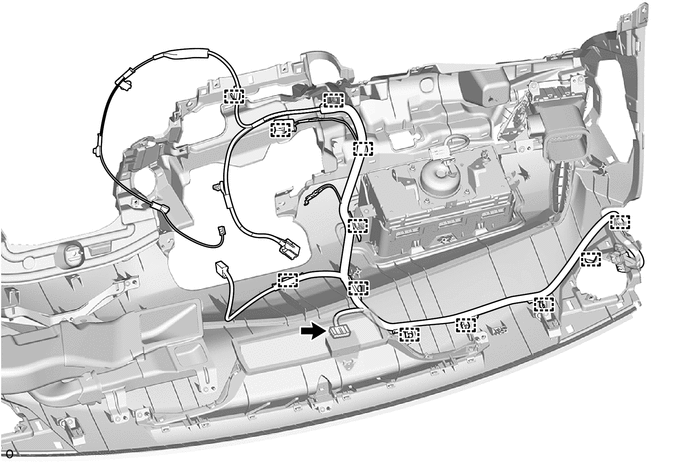
Disconnect the connector.
63311C
4.REMOVE ROOF HEADLINING
86101J
5.REMOVE NO. 2 ANTENNA CORD SUB-ASSEMBLY
for Type A:
Remove each adhesive tape from the roof headlining.
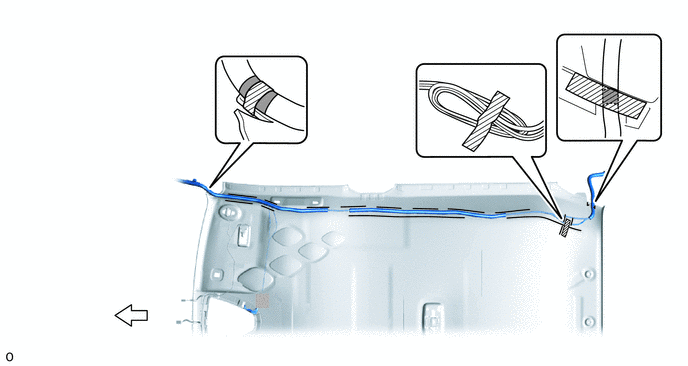

|
Adhesive Tape | 
|
Front |
Remove the No. 2 antenna cord sub-assembly from the roof headlining.
for Type B:
Remove each adhesive tape from the roof headlining.
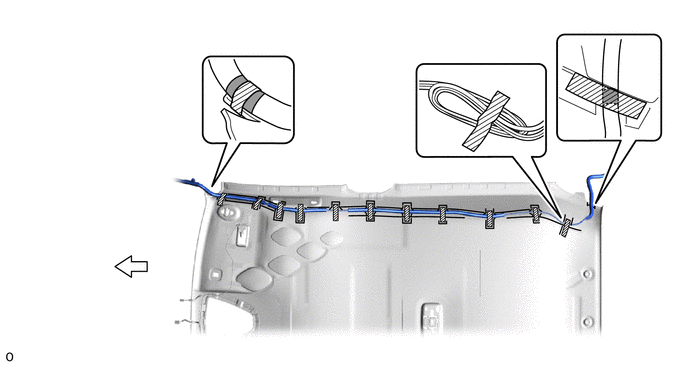
|
|
Adhesive Tape |
|
Front |
Remove the No. 2 antenna cord sub-assembly from the roof headlining.
86101D
6.REMOVE NO. 3 ANTENNA CORD SUB-ASSEMBLY
for Glass Antenna Type:
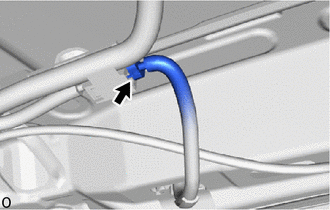
Disconnect the connector of the No. 4 antenna cord sub-assembly.
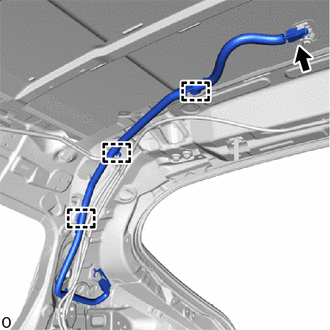
Disconnect the connector.
Disengage the clamps.
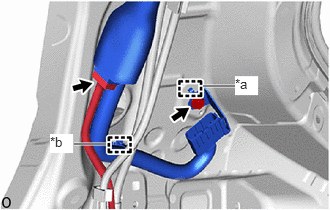
| *a | Guide |
| *b | Clamp |
Disconnect the connector of the floor wire.
Remove the bolt.
Disengage the clamp and guide to remove the No. 3 antenna cord sub-assembly.