HEATING / AIR CONDITIONING AIR CONDITIONING SYSTEM(for Automatic Air Conditioning System) B1423/23 Pressure Sensor Circuit
DESCRIPTION
This DTC is stored if refrigerant pressure on the high pressure side is extremely low (0.19 MPa (2.0 kgf/cm2, 28 psi) or less) or extremely high (3.14 MPa (32.0 kgf/cm2, 455 psi) or more). The air conditioning pressure sensor, which is installed on the pipe on the high pressure side to detect refrigerant pressure, sends a refrigerant pressure signal to the air conditioning amplifier assembly. The air conditioning amplifier assembly converts this signal to a pressure value according to the sensor characteristics and uses it to control the compressor.
| DTC No. | Detection Item | DTC Detection Condition | Trouble Area | Memory |
|---|---|---|---|---|
| B1423/23 | Pressure Sensor Circuit | ·
Open or short in air conditioning pressure sensor circuit ·
Refrigerant pressure on the high pressure side is extremely low (0.19 MPa (2.0 kgf/cm2, 28 psi) or less) or extremely high (3.14 MPa (32.0 kgf/cm2, 455 psi) or more). |
·
Air conditioning pressure sensor ·
Harness or connector between air conditioning pressure sensor and air conditioning amplifier assembly ·
Air conditioning amplifier assembly ·
Cooler expansion valve (blocked, stuck) ·
Cooler dryer (moisture in the refrigerant cycle cannot be absorbed) ·
Condenser assembly (blocked, deterioration of cooling capacity due to dirt) ·
Cooling fan system (condenser assembly cannot be cooled down) ·
A/C system (leaks, blocked) |
- |
WIRING DIAGRAM

CAUTION / NOTICE / HINT
- HINT:
-
If DTC B1423 and B14B8 are output at the same time, troubleshoot for DTC B1423 first.
PROCEDURE
Disconnect the A55 air conditioning pressure sensor connector.
Measure the voltage according to the value(s) in the table below.
- Standard Voltage:
Tester Connection Condition Specified Condition A55-3 (+) - Body ground Ignition switch ON 4.75 to 5.25 V
- Result:
Proceed to OK NG
OK
NG
Measure the resistance according to the value(s) in the table below.
- Standard Resistance:
Tester Connection Condition Specified Condition A55-1 (-) - Body ground Always Below 1 Ω
- Result:
Proceed to OK NG
OK
NG
Reconnect the A55 air conditioning pressure sensor connector.
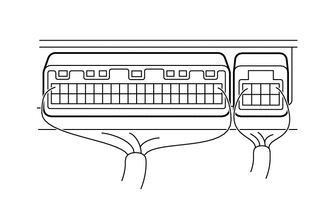
| *a | Component with harness connected
(Air Conditioning Amplifier Assembly) |
Remove the air conditioning amplifier assembly with connectors still connected.
Measure the voltage according to the value(s) in the table below.
- Standard Voltage:
Tester Connection Condition Specified Condition I77-9 (PRE) - Body ground Ignition switch ON
(A/C: off)0.50 to 4.80 V
- HINT:
-
If the measured voltage is not within the normal range, there may be a malfunction in the air conditioning amplifier assembly, air conditioning pressure sensor, or wire harness. It is also possible that the amount of refrigerant may not be appropriate.
- Result:
Proceed to OK NG
OK
NG
Measure the voltage when the following conditions are satisfied.
| Item | Condition |
|---|---|
| Vehicle Doors | Fully open |
| Temperature Setting | MAX COLD |
| Blower Speed | HI |
| A/C Switch | ON |
| R/F Switch | RECIRCULATION |
| Interior Temperature | 25 to 35°C (77 to 95°F) |
| Engine Speed | 2000 rpm |
- NOTICE:
- ·
If refrigerant pressure on the high pressure side becomes extremely high during the inspection (if the voltage exceeds 4.8 V), the fail-safe function stops compressor operation. Therefore, measure the voltage before the fail-safe operation.
·It is necessary to measure the voltage for a certain amount of time (approximately 10 minutes) because the problem symptom may recur after a while.
- HINT:
-
When the outside air temperature is low (below -1.5°C (29.3°F)), the compressor stops due to operation of the ambient temperature sensor and the evaporator temperature sensor to prevent the evaporator from freezing. In this case, perform the inspection in a warm indoor environment.
| *a | Component with harness connected
(Air Conditioning Amplifier Assembly) |
Measure the voltage according to the value(s) in the table below.
- Standard Voltage:
Tester Connection Condition Specified Condition I77-9 (PRE) - Body ground Ignition switch ON
(A/C: on)0.50 to 4.80 V
- Result:
Result Proceed to OK (When troubleshooting according to the DTC) A OK (When troubleshooting according to Problem Symptoms Table) B NG C
A
B
C
Check that the cooling fan(s) operates normally.
- HINT:
- ·
Refer to cooling fan circuit
Click hereEngine / Hybrid System>2AR-FE COOLING>COOLING FAN SYSTEM>ON-VEHICLE INSPECTION
- Result:
Proceed to OK NG
OK
NG
Use a refrigerant recovery unit to recover refrigerant.
Evacuate the A/C system.
Add an appropriate amount of refrigerant.
Click hereVehicle Interior>HEATING / AIR CONDITIONING>REFRIGERANT>REPLACEMENT
- HINT:
-
If refrigerant is added and the system has not been properly evacuated (insufficient vacuum time), moisture in the air remaining in the system will freeze in the expansion valve, blocking the flow on the high pressure side. Therefore, in order to confirm the problem, recover the refrigerant and properly evacuate the system. Add an appropriate amount of refrigerant, and check for the DTC.
- Result:
Proceed to NEXT
NEXT
Recheck for the DTC when the following conditions are satisfied.
| Item | Condition |
|---|---|
| Vehicle Doors | Fully open |
| Temperature Setting | MAX COLD |
| Blower Speed | HI |
| A/C Switch | ON |
| R/F Switch | RECIRCULATION |
| Interior Temperature | 25 to 35°C (77 to 95°F) |
| Engine Speed | 2000 rpm |
- Body Electrical > Air Conditioner > Trouble Codes
- 50001 121
- NOTICE:
-
If refrigerant pressure on the high pressure side becomes high, the DTC will be set. It is necessary to measure the voltage for a certain amount of time (approximately 10 minutes) because the DTC may be set after the air conditioning operates for a while.
- HINT:
- ·
When the outside air temperature is low (below -1.5°C (29.3°F)), the compressor stops due to operation of the ambient temperature sensor and the evaporator temperature sensor to prevent the evaporator from freezing. In this case, perform the inspection in a warm indoor environment.
·If refrigerant is added and the system has not been properly evacuated (insufficient vacuum time), moisture in the air remaining in the system will freeze in the expansion valve, blocking the flow on the high pressure side. Therefore, in order to confirm the problem, recover the refrigerant and properly evacuate the system. Add an appropriate amount of refrigerant, and check for the DTC. If the DTC is not output after this work, it indicates that the cooler dryer in the condenser is not able to absorb moisture in the refrigerant cycle. It is necessary to replace the cooler dryer in order to complete the repair.
- Result:
Result Proceed to DTC B1423/23 is output A DTC B1423/23 is not output B
A
B
Replace the cooler expansion valve with a new one.
Click hereVehicle Interior>HEATING / AIR CONDITIONING>COOLER EXPANSION VALVE>REMOVAL
- HINT:
-
Replace the cooler expansion valve with a new one because the cooler expansion valve is either stuck or clogged.
- Result:
Proceed to NEXT
NEXT
Use a refrigerant recovery unit to recover refrigerant.
Evacuate the A/C system.
Add an appropriate amount of refrigerant.
Click hereVehicle Interior>HEATING / AIR CONDITIONING>REFRIGERANT>REPLACEMENT
- HINT:
-
If refrigerant is added and the system has not been properly evacuated (insufficient vacuum time), moisture in the air remaining in the system will freeze in the expansion valve, blocking the flow on the high pressure side. Therefore, in order to confirm the problem, recover the refrigerant and properly evacuate the system. Add an appropriate amount of refrigerant, and check for the DTC.
- Result:
Proceed to NEXT
NEXT
Recheck for the DTC when the following conditions are satisfied.
| Item | Condition |
|---|---|
| Vehicle Doors | Fully open |
| Temperature Setting | MAX COLD |
| Blower Speed | HI |
| A/C Switch | ON |
| R/F Switch | RECIRCULATION |
| Interior Temperature | 25 to 35°C (77 to 95°F) |
| Engine Speed | 2000 rpm |
- Body Electrical > Air Conditioner > Trouble Codes
- 50001 121
- NOTICE:
-
If refrigerant pressure on the high pressure side becomes high, the DTC will be set. It is necessary to measure the voltage for a certain amount of time (approximately 10 minutes) because the DTC may be set after the air conditioning operates for a while.
- HINT:
- ·
When the outside air temperature is low (below -1.5°C (29.3°F)), the compressor stops due to operation of the ambient temperature sensor and the evaporator temperature sensor to prevent the evaporator from freezing. In this case, perform the inspection in a warm indoor environment.
·If refrigerant pressure is not normal after replacing the expansion valve with a normal one, the condenser or pipes may be clogged due to dirt, dust or other foreign matter. In this case, clean or replace the condenser or pipes.
- Result:
Result Proceed to DTC B1423/23 is not output A DTC B1423/23 is output B
A
B
Disconnect the I77 air conditioning amplifier assembly connector.
Measure the resistance according to the value(s) in the table below.
- Standard Resistance:
Tester Connection Condition Specified Condition A55-2 (PR) - I77-9 (PRE) Always Below 1 Ω I77-9 (PRE) - Body ground Always 10 kΩ or higher
- Result:
Proceed to OK NG
OK
NG
Install the manifold gauge set.
Recover the refrigerant from the A/C system using a refrigerant recovery unit.
Evacuate the A/C system and check that vacuum can be maintained in it.
- OK:
Vacuum can be maintained in the A/C system.
- HINT:
-
If vacuum cannot be maintained in the A/C system, refrigerant may be leaking from it. In this case, it is necessary to repair or replace the leaking part of the A/C system.
- Result:
Proceed to OK NG
OK
NG
Use a refrigerant recovery unit to recover refrigerant.
Evacuate the A/C system.
Add an appropriate amount of refrigerant.
Click hereVehicle Interior>HEATING / AIR CONDITIONING>REFRIGERANT>REPLACEMENT
- HINT:
-
If refrigerant is added and the system has not been properly evacuated (insufficient vacuum time), moisture in the air remaining in the system will freeze in the expansion valve, blocking the flow on the high pressure side. Therefore, in order to confirm the problem, recover the refrigerant and properly evacuate the system. Add an appropriate amount of refrigerant, and check for the DTC.
- Result:
Proceed to NEXT
NEXT
Recheck for the DTC when the following conditions are satisfied.
| Item | Condition |
|---|---|
| Vehicle Doors | Fully open |
| Temperature Setting | MAX COLD |
| Blower Speed | HI |
| A/C Switch | ON |
| R/F Switch | RECIRCULATION |
| Interior Temperature | 25 to 35°C (77 to 95°F) |
| Engine Speed | 2000 rpm |
- Body Electrical > Air Conditioner > Trouble Codes
- 50001 121
- NOTICE:
-
If refrigerant pressure on the high pressure side becomes high, the DTC will be set. It is necessary to measure the voltage for a certain amount of time (approximately 10 minutes) because the DTC may be set after the A/C operates for a while.
- HINT:
-
When the outside air temperature is low (below -1.5°C (29.3°F)), the compressor stops due to operation of the ambient temperature sensor and the evaporator temperature sensor to prevent the evaporator from freezing. In this case, perform the inspection in a warm indoor environment.
- NOTICE:
-
If the DTC was set due to an insufficient or excessive amount of refrigerant, the problem may have been solved after performing the previous step. However, the root cause of insufficient refrigerant may be refrigerant leaks. The root cause of excessive refrigerant may be adding refrigerant when the level was insufficient. Therefore, identify and repair the area where refrigerant leaks from as necessary.
- Result:
Result Proceed to DTC B1423/23 is output A DTC B1423/23 is not output B
A
B
Install the manifold gauge set.
Reconnect the air conditioning pressure sensor connector.
Turn the ignition switch to ON.
| *a | Component with harness connected
(Air Conditioning Amplifier Assembly) |
Measure the voltage according to the value(s) in the table below.
- Standard Voltage:
Tester Connection Condition Specified Condition I77-9 (PRE) - I77-13 (SG-2) Refrigerant pressure: (less than 3025 kPa (30.9 kgf/cm2, 439 psi) and more than 176 kPa (1.8 kgf/cm2, 25 psi)) 0.50 to 4.80 V
- Result:
Proceed to OK NG
OK
NG
Identify the area where refrigerant leaks from.
Click hereVehicle Interior>HEATING / AIR CONDITIONING>REFRIGERANT>REPLACEMENT
Repair the identified area of the A/C system.
Evacuate the A/C system.
- Result:
Proceed to NEXT
NEXT
Disconnect the I77 air conditioning amplifier assembly connector.
Measure the resistance according to the value(s) in the table below.
- Standard Resistance:
Tester Connection Condition Specified Condition A55-1 (-) - I77-13 (SG-2) Always Below 1 Ω I77-13 (SG-2) - Body ground Always 10 kΩ or higher
- Result:
Proceed to OK NG
OK
NG
Disconnect the I77 air conditioning amplifier assembly connector.
Measure the resistance according to the value(s) in the table below.
- Standard Resistance:
Tester Connection Condition Specified Condition A55-3 (+) - I77-10 (S5-3) Always Below 1 Ω I77-10 (S5-3) - Body ground Always 10 kΩ or higher
- Result:
Proceed to OK NG
OK
NG