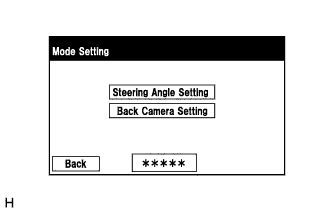
Preparation for adjustment
Park the vehicle with the steering wheel centered.
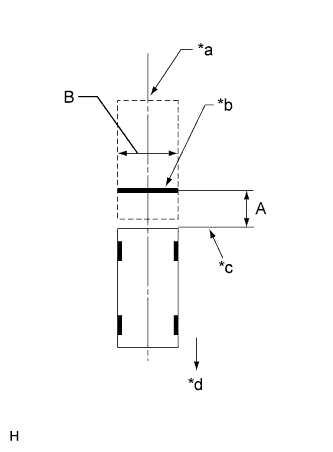
Set a target bar for optical axis adjustment of the rear television camera assembly.
- HINT:
- Only when adjusting the optical axis of the camera, create a target bar for adjustment.
- Dimension:
Area Specification A 826 to 836 mm (2.71 to 2.74 ft.) B 1995 to 2005 mm (6.545 to 6.578 ft.)
Text in Illustration *a Vehicle Center *b Target Bar for Back Camera Adjustment *c Vehicle End *d Front - HINT:
- Set a piece of tape on the ground as the target bar for adjustment. Its width and length should be 20 to 30 mm (0.787 to 1.181 in.) and 1995 to 2005 mm (6.545 to 6.578 ft.), respectively. Check the color on the navigation ECU sub-assembly and choose a tape color which can be easily seen.
- Before parking the vehicle, be sure to move the vehicle forward and in reverse to check that the tires are facing straight ahead with the steering wheel centered.
- Check that the luggage compartment door is fully closed.
 |
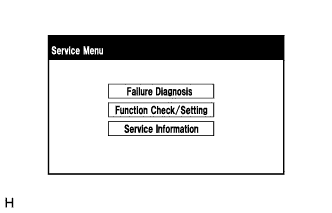
Start diagnostic mode (Click here).
- NOTICE:
- The following must be carried out with the engine started. Apply the parking brake, depress the brake pedal, check that the shift lever is in P, and ensure that the vehicle is not moving.
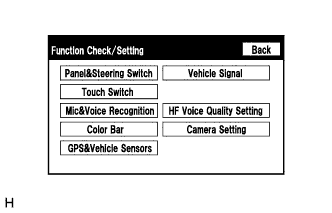
Select "Function Check/Setting" on the "Service Menu" screen.
Select "Camera Setting" on the "Function Check/Setting" screen.
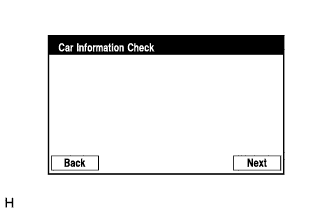
Select "Next" on the "Car Information Check" screen.
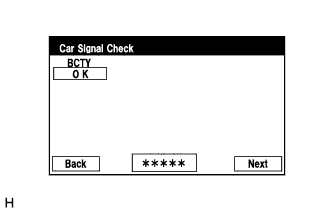
Select "Next" on the "Car Signal Check" screen.
- HINT:
- When "CHK" (red) is displayed for any items on the "Car Signal Check" screen, selecting "Next" will not change the screen to the "Steering Angle Setting" screen.
- When "CHK" (red) is displayed for any items on the "Car Signal Check" screen, perform inspections using the "Car Signal Check" screen (Click here).
 |
 |
 |
 |
Steering Angle Setting
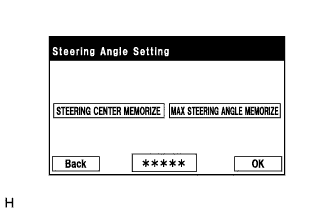
Perform the "STEERING CENTER MEMORIZE" operation.
- Check that the steering wheel is centered, and then select "STEERING CENTER MEMORIZE".
- HINT:
- When performing removal and installation, or replacement of the rear television camera assembly, steering angle setting is not required.
- Check that the steering wheel is centered, and then select "STEERING CENTER MEMORIZE".
Perform the "MAX STEERING ANGLE MEMORIZE" operation.
- After performing the steering center memorize operation, turn the steering wheel to the left and right lock positions and select "MAX STEERING ANGLE MEMORIZE". The maximum steering angle is then stored and the screen changes to the "Back Camera Position Setting" screen.
- HINT:
- The "Next" button does not respond until the system memorizes the steering center and maximum steering wheel angle.
- HINT:
- It is also possible to start by initially turning the steering to the right side.
- When "MAX STEERING ANGLE MEMORIZE" is selected, a beep will sound to confirm that the adjustment values have been stored.
- The adjustment values will not be stored unless "MAX STEERING ANGLE MEMORIZE" is selected after turning the steering wheel from lock to lock.
- When "BACK" is selected, the screen changes to the "Car Signal Check" screen without storing any values.
- Even if no DTCs are detected, selecting "MAX STEERING ANGLE MEMORIZE" may not cause the adjustment values to be stored if the steering sensor is malfunctioning.
- If selecting "MAX STEERING ANGLE MEMORIZE" does not cause the adjustment value to be stored after performing the steering angle setting procedure, replace the steering sensor (Click here).
- After performing the steering center memorize operation, turn the steering wheel to the left and right lock positions and select "MAX STEERING ANGLE MEMORIZE". The maximum steering angle is then stored and the screen changes to the "Back Camera Position Setting" screen.
 |
 |
Back Camera Position Setting
- HINT:
- When adjusting the camera optical axis, "Back door is open. Do not use the rear view monitor when the back door is not completely closed." is displayed even after the luggage compartment door has been closed.
- When the luggage compartment door is open, the "Back door is open. Do not use the rear view monitor when the back door is not completely closed." message will be displayed and camera position setting will not be possible.
- If the "Back door is open. Do not use the rear view monitor when the back door is not completely closed." message is displayed even when the luggage compartment door is closed, perform inspections according to Problem Symptoms Table (When adjusting the camera optical axis, "Back door is open. Do not use the rear view monitor when the back door is not completely closed." is displayed even after the luggage compartment door has been closed.) (Click here).
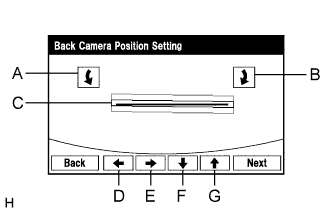
Perform roll angle adjustment.
- Use switches A and B to rotate C so that it is parallel to the target adjustment bar.
- Use switches A and B to rotate C so that it is parallel to the target adjustment bar.
Perform vertical and horizontal position adjustment.
- Use the directional switches D, E, F and G to move C so that the target adjustment bar is centered in C.
- Use the directional switches D, E, F and G to move C so that the target adjustment bar is centered in C.
Select the "Next" button on the "Back Camera Position Setting" screen.
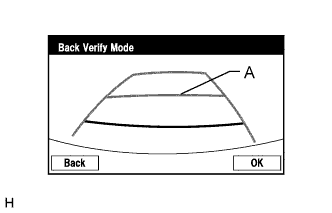 |
Back Verify Mode
Check that A and the target adjustment bar are overlapping.
- If the lines are not aligned, perform the "STEERING CENTER MEMORIZE" and "MAX STEERING ANGLE MEMORIZE" operations.
- If A and the target adjustment bar are not aligned even if the tires are aligned straight ahead, perform the back camera position setting operation.
- If the lines are not aligned, perform the "STEERING CENTER MEMORIZE" and "MAX STEERING ANGLE MEMORIZE" operations.
Selecting "OK" will return to the "Service Menu" screen and complete the adjustment.
- HINT:
- The update is not completed until "OK" is selected.
- When "OK" is selected, a beep will sound to confirm that the adjustment values have been stored.
- The adjustment values are not stored until the beep has sounded.
Finish diagnostic mode (Click here).
Confirm steering angle adjustment.
- HINT:
- If the steering angle has been adjusted, confirm the steering angle adjustment on the parking assist monitor screen after finishing diagnosis mode.
Check on the parking assist screen that the predicted path line moves until the steering wheel is fully turned to either the left or right.
- HINT:
- If the predicted path line stops moving before the steering wheel is fully turned to either the left or right, the steering angle adjustment values have not been stored correctly. In this case, perform "STEERING CENTER MEMORIZE" and "MAX STEERING ANGLE MEMORIZE" again.