AXLE AND DIFFERENTIAL REAR AXLE CARRIER REMOVAL
CAUTION / NOTICE / HINT
- HINT:
- ·
Use the same procedure for the RH side and LH side.
·The procedure listed below is for the LH side.
PROCEDURE

 1.REMOVE REAR WHEEL
2.SEPARATE REAR DISC BRAKE CALIPER ASSEMBLY
42491
3.REMOVE PARKING BRAKE SHOE ADJUSTING HOLE PLUG
Click hereBrake>BRAKE (REAR)>REAR BRAKE>REMOVAL
42431
4.REMOVE REAR DISC
Click hereBrake>BRAKE (REAR)>REAR BRAKE>REMOVAL
89516D
5.DISCONNECT SKID CONTROL SENSOR WIRE
42450B
6.REMOVE REAR AXLE HUB AND BEARING ASSEMBLY
89407C
7.REMOVE REAR HEIGHT CONTROL SENSOR SUB-ASSEMBLY (w/ Height Control Sensor)
Click hereVehicle Exterior>LIGHTING (EXT)>HEIGHT CONTROL SENSOR>REMOVAL
- HINT:
-
It is necessary to remove the rear height control sensor sub-assembly when separating the rear No. 2 suspension arm assembly RH.
48780A
8.SEPARATE REAR STRUT ROD ASSEMBLY
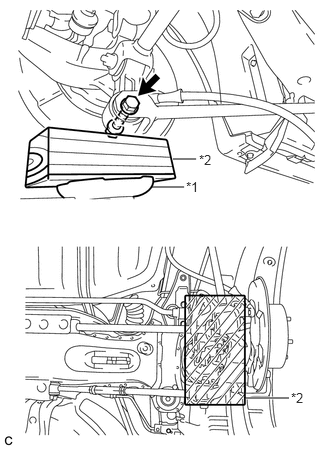
| *1 | Jack |
| *2 | Wooden Block |
Use a jack and wooden block to support the rear axle carrier sub-assembly.
Remove the bolt and nut, and separate the rear strut rod assembly (rear side) from the rear axle carrier sub-assembly.
- NOTICE:
-
When removing the bolt, keep the nut from rotating.
48740F
9.SEPARATE REAR NO. 2 SUSPENSION ARM ASSEMBLY
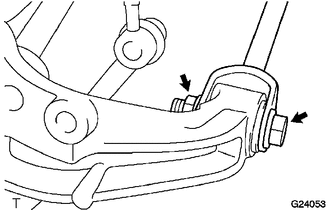
Remove the bolt and nut, and separate the rear No. 2 suspension arm assembly (outer side) from the rear axle carrier sub-assembly.
- NOTICE:
-
When removing the bolt, keep the nut from rotating.
48720A
10.SEPARATE REAR NO. 1 SUSPENSION ARM ASSEMBLY
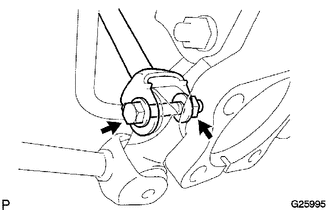
Remove the bolt and nut, and separate the rear No. 1 suspension arm assembly (outer side) from the rear axle carrier sub-assembly.
- NOTICE:
-
When removing the bolt, keep the nut from rotating.
42305
11.REMOVE REAR AXLE CARRIER SUB-ASSEMBLY
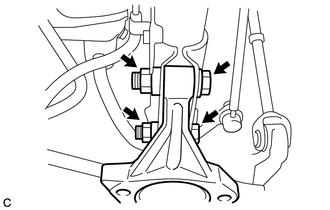
Remove the 2 bolts, 2 nuts and rear axle carrier sub-assembly from the rear shock absorber assembly.
- NOTICE:
-
When removing the nuts, keep the bolts from rotating.