WINDOW / GLASS WINDSHIELD GLASS REMOVAL
PROCEDURE

 1.REMOVE FRONT WIPER ARM AND BLADE ASSEMBLY RH
2.REMOVE FRONT WIPER ARM AND BLADE ASSEMBLY LH
53866J
3.REMOVE FRONT FENDER TO COWL SIDE SEAL RH
53867H
4.REMOVE FRONT FENDER TO COWL SIDE SEAL LH
- HINT:
-
Use the same procedure as for the RH side.
55781E
5.REMOVE COWL TOP VENTILATOR LOUVER SUB-ASSEMBLY
87810
6.REMOVE INNER REAR VIEW MIRROR ASSEMBLY (w/o EC Mirror)
87834
7.REMOVE INNER REAR VIEW MIRROR STAY HOLDER COVER (w/ EC Mirror)
87810
8.REMOVE INNER REAR VIEW MIRROR ASSEMBLY (w/ EC Mirror)
89943
9.REMOVE RAIN SENSOR COVER (w/ Rain Sensor)
62311B
10.DISCONNECT FRONT DOOR OPENING TRIM WEATHERSTRIP RH
62211
11.REMOVE FRONT PILLAR GARNISH RH
62312B
12.DISCONNECT FRONT DOOR OPENING TRIM WEATHERSTRIP LH
62212
13.REMOVE FRONT PILLAR GARNISH LH
- HINT:
-
Use the same procedure as for the RH side.
63650A
14.REMOVE ROOF CONSOLE BOX ASSEMBLY (w/o Sliding Roof)
63650A
15.REMOVE ROOF CONSOLE BOX ASSEMBLY (w/ Sliding Roof)
81240
16.REMOVE NO. 1 ROOM LIGHT ASSEMBLY (w/o Sliding Roof)
81360T
17.REMOVE SPOT LIGHT ASSEMBLY (w/ Sliding Roof)
74610A
18.REMOVE ASSIST GRIP SUB-ASSEMBLY (for RH Side)
74610A
19.REMOVE ASSIST GRIP SUB-ASSEMBLY (for LH Side)
- HINT:
-
Use the same procedure as for the RH side.
74620C
20.REMOVE REAR ASSIST GRIP ASSEMBLY RH
74630E
21.REMOVE REAR ASSIST GRIP ASSEMBLY LH
- HINT:
-
Use the same procedure as for the RH side.
63318C
22.REMOVE SLIDING ROOF OPENING TRIM MOULDING (w/ Sliding Roof)
74325
23.REMOVE VISOR BRACKET COVER (for RH Side)
74310
24.REMOVE VISOR ASSEMBLY RH
74325
25.REMOVE VISOR BRACKET COVER (for LH Side)
- HINT:
-
Use the same procedure as for the RH side.
74320
26.REMOVE VISOR ASSEMBLY LH
- HINT:
-
Use the same procedure as for the RH side.
74348
27.REMOVE VISOR HOLDER
28.REMOVE ROOF HEADLINING ASSEMBLY
Slightly lower the front section of the roof headlining assembly so that the windshield glass can be removed.
- NOTICE:
-
Do not damage the roof headlining assembly or body interior.
- HINT:
-
It is not necessary to completely remove the roof headlining assembly.
56111
29.REMOVE WINDSHIELD GLASS SUB-ASSEMBLY
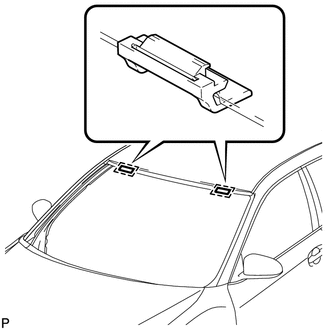
w/ Front Window Deicer System:
Disengage each clamp and disconnect the connector.
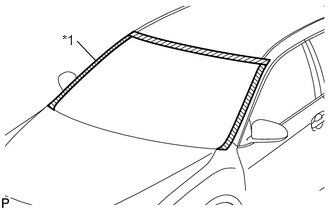
| *1 | Protective Tape |
Apply protective tape to the area around the installation position of the windshield glass on the vehicle body to prevent it from being scratched.
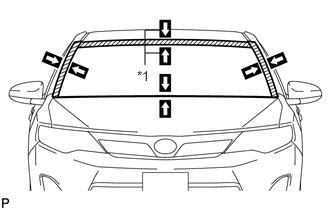
| *1 | Matchmark |
Place matchmarks on the windshield glass sub-assembly and vehicle body on the locations indicated in the illustration.
- HINT:
-
Matchmarks are not necessary if the windshield glass sub-assembly is not going to be reused.
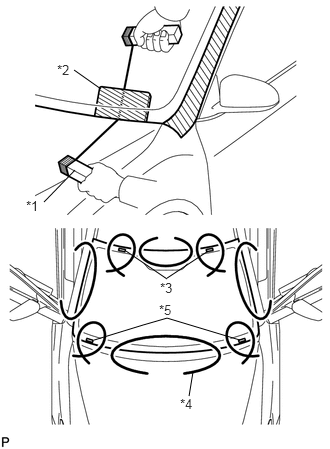
| *1 | Wooden Block |
| *2 | Plastic Sheet |
| *3 | Stopper |
| *4 | Piano Wire |
| *5 | Windshield Glass Retainer |
Pass a piano wire between the vehicle body and glass from the interior as shown in the illustration.
Tie both wire ends to wooden blocks or similar objects that can serve as handles.
Cut off the adhesive by pulling the piano wire around the windshield glass sub-assembly.
- NOTICE:
- ·
When separating the windshield glass sub-assembly, be careful not to damage the paint or interior and exterior ornaments.
·To prevent the safety pad from being scratched when removing the windshield glass, place a plastic sheet between the piano wire and safety pad.
Disconnect the windshield glass stoppers.
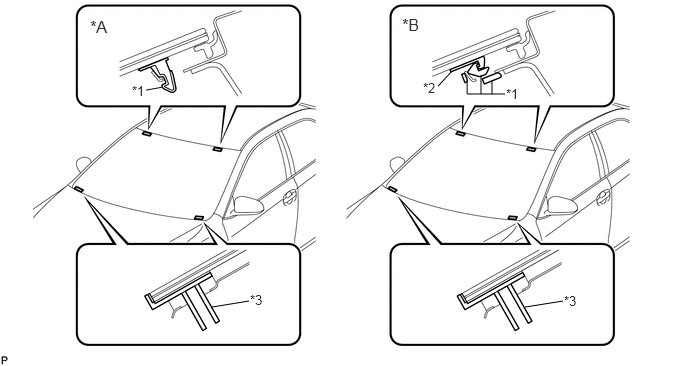
| *A | 1-piece Type | *B | 2-pieceType |
| *1 | No. 1 Windshield Glass Stopper | *2 | No. 2 Windshield Glass Stopper |
| *3 | Windshield Glass Retainer | - | - |
- NOTICE:
- ·
There are No. 1 and No. 2 stoppers on the windshield glass as shown in the illustration. Be careful not to damage the windshield glass when cutting off the adhesive.
·To prevent the windshield glass from falling when performing this operation, be sure to hold the windshield glass using suction cups.
- HINT:
-
Depending on the vehicle, either 1-piece or 2-piece type stoppers may be present.
Using suction cups, remove the windshield glass sub-assembly.
- NOTICE:
- ·
Be careful not to drop the windshield glass sub-assembly.
·Leave as much adhesive on the vehicle body as possible when removing the windshield glass sub-assembly.
56117A
30.REMOVE WINDOW GLASS ADHESIVE DAM
When reusing the windshield glass:
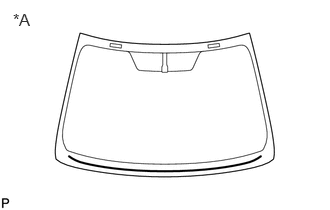
| *A | Back Side |
Using a scraper, remove the window glass adhesive dam.
- NOTICE:
- ·
Be careful not to damage the windshield glass.
·Be sure to replace the window glass adhesive dam with a new one.
31.REMOVE WINDSHIELD OUTSIDE MOULDING
When reusing the windshield glass:
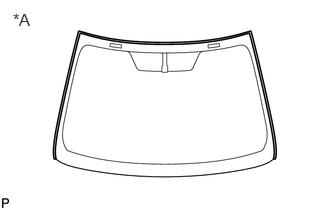
| *A | Back Side |
Using a scraper, remove the windshield outside moulding.
- NOTICE:
- ·
Be careful not to damage the windshield glass.
·Be sure to replace the windshield outside moulding with a new one.
32.REMOVE NO. 1 WINDSHIELD GLASS STOPPER (for 1-piece Type)
When reusing the windshield glass:
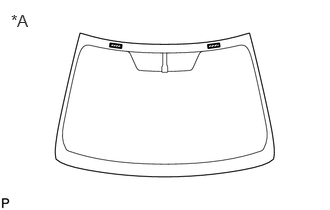
| *A | Back Side |
Using a scraper, remove the 2 No. 1 windshield glass stoppers.
- NOTICE:
- ·
Be careful not to damage the windshield glass.
·Be sure to replace the 1-piece type No. 1 windshield glass stoppers with a new pair of 2-piece type No. 1 and No. 2 windshield glass stoppers.
56116C
33.REMOVE NO. 2 WINDSHIELD GLASS STOPPER (for 2-piece Type)
When reusing the windshield glass:
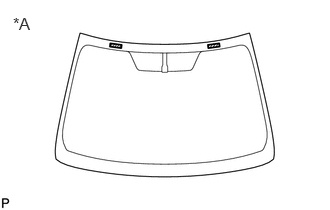
| *A | Back Side |
Using a scraper, remove the 2 No. 2 windshield glass stoppers.
- NOTICE:
- ·
Be careful not to damage the windshield glass.
·Be sure to replace the No. 2 windshield glass stoppers with new ones.
56114
34.REMOVE WINDSHIELD GLASS RETAINER
When reusing the windshield glass:
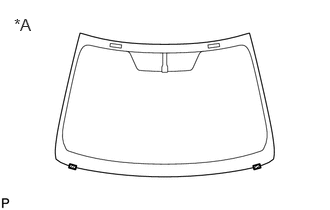
| *A | Back Side |
Remove the 2 windshield glass retainers.
- NOTICE:
- ·
Be careful not to damage the windshield glass.
·Be sure to replace the windshield glass retainers with new ones.
56115A
35.REMOVE NO. 1 WINDSHIELD GLASS STOPPER (for 2-piece Type)
Remove the 2 No. 1 windshield glass stoppers.
- NOTICE:
-
Be sure to replace the No. 1 windshield glass stoppers with new ones.
36.CLEAN WINDSHIELD GLASS
When reusing the windshield glass:
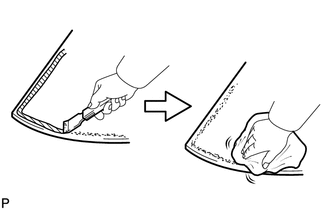
Using a scraper, remove any adhesive dam and adhesive residue from the windshield glass.
- NOTICE:
-
Be careful not to damage the windshield glass.
Clean the outer circumference of the windshield glass with a non-residue solvent.
- NOTICE:
- ·
Do not touch the windshield glass surface after cleaning it.
·Even if using a new windshield glass, clean the windshield glass with a non-residue solvent.
37.CLEAN VEHICLE BODY
| *1 | Adhesive |
| *2 | Body |
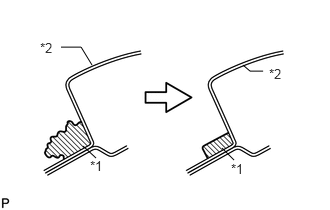
Clean and shape the contact surfaces of the vehicle body.
Using a knife, cut away excess adhesive on the contact surfaces of the vehicle body as shown in the illustration.
- NOTICE:
-
Be careful not to damage the vehicle body.
- HINT:
-
Leave as much adhesive on the vehicle body as possible.
Clean the contact surfaces of the vehicle body with a piece of cloth saturated with cleaner.
- HINT:
-
Even if all the adhesive has been removed, clean the vehicle body.