HEATING / AIR CONDITIONING COMPRESSOR(for 2GR-FKS) REMOVAL
CAUTION / NOTICE / HINT
The necessary procedures (adjustment, calibration, initialization, or registration) that must be performed after parts are removed and installed, or replaced during compressor assembly with magnetic clutch removal/installation are shown below.
| Replaced Part or Performed Procedure | Necessary Procedure | Effect/Inoperative Function when Necessary Procedure not Performed | Link |
|---|---|---|---|
| Front bumper assembly (w/ Panoramic View Monitor System) | Front television camera view adjustment | Panoramic view monitor system | ( ) |
PROCEDURE

 1.RECOVER REFRIGERANT FROM REFRIGERATION SYSTEM
16361A
2.REMOVE V-RIBBED BELT
16400
3.REMOVE RADIATOR ASSEMBLY
88711
4.DISCONNECT NO. 1 COOLER REFRIGERANT DISCHARGE HOSE SUB-ASSEMBLY
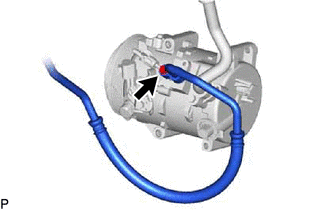
Remove the bolt and disconnect the No. 1 cooler refrigerant discharge hose sub-assembly from the compressor assembly with magnetic clutch.
Remove the O-ring from the No. 1 cooler refrigerant discharge hose sub-assembly.
- NOTICE:
-
Seal the openings of the disconnected parts using vinyl tape to prevent moisture and foreign matter from entering them.
88704
5.DISCONNECT SUCTION HOSE SUB-ASSEMBLY
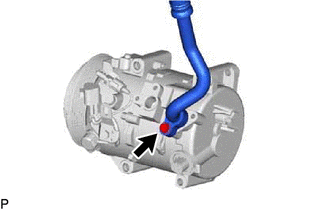
Remove the bolt and disconnect the suction hose sub-assembly from the compressor assembly with magnetic clutch.
Remove the O-ring from the suction hose sub-assembly.
- NOTICE:
-
Seal the openings of the disconnected parts using vinyl tape to prevent moisture and foreign matter from entering them.
6.REMOVE COMPRESSOR ASSEMBLY WITH MAGNETIC CLUTCH
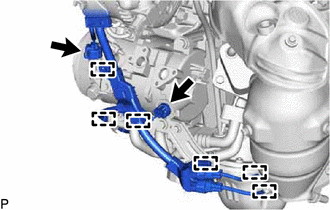
Disconnect each connector.
Disengage each clamp.
for Type A:
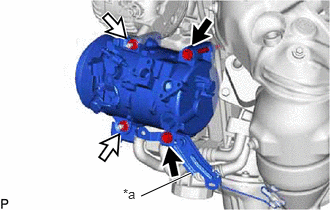
| *a | Bracket |

|
Bolt |

|
Nut |
Remove the 2 bolts and 2 nuts, and separate the bracket.
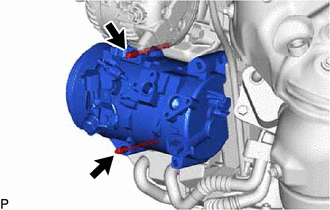
Using an E8 "TORX" socket wrench, remove the 2 stud bolts.
for Type B:
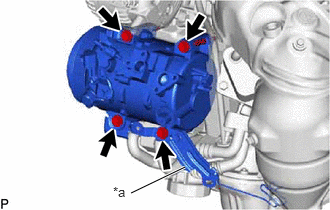
| *a | Bracket |
Remove the 4 bolts and separate the bracket.
Remove the compressor assembly with magnetic clutch.