REAR SUSPENSION REAR STABILIZER BAR REMOVAL
CAUTION / NOTICE / HINT
The necessary procedures (adjustment, calibration, initialization, or registration) that must be performed after parts are removed and installed, or replaced during rear stabilizer bar removal/installation are shown below.
| Replaced Part or Performed Procedure | Necessary Procedure | Effect/Inoperative Function when Necessary Procedure not Performed | Link |
|---|---|---|---|
| Gas leak from exhaust system is repaired | Inspection After Repair | ·
Poor idle, etc. ·
Engine start function, etc. |
( )for 2AR-FE ( )for A25A-FKS (w/ Canister Pump Module)
( )for A25A-FKS (w/o Canister Pump Module)
( )for 2GR-FKS
( )for 6AR-FSE
|
- CAUTION:
-
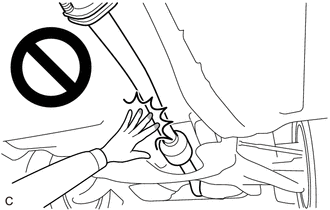
-
To prevent burns, do not touch the engine, exhaust pipe or other high temperature components while the engine is hot.
PROCEDURE

 1.REMOVE REAR WHEEL
58399D
2.REMOVE NO. 2 FLOOR UNDER COVER (w/ Cover)
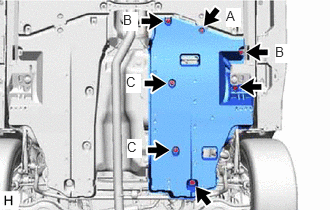
Remove the 2 bolts and clip (A).
Disengage the 2 grommets (B) and 2 clips (C) to remove the No. 2 floor under cover.
58398F
3.REMOVE NO. 1 FLOOR UNDER COVER (w/ Cover)
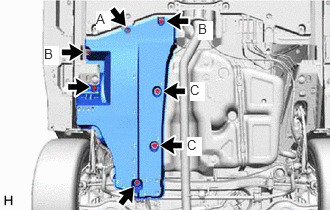
Remove the 2 bolts and clip (A).
Disengage the 2 grommets (B) and 2 clips (C) to remove the No. 1 floor under cover.
17420
4.REMOVE CENTER EXHAUST PIPE ASSEMBLY
for 2AR-FE: Click hereEngine / Hybrid System>2AR-FE (INTAKE / EXHAUST)>EXHAUST PIPE>REMOVAL
for A25A-FKS: Click hereEngine / Hybrid System>A25A-FKS (INTAKE / EXHAUST)>EXHAUST PIPE>REMOVAL
for 2GR-FKS: Click hereEngine / Hybrid System>2GR-FKS (INTAKE / EXHAUST)>EXHAUST PIPE>REMOVAL
for 6AR-FSE: Click hereEngine / Hybrid System>6AR-FSE (INTAKE / EXHAUST)>EXHAUST PIPE>REMOVAL
48840A
5.REMOVE REAR STABILIZER LINK ASSEMBLY LH
w/ Cap:
Remove the cap from the rear stabilizer link assembly LH.
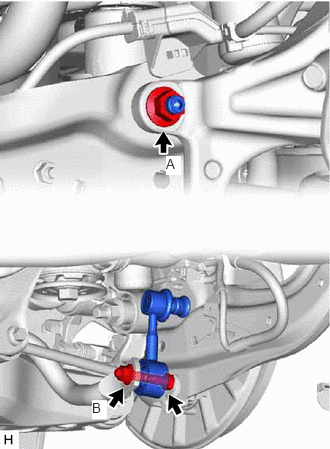
Loosen the nut (A) of the rear stabilizer link assembly LH.
- HINT:
-
If the ball joint turns together with the nut, use a 6 mm hexagon socket wrench to hold the stud bolt.
Loosen the nut (B) of the rear stabilizer link assembly LH.
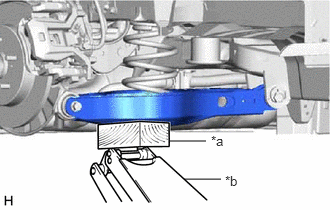
| *a | Wooden Block |
| *b | Jack |
Using a jack and a wooden block, support the rear No. 2 suspension arm assembly.
- NOTICE:
- ·
When jacking up the rear No. 2 suspension arm assembly, be sure to jack it up slowly.
·Make sure to perform this operation with the vehicle kept as low as possible.
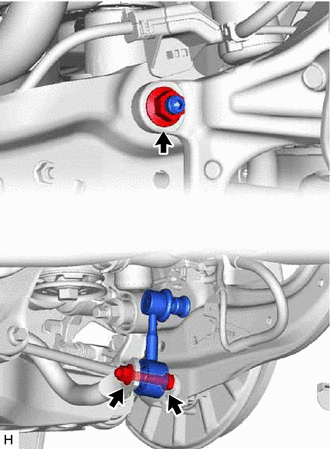
Remove the bolt, 2 nuts and rear stabilizer link assembly LH.
48830D
6.REMOVE REAR STABILIZER LINK ASSEMBLY RH
- HINT:
-
Perform the same procedure as for the LH side.
48812
7.REMOVE REAR STABILIZER BAR (for TMC Made)
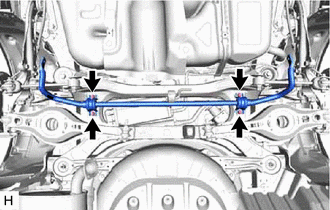
Remove the 4 bolts, rear stabilizer bar, 2 rear No. 1 stabilizer bar brackets and 2 rear stabilizer bushings from the rear suspension member sub-assembly.
48832A
8.REMOVE REAR NO. 1 STABILIZER BAR BRACKET (for TMC Made)
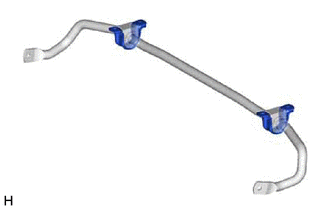
Remove the 2 rear No. 1 stabilizer bar brackets from the 2 rear stabilizer bushings.
48818
9.REMOVE REAR STABILIZER BUSHING (for TMC Made)
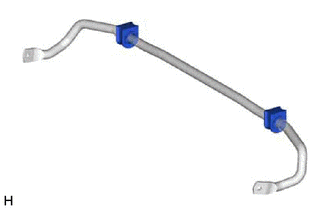
Remove the 2 rear stabilizer bushings from the rear stabilizer bar.
48805
10.REMOVE REAR STABILIZER BAR SUB-ASSEMBLY (for TMR Made)
Remove the 4 bolts and the rear stabilizer bar sub-assembly from the rear suspension member sub-assembly.