M20A-FKS FUEL FUEL FILTER REPLACEMENT
CAUTION / NOTICE / HINT
The necessary procedures (adjustment, calibration, initialization or registration) that must be performed after parts are removed and installed, or replaced during fuel filter (fuel suction plate sub-assembly) removal/installation are shown below.
| Replaced Part or Performed Procedure | Necessary Procedure | Effect/Inoperative Function when Necessary Procedure not Performed | Link |
|---|---|---|---|
| Battery terminal is disconnected/reconnected | Perform steering sensor zero point calibration | Lane Tracing Assist System | ( ) |
| Pre-collision System | |||
| Memorize steering angle neutral point | Parking Assist Monitor System | ()
|
|
| Panoramic View Monitor System | ()
|
||
| Replacement of fuel pump | Inspection after repair | ·
Poor idle, etc. ·
Engine start function, etc. |
()
|
- CAUTION:
- ·
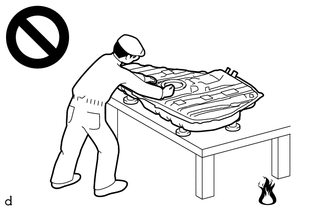
Never perform work on fuel system components near any possible ignition sources.
·Vaporized fuel could ignite, resulting in a serious accident.
- ·
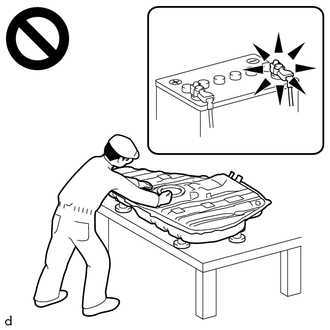
Do not perform work on fuel system components without first disconnecting the cable from the negative (-) battery terminal.
·Sparks could cause vaporized fuel to ignite, resulting in a serious accident.
- NOTICE:
- ·
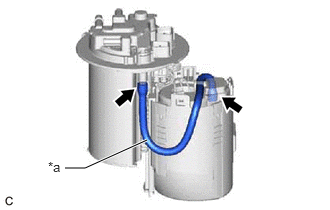 0.677,1.75 0.885,1.75 0.885,1.75 1.531,1.458 true 0.5,1.656 0.813,1.813 0.313,0.156 10 false *a
*a Tube
Do not disconnect the tube shown in the illustration when disassembling the fuel suction tube with pump and gauge assembly. Doing so will cause reassembly of the fuel suction tube with pump and gauge assembly to be impossible as the tube is pressed into the fuel suction plate sub-assembly.
·When replacing the fuel filter, replace it together with the fuel suction plate sub-assembly.
PROCEDURE

 77020A
1.REMOVE FUEL SUCTION TUBE WITH PUMP AND GAUGE ASSEMBLY
23221
2.REMOVE FUEL PUMP
23070
3.REMOVE FUEL MAIN VALVE ASSEMBLY (for Low Pressure)
23070
4.REMOVE FUEL MAIN VALVE ASSEMBLY (for High Pressure)
77174
5.REMOVE NO. 1 FUEL SUCTION SUPPORT
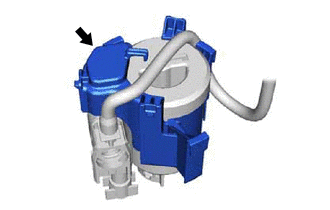
for Type A:
Remove the No. 1 fuel suction support from the fuel filter.
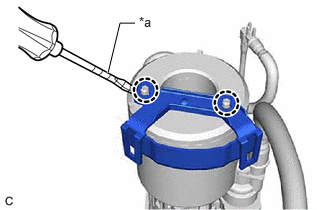
| *a | Protective Tape |
for Type B:
Using a screwdriver with its tip wrapped with protective tape, disengage the 2 claws and remove the No. 1 fuel suction support from the fuel filter.
77174
6.INSTALL NO. 1 FUEL SUCTION SUPPORT
for Type A:
Install the No. 1 fuel suction support to the fuel filter.
for Type B:
Engage the 2 claws to install the No. 1 fuel suction support to the fuel filter.
23070
7.INSTALL FUEL MAIN VALVE ASSEMBLY (for High Pressure)
23070
8.INSTALL FUEL MAIN VALVE ASSEMBLY (for Low Pressure)
23221
9.INSTALL FUEL PUMP
77020A
10.INSTALL FUEL SUCTION TUBE WITH PUMP AND GAUGE ASSEMBLY