HYBRID / BATTERY CONTROL HV RELAY ASSEMBLY REMOVAL
CAUTION / NOTICE / HINT
The necessary procedures (adjustment, calibration, initialization, or registration) that must be performed after parts are removed and installed, or replaced during HV battery junction block assembly removal/installation are shown below.
| Replaced Part or Performed Procedure | Necessary Procedures | Effect/Inoperative Function when Necessary Procedure not Performed | Link |
|---|---|---|---|
| Auxiliary battery terminal is disconnected/reconnected | Perform steering sensor zero point calibration | Lane departure alert system (w/ steering control) | ( ) |
| Pre-collision system | |||
| Memorize steering angle neutral point | Parking assist monitor system | ()
|
- CAUTION:
- ·
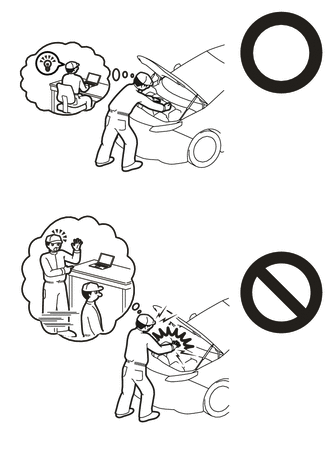
Orange wire harnesses and connectors indicate high-voltage circuits. To prevent electric shock, always follow the procedure described in the repair manual.
·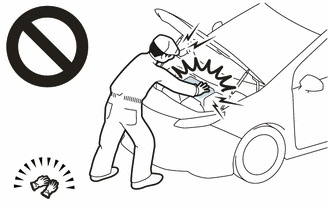
To prevent electric shock, wear insulated gloves when working on wire harnesses and components of the high voltage system.
- NOTICE:
-
After turning the power switch off, waiting time may be required before disconnecting the cable from the negative (-) auxiliary battery terminal. Therefore, make sure to read the disconnecting the cable from the negative (-) auxiliary battery terminal notices before proceeding with work.
-
Click hereGeneral>INTRODUCTION>REPAIR INSTRUCTION>PRECAUTION
PROCEDURE

 G3834
1.REMOVE SERVICE PLUG GRIP
82111
2.DISCONNECT ENGINE ROOM MAIN WIRE
3.REMOVE CONNECTOR COVER ASSEMBLY
4.CHECK TERMINAL VOLTAGE
5.INSTALL CONNECTOR COVER ASSEMBLY
82111
6.CONNECT ENGINE ROOM MAIN WIRE
899A0
7.REMOVE NO. 1 INDOOR ELECTRICAL KEY ANTENNA ASSEMBLY
67918A
8.REMOVE REAR DOOR SCUFF PLATE LH
76974F
9.REMOVE REAR UNDER SIDE COVER LH
67917A
10.REMOVE REAR DOOR SCUFF PLATE RH
- HINT:
-
Use the same procedure as for the LH side.
76973F
11.REMOVE REAR UNDER SIDE COVER RH
76971G
12.REMOVE REAR UNDER COVER
71033
13.REMOVE REAR SEAT CUSHION LEG SUB-ASSEMBLY
G92N4A
14.REMOVE NO. 1 HV BATTERY COVER PANEL RH
821H1
15.DISCONNECT HV FLOOR UNDER WIRE
82161
16.DISCONNECT FLOOR WIRE
- CAUTION:
-
Be sure to wear insulated gloves.
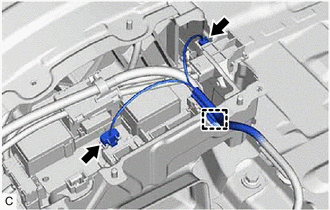
Disengage the clamp.
Disconnect the electric vehicle battery plug assembly connector.
Disconnect the HV battery junction block assembly connector.
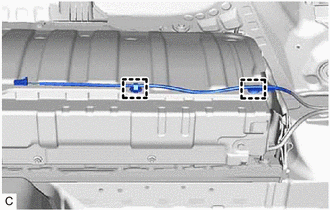
Disengage the 2 clamps to disconnect the floor wire.
G92F1
17.REMOVE NO. 1 HYBRID BATTERY EXHAUST DUCT
G920NB
18.REMOVE UPPER HV BATTERY COVER SUB-ASSEMBLY
G92Z0
19.REMOVE HV BATTERY JUNCTION BLOCK ASSEMBLY
- CAUTION:
-
Be sure to wear insulated gloves and protective goggles.
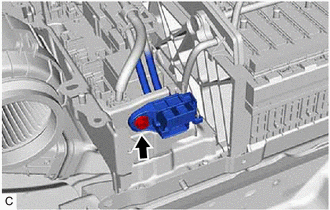
Remove the bolt and disconnect the electric vehicle battery plug assembly.
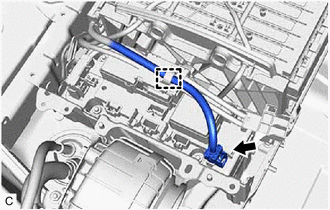
Disconnect the HV battery junction block assembly connector.
- NOTICE:
-
Insulate the disconnected connectors with insulating tape.
Disengage the clamp.
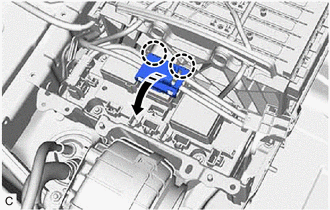
Disengage the 2 claws and open the wiring harness protector.
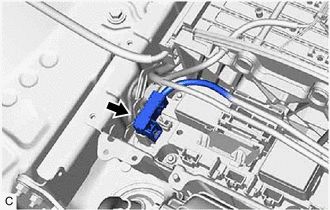
Disconnect the HV battery junction block assembly connector.
- NOTICE:
-
Insulate the disconnected connectors with insulating tape.
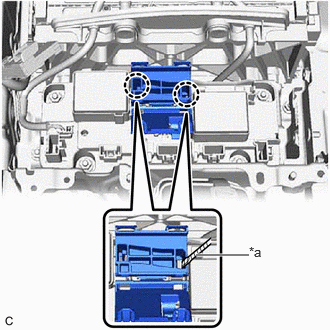
| *a | Protective Tape |
Using a screwdriver with its tip wrapped with protective tape, disengage the 2 claws and remove the wiring harness protector.
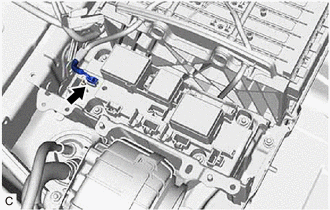
Disconnect the HV battery junction block assembly connector.
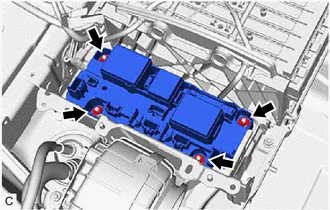
Remove the 4 nuts and HV battery junction block assembly from the HV battery.
- NOTICE:
-
If the HV battery junction block assembly has been struck or dropped, replace it with a new one.