WINDOW / GLASS FRONT SIDE FIX WINDOW ASSEMBLY LH(for Rear Side) REMOVAL
PROCEDURE

 63310
1.REMOVE ROOF HEADLINING ASSEMBLY
65936
2.REMOVE NO. 1 CURTAIN RAIL (w/ Curtain)
65938
3.REMOVE NO. 3 CURTAIN RAIL (w/ Curtain)
63940
4.REMOVE NO. 4 COOLER INNER DUCT LH (for Long Body, w/ Rear Air Duct)
63917A
5.REMOVE NO. 3 COOLER INNER DUCT LH (w/ Rear Air Duct)
63926
6.REMOVE NO. 2 COOLER INNER DUCT LH (w/ Rear Air Duct)
63925
7.REMOVE NO. 1 COOLER INNER DUCT LH (w/ Rear Air Duct)
62989
8.REMOVE CENTER DOOR LOCK COVER (for Folding Type)
62638A
9.REMOVE QUARTER PILLAR GARNISH RH
73224
10.REMOVE FRONT SEAT BELT RETRACTOR COVER LH
67676
11.REMOVE FRONT SIDE TRIM BOARD COVER LH
62540A
12.REMOVE NO. 2 SIDE TRIM ASSEMBLY LH
62520G
13.REMOVE NO. 1 SIDE TRIM ASSEMBLY LH
62425
14.REMOVE CENTER PILLAR GARNISH COVER
74730
15.REMOVE HAND GRIP FRAME ASSEMBLY (for Folding Type)
74708
16.REMOVE NO. 2 HAND GRIP FRAME SUB-ASSEMBLY (for Glide Type)
62639A
17.REMOVE QUARTER PILLAR GARNISH LH
62720B
18.REMOVE FRONT SIDE WINDOW ASSEMBLY LH
- NOTICE:
- ·
The front side window assembly LH may fall while performing this procedure. Therefore, use suction cups to hold the windshield glass from the outside of the vehicle.
·The front side window assembly LH is installed with EPT sealer in the area shown in the illustration. Therefore, make sure not to damage it while working.
·If the EPT sealer on the front side window assembly LH is damaged, replace the front side window assembly LH.
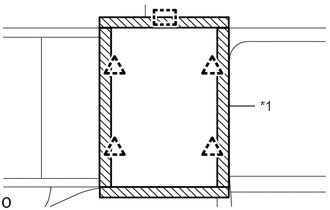
Apply protective tape to the outer surface of the vehicle body to prevent scratches.
| *1 | Protective Tape |
Install the suction cups to the front side window assembly LH.
Apply a sufficient amount of soapy water to the adhesive.
- HINT:
-
Start this procedure where the front side window assembly LH and body are furthest apart.
From the interior, insert a piano wire between the vehicle body and glass.
Cut through the adhesive by knife around the glass.
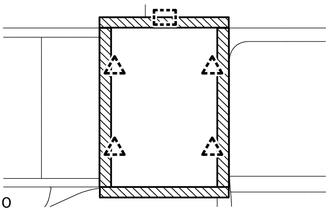
Using suction cups, disconnect the 4 spacers, retainer and remove the front side window assembly LH.
- NOTICE:
-
Be careful not to drop the front side window assembly LH.
62785W
19.REMOVE SIDE WINDOW GLASS SPACER
When reusing the front side window assembly LH:
- NOTICE:
- ·
The front side window assembly LH is installed with EPT sealer in the area shown in the illustration. Therefore, make sure not to damage it while working.
·If the EPT sealer on the front side window assembly LH is damaged, replace the front side window assembly LH.
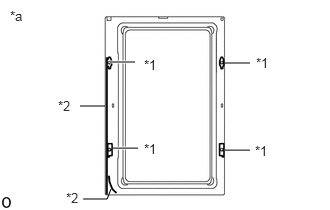
Using a scraper, remove the 4 side window glass spacers.
| *1 | Side Window Glass Spacer |
| *2 | EPT sealer |
| *a | Back Side |
62763W
20.REMOVE SIDE WINDOW FRAME RETAINER
When reusing the front side window assembly LH:
- NOTICE:
- ·
The front side window assembly LH is installed with EPT sealer in the area shown in the illustration. Therefore, make sure not to damage it while working.
·If the EPT sealer on the front side window assembly LH is damaged, replace the front side window assembly LH.
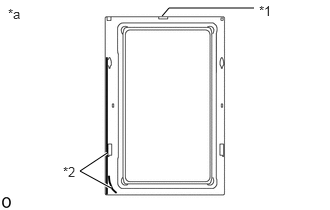
Using a scraper, remove the 4 side window frame retainers.
| *1 | Side Window Glass Spacer |
| *2 | EPT sealer |
| *a | Back Side |
62763Q
21.REMOVE SIDE WINDOW FRAME RETAINER
- NOTICE:
- ·
Do not damage the vehicle body.
·Be sure to replace the side window frame retainer with a new one.
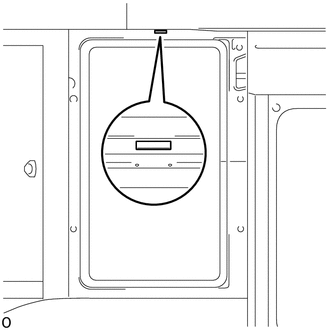
Using a scraper, remove the side window frame retainer.