2AZ-FE FUEL FUEL PUMP INSTALLATION
PROCEDURE

 23221
1.INSTALL FUEL PUMP ASSEMBLY
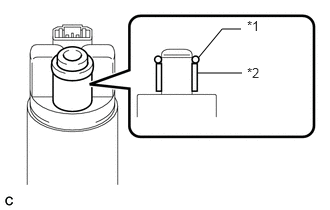
Apply gasoline to a new O-ring. Then install the O-ring and spacer to the fuel pump.
| *1 | O-ring |
| *2 | Spacer |
Connect the pump harness connector.
Engage the 5 claws to install the fuel pump.
- NOTICE:
- ·
Make sure that the O-ring is not cut or pinched during the installation.
·Engage the claws securely.
2.INSTALL BRACKET
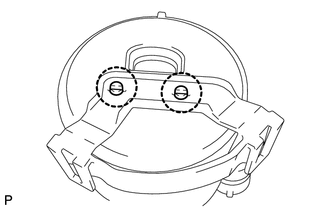
Attach the 2 claws to the claw holes and install the bracket.
3.INSTALL FUEL SUB-TANK ASSEMBLY
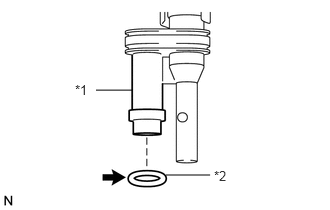
Apply gasoline to a new O-ring and install it to the jet pump.
| *1 | Jet Pump |
| *2 | O-ring |
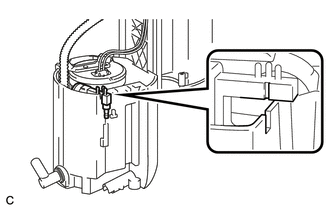
Install the jet pump while aligning it with the installation position of the sub-tank.
- NOTICE:
-
Make sure that the O-ring is not cut or pinched during the installation.
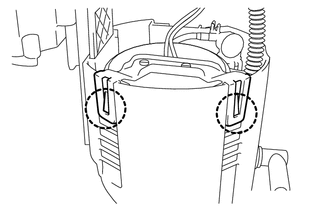
Attach the 2 claws to the claw holes and install the sub-tank.
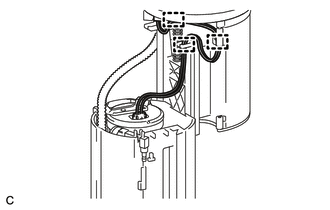
Install the wire harness.
Connect the wire harness connector.
83320
4.INSTALL FUEL SENDER GAUGE ASSEMBLY
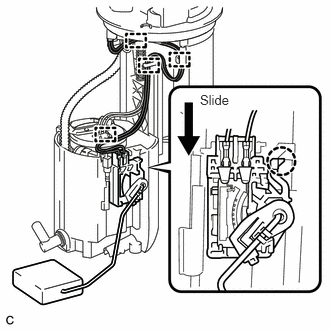
Install the fuel sender gauge assembly by sliding the sender gauge downward.
Connect the wire harness to the 4 harness clamps.
- NOTICE:
-
Do not damage the wire harness.
Connect the connector of the fuel sender gauge assembly.
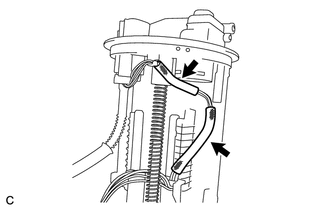
Install the 2 harness protectors.
- NOTICE:
-
Do not damage the wire harness.
77020A
5.INSTALL FUEL SUCTION WITH PUMP AND GAUGE TUBE ASSEMBLY
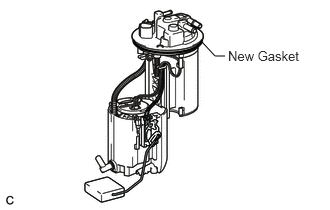
Install a new gasket onto the fuel pump.
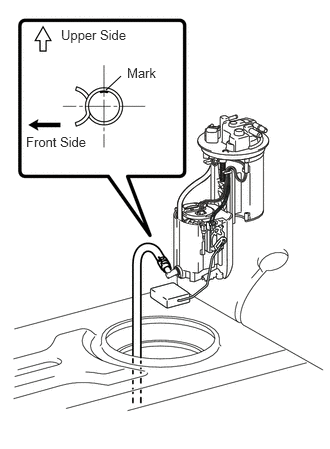
Connect the fuel hose and install the fuel pump into the fuel tank.
- NOTICE:
- ·
When connecting the fuel hose, make sure the fuel hose marking faces upward, and make sure the grip part of the clamp faces the front of the vehicle.
- ·
Be careful not to bend the arm of the fuel sender gauge.
- ·
When connecting the fuel hose, do not forcibly pull the hose.
77168A
6.INSTALL FUEL TANK VENT TUBE SET PLATE
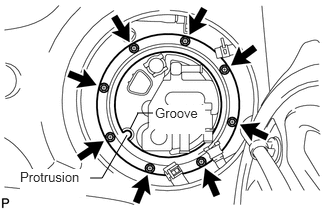
Install the set plate with the 8 bolts.
- Torque:
- 6.0 N*m (61 kgf*cm, 53 in.*lbf)
- HINT:
-
Align the protrusion of the set plate with the groove of the fuel pump.
77209D
7.CONNECT FUEL TANK MAIN TUBE SUB-ASSEMBLY
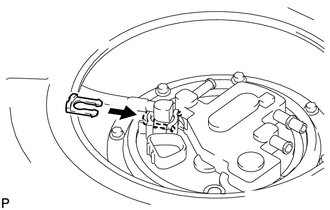
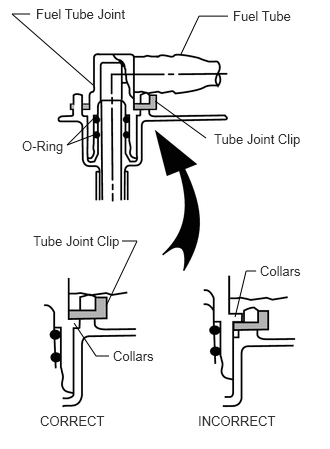
Install the fuel tube with the joint clip.
- CAUTION:
-
 0.313,0.146 0.125,0.146 0.125,0.146 0.969,0.885 false 0.99,1.219 0.698,1.51 0.698,1.51 1,1.396 false 1.615,1.052 2.146,1.438 false 1.271,2.51 1.427,2.51 1.427,2.51 1.104,3.188 false 0.771,3.365 1,3.708 1,3.708 1.135,3.708 false 2.448,3.302 2.563,2.823 2.563,2.823 2.667,2.823 false 2.375,0.167 2.073,0.167 2.073,0.167 1.885,0.563 false 0.375,0.063 1.438,0.26 1.063,0.198 10 false Fuel Tube Joint 2.427,0.083 3.125,0.292 0.698,0.208 10 false Fuel Tube 0.229,1.438 0.75,1.667 0.521,0.229 10 false O-Ring 0.344,2.427 1.313,2.656 0.969,0.229 10 false Tube Joint Clip 2.229,1.365 3.219,1.594 0.99,0.229 10 false Tube Joint Clip 1.177,3.625 1.688,3.792 0.51,0.167 10 false Collars 0.417,4.302 1.177,4.5 0.76,0.198 10 false CORRECT 2.063,4.302 2.958,4.479 0.896,0.177 10 false INCORRECT 2.708,2.74 3.219,2.906 0.51,0.167 10 false Collars
- ·
Check that there are no scratches or foreign matter on the connecting parts.
- ·
Check that the fuel tube joint is inserted securely.
- ·
Check that the fuel tube joint clip is on the collars of the fuel tube joint.
- ·
After installing the tube joint clip, check that the fuel tube joint has not been pulled off.
- ·
Be careful not to damage the clip. If the clip is damaged, replace it.
77027
8.CONNECT NO. 2 FUEL EVAPORATION TUBE SUB-ASSEMBLY
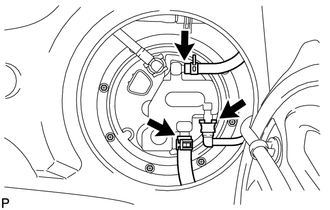
Connect the tube to the fuel suction with pump and gauge.
- NOTICE:
- ·
Before installing the pipe, make sure that it is not damaged. Make sure that there is no foreign matter present on the connecting surfaces.
- ·
After connecting, check if the pipe and the connector are securely connected by pulling on them.
77026A
9.CONNECT NO. 1 FUEL EVAPORATION TUBE SUB-ASSEMBLY
Connect the tube to the fuel suction with pump and gauge.
77707
10.CONNECT CHARCOAL CANISTER OUTLET TUBE SUB-ASSEMBLY
Connect the outlet tube to the fuel suction with pump and gauge.
58325E
11.INSTALL REAR FLOOR SERVICE HOLE COVER
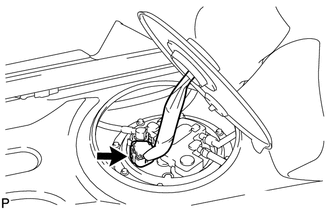
Connect the fuel pump connector.
Install the service hole cover with new butyl tape and return the floor carpet to its original position.
77310A
12.INSTALL FUEL TANK CAP
28800
13.CONNECT CABLE TO NEGATIVE BATTERY TERMINAL
14.PERFORM INITIALIZATION
Perform initialization (see page General>INTRODUCTION>REPAIR INSTRUCTION>INITIALIZATION).
- NOTICE:
-
Certain systems need to be initialized after disconnecting and reconnecting the cable from the negative (-) battery terminal.
15.CHECK FOR FUEL LEAKS