SEAT BELT FRONT SEAT OUTER BELT ASSEMBLY INSTALLATION
CAUTION / NOTICE / HINT
- HINT:
- ·
Use the same procedures for the LH side and RH side.
·The procedures listed below are for the LH side.
·A bolt without a torque specification is shown in the standard bolt chart (see page General>SPECIFICATIONS>STANDARD BOLT>SPECIFIED TORQUE FOR STANDARD BOLTS).
PROCEDURE

 73200A
1.INSTALL FRONT SHOULDER BELT ANCHOR ADJUSTER ASSEMBLY
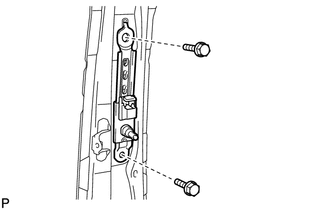
Align the adjuster positioning hole with the claw, and install the adjuster with the 2 bolts as shown in the illustration.
- Torque:
- 42 N*m (428 kgf*cm, 31 ft.*lbf)
73220
2.INSTALL FRONT SEAT OUTER BELT ASSEMBLY LH
- NOTICE:
-
Do not disassemble the retractor.
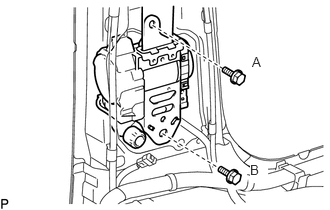
Install the retractor of the front seat outer belt assembly LH with the 2 bolts as shown in the illustration.
- Torque:
- Bolt (A) : 8.5 N*m (87 kgf*cm, 75 in.*lbf)
- Bolt (B) : 42 N*m (428 kgf*cm, 31 ft.*lbf)
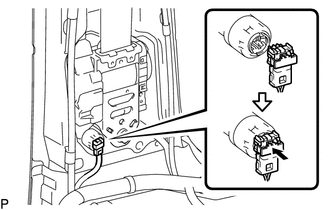
Connect the pretensioner connector as shown in the illustration.
- NOTICE:
-
Securely lock the locking button.
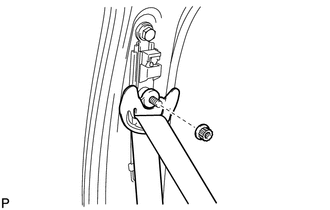
Connect the outer belt with the shoulder anchor's bolt.
- Torque:
- 42 N*m (428 kgf*cm, 31 ft.*lbf)
62412
3.INSTALL CENTER PILLAR GARNISH LH
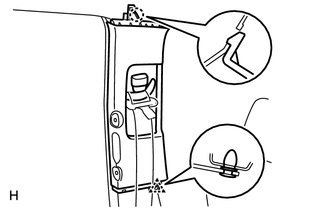
Pass the outer belt anchor through the center pillar garnish.
Attach the clip.
Install the garnish with the 2 screws.
74603C
4.INSTALL ASSIST GRIP SUB-ASSEMBLY
74617A
5.INSTALL ASSIST GRIP PLUG
62414A
6.INSTALL CENTER PILLAR GARNISH LOWER LH
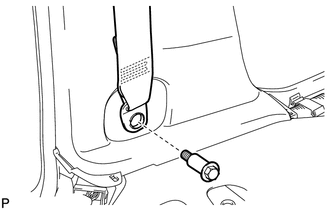
Attach the 2 claws and 2 clips to install the garnish.
Connect the floor anchor with the bolt.
- Torque:
- 42 N*m (428 kgf*cm, 31 ft.*lbf)
73233
7.INSTALL LAP BELT OUTER ANCHOR COVER
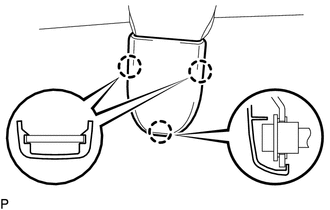
Install the cover.
62331C
8.INSTALL NO. 1 SLIDE DOOR WEATHERSTRIP
67918D
9.INSTALL REAR DOOR SCUFF PLATE LH
67918E
10.INSTALL REAR DOOR SCUFF PLATE LH
67914B
11.INSTALL FRONT DOOR SCUFF PLATE LH
62312B
12.INSTALL FRONT DOOR OPENING TRIM WEATHERSTRIP LH
28800
13.CONNECT CABLE TO NEGATIVE BATTERY TERMINAL
28800
14.PERFORM INITIALIZATION
Perform initialization (see page General>INTRODUCTION>REPAIR INSTRUCTION>INITIALIZATION).
- NOTICE:
-
Certain systems need to be initialized after disconnecting and reconnecting the cable from the negative (-) battery terminal.