U241E AUTOMATIC TRANSMISSION / TRANSAXLE AUTOMATIC TRANSAXLE ASSEMBLY REMOVAL
PROCEDURE

 1.DISCONNECT CABLE FROM NEGATIVE BATTERY TERMINAL
- NOTICE:
-
When disconnecting the cable, some systems need to be initialized after the cable is reconnected (See page General>INTRODUCTION>REPAIR INSTRUCTION>INITIALIZATION).
2.REMOVE ENGINE ASSEMBLY WITH TRANSAXLE
Remove the engine assembly with transaxle (See page Engine / Hybrid System>2AZ-FE ENGINE MECHANICAL>ENGINE ASSEMBLY>REMOVAL).
3.DRAIN AUTOMATIC TRANSAXLE FLUID
Remove the drain plug and gasket, and drain ATF.
Install a new gasket and the drain plug.
- Torque:
- 49 N*m (500 kgf*cm, 36 ft.*lbf)
28100
4.REMOVE STARTER ASSEMBLY
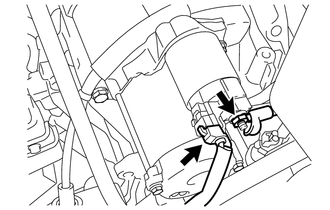
Disconnect the starter assembly connector.
Open the terminal cap.
Remove the nut and disconnect the terminal.
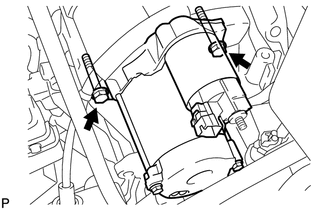
Remove the 2 bolts and starter assembly from the automatic transaxle assembly.
5.DISCONNECT WIRE HARNESS
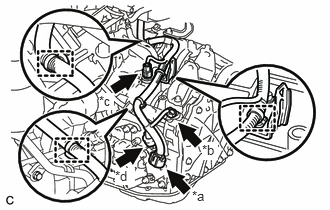
Disconnect the park/neutral position switch assembly connector.
| *a | Park/Neutral Position Switch Assembly Connector |
| *b | Transmission Revolution Sensor NT Connector |
| *c | Transmission Revolution Sensor NC Connector |
| *d | Transmission Wire Connector |
Disconnect the transmission revolution sensor NT connector.
Disconnect the transmission revolution sensor NC connector.
Disconnect the transmission wire connector.
Disengage the 3 clamps.
6.DISCONNECT OIL COOLER HOSE
12321A
7.REMOVE REAR ENGINE MOUNTING BRACKET
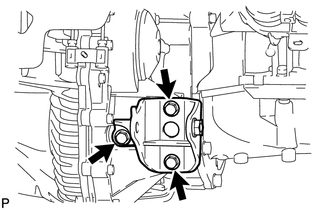
Remove the 3 bolts and rear engine mounting bracket from the automatic transaxle assembly.
12311A
8.REMOVE FRONT ENGINE MOUNTING BRACKET
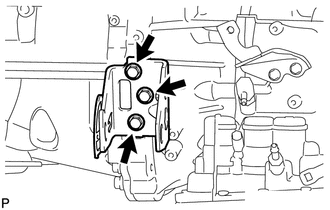
Remove the 3 bolts and front engine mounting bracket from the automatic transaxle assembly.
12325A
9.REMOVE ENGINE MOUNTING BRACKET LH
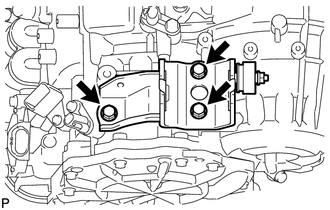
Remove the 3 bolts and engine mounting bracket LH from the automatic transaxle assembly.
11361J
10.REMOVE FLYWHEEL HOUSING UNDER COVER
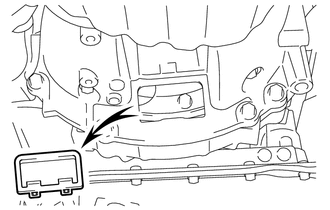
Remove the flywheel housing under cover from the engine assembly.
32101A
11.REMOVE DRIVE PLATE AND TORQUE CONVERTER ASSEMBLY SETTING BOLT
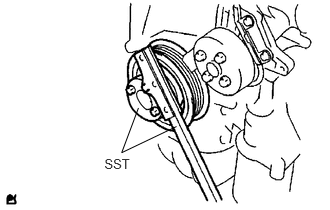
Using SST, hold the crankshaft pulley.
- SST
- 09213-54015 (91651-60855)
09330-00021
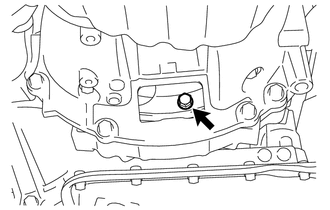
Remove the 6 drive plate and torque converter assembly setting bolts.
30500
12.REMOVE AUTOMATIC TRANSAXLE ASSEMBLY
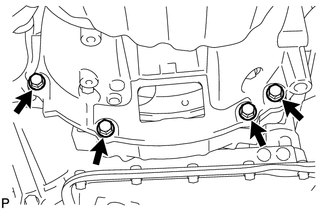
Remove the 4 bolts.
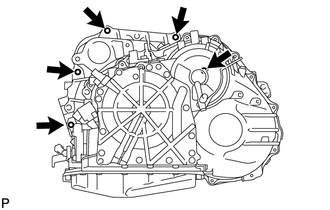
Remove the 5 bolts and automatic transaxle assembly from the engine assembly.
- NOTICE:
-
To prevent damage to the 2 knock pins, do not pry between the automatic transaxle assembly and engine assembly.
35013
13.REMOVE TRANSMISSION OIL FILLER TUBE SUB-ASSEMBLY
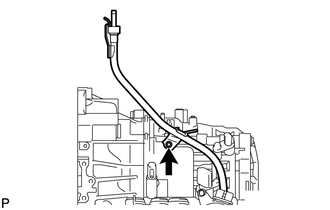
Remove the transmission oil level gauge sub-assembly from the transmission oil filler tube sub-assembly.
Remove the bolt and transmission oil filler tube sub-assembly from the automatic transaxle assembly.
Using a screwdriver, remove the O-ring from the transmission oil filler tube sub-assembly.
- NOTICE:
-
Be careful not to damage the transmission oil filler tube sub-assembly.
- HINT:
-
Tape the screwdriver tip before use.
33823
14.REMOVE NO. 1 TRANSMISSION CONTROL CABLE BRACKET
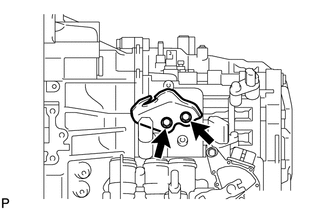
Remove the 2 bolts and No. 1 transmission control cable bracket from the automatic transaxle assembly.
32000
15.REMOVE TORQUE CONVERTER ASSEMBLY
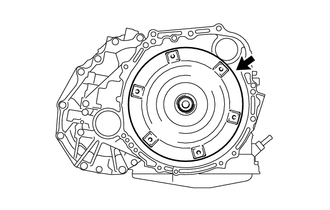
Remove the torque converter assembly from the automatic transaxle assembly.
- NOTICE:
-
Remove the torque converter assembly from the input shaft horizontally.