2011-2016 FJ Cruiser · Service Manual ENGINE

REMOVAL

Removal / installation · Vehicles built Aug 2009 – Oct 2010

Versions by build date: Jul 2007 – Jul 2009 Aug 2009 – Oct 2010 Nov 2010 – Jul 2013 Aug 2013 – Jul 2014 from Aug 2014


1. REMOVE NO. 1 ENGINE UNDER COVER SUB-ASSEMBLY
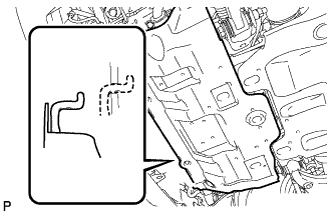
  1. Remove the 4 bolts.

  1. A224743
    Unhook the engine under cover from the vehicle body as shown in the illustration.


2. DRAIN ENGINE COOLANT

CAUTION:
Do not remove the radiator cap while the engine and radiator are still hot. Pressurized, hot engine coolant and steam may be released and cause serious burns.

  1. Remove the service hole cover from the engine under cover.

  1. A070279E02
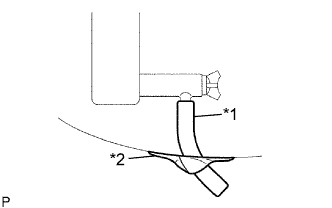
    Install a vinyl hose onto the drain on the radiator side.
    Text in Illustration 
    *1
    Vinyl Hose
    *2
    Tape

  1. Fix the vinyl hose with tape.

    A220213E01

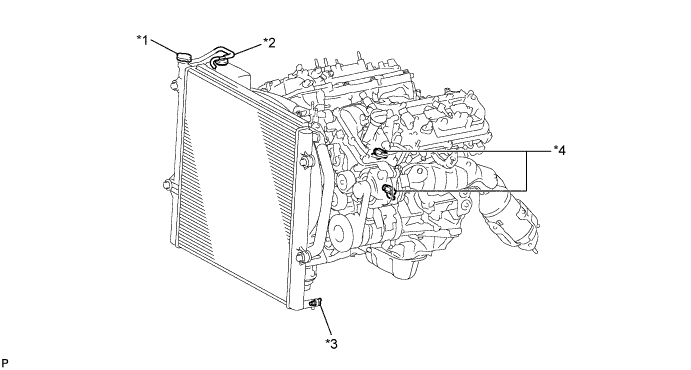
    Text in Illustration 
    *1
    Radiator Cap
    *2
    Reservoir Cap
    *3
    Radiator Drain Cock Plug
    *4
    Cylinder Block Drain Cock Plug

  1. Loosen the radiator drain cock plug.

  1. Remove the radiator cap and drain the coolant.

    HINT:
    Collect the coolant in a container and dispose of it according to the regulations in your area.

  1. Loosen the 2 cylinder block drain cock plugs and drain the coolant from the engine.

    NOTICE:
    If coolant is not drained from the radiator drain cock plug, cylinder block drain cock plugs and radiator reservoir, clogging in the radiator or coolant leakage from the seal of water pump may result.


3. REMOVE V-BANK COVER

  1. A221454E02
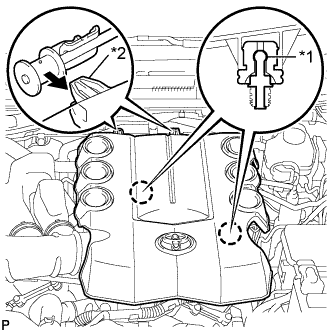
    Raise the front of the V-bank cover to disengage the 2 pins.

  1. Remove the 2 V-bank cover hooks from the bracket.

  1. Remove the V-bank cover.

    Text in Illustration 
    *1
    Pin
    *2
    Hook


4. REMOVE UPPER RADIATOR SUPPORT SEAL

  1. A226630
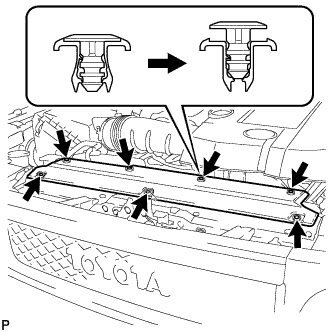
    Disengage the 7 clips, then remove the radiator support seal.


5. REMOVE FAN SHROUD

  1. A226631
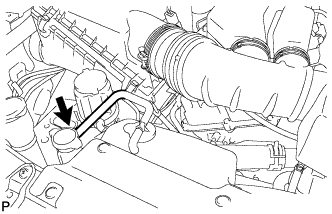
    Disconnect the reservoir hose from the radiator.

  1. A226632
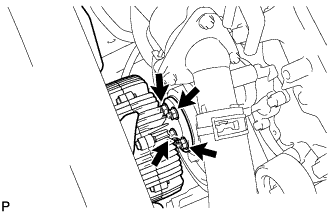
    Loosen the 4 nuts holding the fluid coupling fan.

  1. Remove the fan and V-ribbed belt (Click here).

  1. A226634
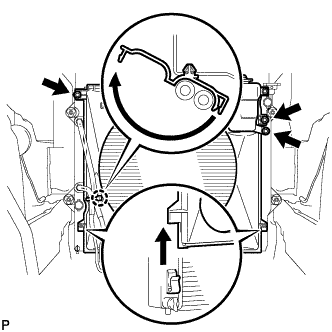
    Disengage the claw to open the hose clamp and disconnect the oil cooler tube from the fan shroud.

  1. Remove the bolt from the reserve tank.

  1. Remove the 2 bolts from the fan shroud.

  1. Disengage the claws of the shroud from the radiator as shown in the illustration.

  1. Remove the 4 nuts of the fluid coupling fan, and then remove the shroud together with the coupling fan.

    NOTICE:
    Be careful not to damage the radiator core.

  1. Remove the fan pulley from the water pump.


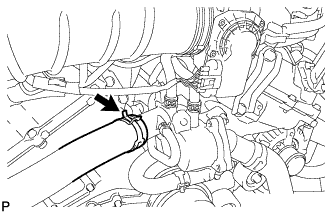
6. DISCONNECT NO. 1 RADIATOR HOSE

  1. A226635
    Disconnect the radiator hose.


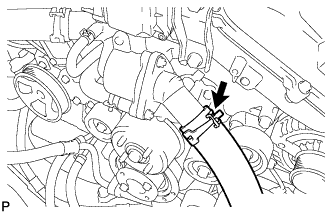
7. DISCONNECT NO. 2 RADIATOR HOSE

  1. A226636
    Disconnect the radiator hose.


8. REMOVE WATER INLET HOUSING (w/ Oil Cooler)
  1. Disconnect the throttle body connector.

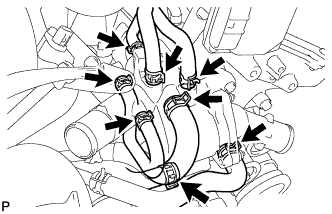
  1. A223011
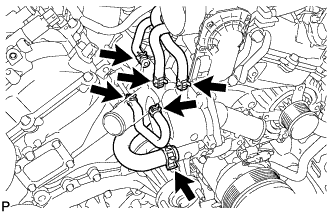
    Disconnect the 5 water by-pass hoses.

  1. Disconnect the oil cooler hose.

  1. Disconnect the No. 2 oil cooler hose.

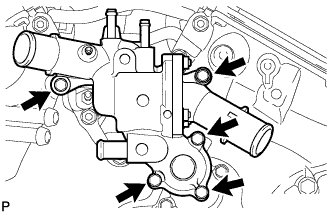
  1. A223012
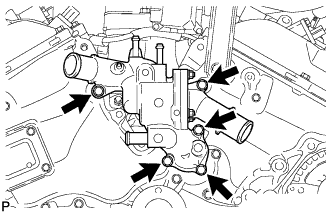
    Remove the 5 bolts and water inlet.

  1. Remove the gasket from the water outlet pipe.

  1. Remove the gasket from the water pump.


9. REMOVE WATER INLET HOUSING (w/o Oil Cooler)
  1. Disconnect the throttle body connector.

  1. A223004
    Disconnect the 5 water by-pass hoses.

  1. A223005
    Remove the 5 bolts and water inlet.

  1. Remove the gasket from the water outlet pipe.

  1. Remove the gasket from the water pump.


10. REMOVE NO. 2 IDLER PULLEY SUB-ASSEMBLY

A223006
  1. for Cover Separate Type:
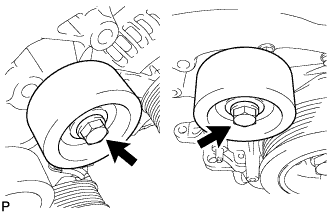
    Remove the 2 bolts, 2 idler pulley cover plates, 2 No. 2 idler pulleys, and 2 No. 2 idler pulley cover plates.

  1. for Cover Integrated Type:
    Remove the 2 bolts and 2 No. 2 idler pulleys.


11. REMOVE FRONT FENDER APRON SEAL RH

A223336
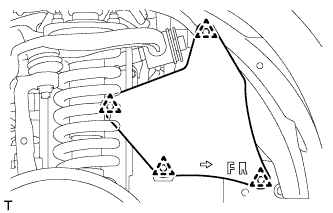
  1. Remove the 4 clips and fender apron seal.


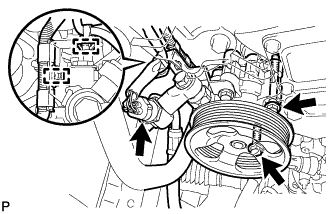
12. SEPARATE VANE PUMP ASSEMBLY

A225904
  1. Disconnect the 2 clamps and vane pump connector.

  1. Remove the 2 bolts and separate the vane pump.


13. REMOVE GENERATOR ASSEMBLY
  1. Remove the generator assembly (Click here).


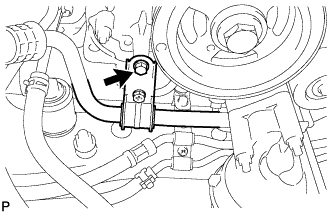
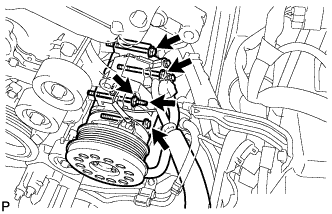
14. SEPARATE COOLER COMPRESSOR ASSEMBLY

HINT:
It is not necessary to completely remove the compressor. With the hoses connected to the compressor, hang the compressor on the vehicle body with a rope.

  1. Disconnect the cooler compressor connector.

  1. A225902
    Remove the bolt and separate the suction hose.

  1. A225903
    Remove the 3 bolts and nut.

  1. Remove the stud bolt and separate the cooler compressor assembly.


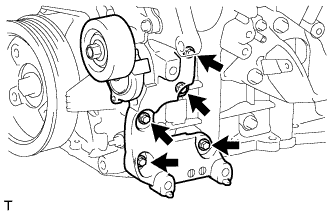
15. REMOVE V-RIBBED BELT TENSIONER ASSEMBLY

A222180
  1. Remove the 5 bolts and V-ribbed belt tensioner.


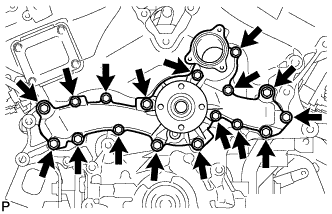
16. REMOVE WATER PUMP ASSEMBLY

  1. A223007
    Remove the 17 bolts, water pump and gasket.

← REMOVAL (Jul 2007 – Jul 2009)REMOVAL (Nov 2010 – Jul 2013) →