REMOVAL
Removal / installation · Vehicles built Jul 2007 – Jul 2009
Versions by build date: Jul 2007 – Jul 2009 Aug 2009 – Oct 2010 Nov 2010 – Jul 2013 Aug 2013 – Jul 2014 from Aug 2014
| 1.
REMOVE FAN |
 |
Refer to the procedures up to "REMOVE FAN" (Click here).
| 2.
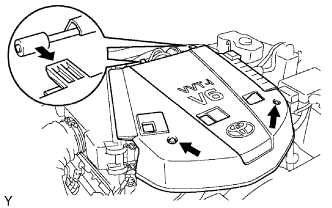
REMOVE V-BANK COVER
|
|
Remove the 2 nuts, then remove the V-bank cover.
| 3.
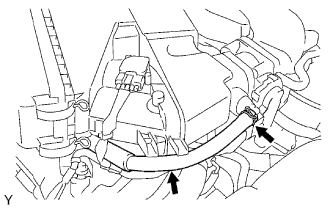
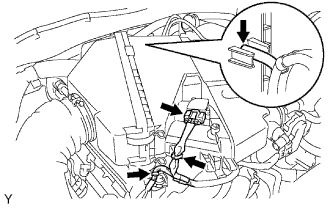
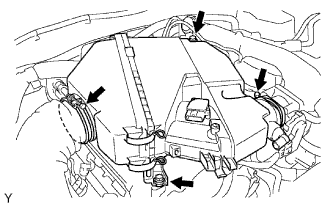
REMOVE AIR CLEANER ASSEMBLY
|
|
Disconnect the No. 2 ventilation hose.
- Disconnect the vacuum hose.
Disconnect the mass air flow meter connector.
Disengage the 2 wire harness clamps.
- Loosen the 2 hose clamps.
Remove the 2 bolts.
Disconnect the air cleaner hose and remove the air cleaner.
| 4.
REMOVE GENERATOR ASSEMBLY |
|
Refer to the procedures up to "REMOVE GENERATOR ASSEMBLY" (Click here)
| 5.
REMOVE WATER INLET |
|
- Disconnect the 2 oil cooler hoses. (w/ Oil Cooler)
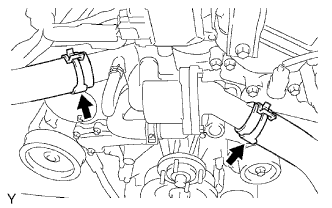
Disconnect the 2 radiator hoses.
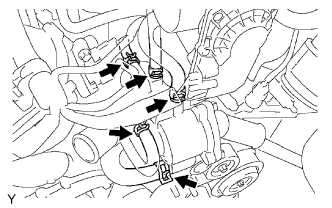
- Disconnect the 5 water by-pass hoses.
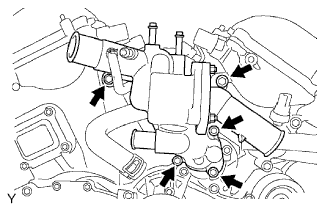
- Remove the 5 bolts and water inlet.
Remove the O-ring from the water outlet pipe.
Remove the gasket from the water pump.
| 6.
REMOVE NO. 2 IDLER PULLEY SUB-ASSEMBLY
|
|
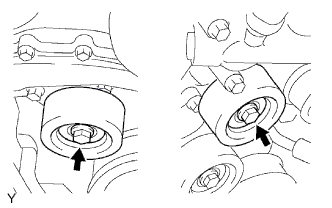
- Remove the 2 bolts, then remove the No. 2 idler pulleys.
| 7.
SEPARATE COOLER COMPRESSOR ASSEMBLY
|
|
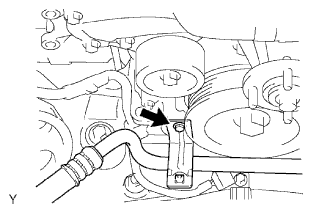
Remove the bolt, then separate the suction hose sub-assembly.
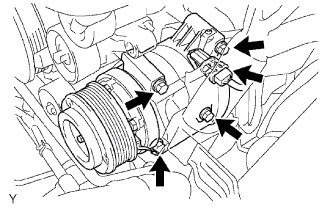
- Disconnect the cooler compressor assembly connector.
Remove the 4 bolts, then separate the cooler compressor assembly from the V-ribbed belt tensioner assembly.
| 8.
REMOVE V-RIBBED BELT TENSIONER ASSEMBLY
|
|
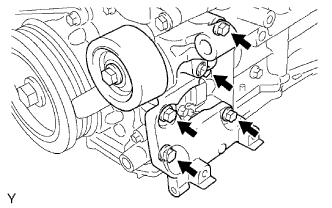
Remove the 5 bolts, then remove the V-ribbed belt tensioner.
| 9.
SEPARATE VANE PUMP ASSEMBLY
|
|
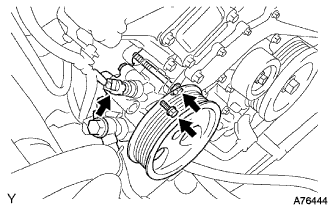
Disconnect the power steering pressure switch connector.
Remove the 2 bolts, then separate the vane pump.
- NOTICE:
- Do not hit the pulley with other parts when separating the vane pump.
- HINT:
- The vane pump is suspended securely.
| 10.
REMOVE WATER PUMP ASSEMBLY |
|
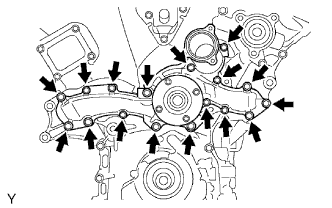
Remove the 17 bolts, then remove the water pump and gasket.