INSTALLATION
Removal / installation · Vehicles built Jul 2007 – Jul 2009
Versions by build date: Jul 2007 – Jul 2009 Aug 2009 – Oct 2010 from Nov 2010
| 1. INSTALL FRONT EXHAUST PIPE ASSEMBLY |

Install a new gasket onto the exhaust manifold RH.
Install the exhaust front pipe with new 2 nuts.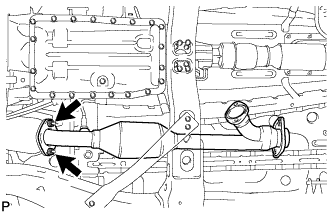

- Torque:
- 54 N*m{ 554 kgf*cm , 40 ft.*lbf }
Install a new gasket onto the front exhaust pipe.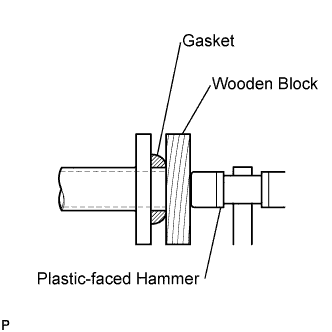
Using a wooden block and plastic-faced hammer, tap in a new gasket until it is flush with the front exhaust pipe end.
- NOTICE:
- Make sure that the gasket is in the correct direction when installing.
- Do not reuse the removed gasket.
- Do not push in the gasket with the exhaust pipe when connecting it.
- Make sure that the gasket is in the correct direction when installing.
| 2. INSTALL NO. 2 FRONT EXHAUST PIPE ASSEMBLY |
Install a new gasket onto the exhaust manifold LH.
Install a new gasket onto the No. 2 front exhaust pipe.
Install the No. 2 front exhaust pipe with 2 new nuts and 2 bolts and exhaust pipe support.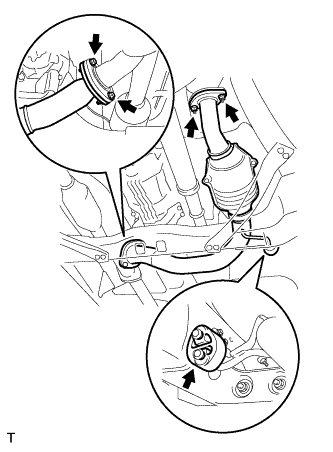
- Torque:
- Nut:
- 54 N*m{ 554 kgf*cm , 40 ft.*lbf }
- Bolt:
- 48 N*m{ 489 kgf*cm , 35 ft.*lbf }
Install the exhaust pipe stopper bracket with the 2 bolts (for 4WD).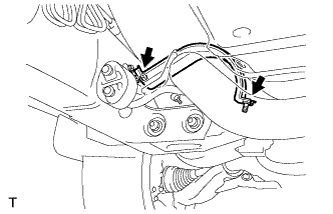
- Torque:
- 19 N*m{ 193 kgf*cm , 14 ft.*lbf }
| 3. INSTALL CENTER EXHAUST PIPE ASSEMBLY |
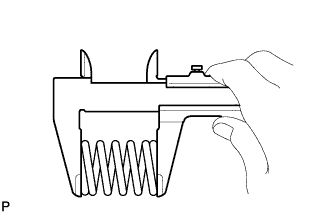 |
Check the free length.
Using vernier calipers, measure the free length of the compression spring.
- Minimum:
- 40.5mm (1.594 in.)
Install the center exhaust pipe onto the 4 exhaust pipe supports.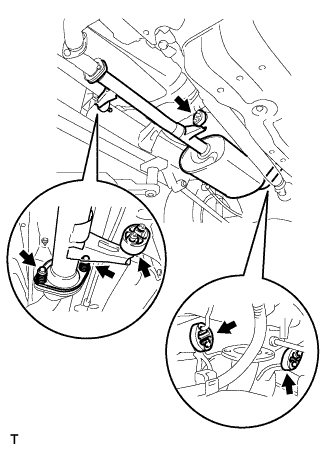
Install the center exhaust pipe with the 2 bolts and 2 springs.
- Torque:
- 43 N*m{ 438 kgf*cm , 32 ft.*lbf }
| 4. INSTALL TAIL EXHAUST PIPE ASSEMBLY |
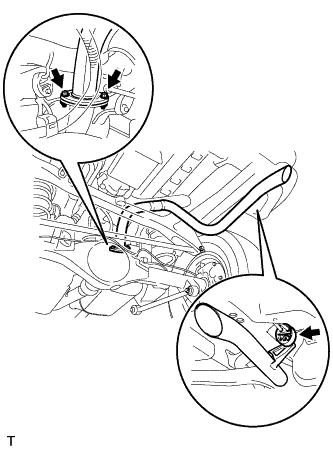 |
Install a new gasket onto the center exhaust pipe.
Install the tail exhaust pipe with the 2 bolts and exhaust pipe support.
- Torque:
- 48 N*m{ 489 kgf*cm , 35 ft.*lbf }
| 5. INSTALL HEATED OXYGEN SENSOR |
Using SST, install the 2 heated oxygen sensors onto the exhaust pipe.
- SST
- 09224-00010
- Torque:
- 44 N*m{ 449 kgf*cm , 33 ft.*lbf }
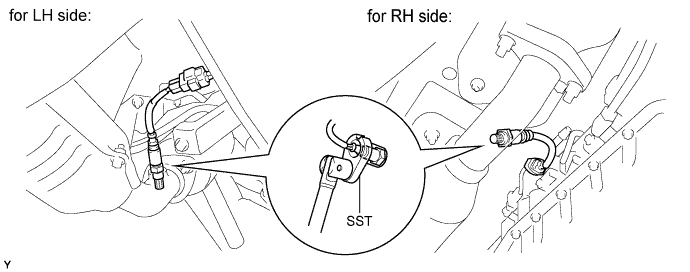
Connect the 2 heated oxygen sensor connectors.
| 6. CHECK EXHAUST GAS LEAK |