CYLINDER HEAD > INSTALLATION |
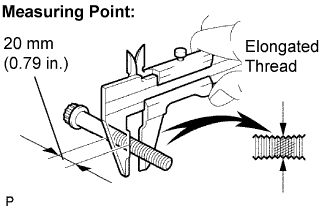
| 1. INSPECT CYLINDER HEAD SET BOLT |
![]() |
Using vernier calipers, measure the minimum diameter of the elongated thread at the measuring point.
| 2. INSTALL CYLINDER HEAD GASKET |
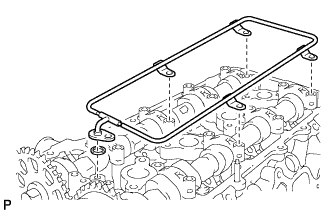
![]() |
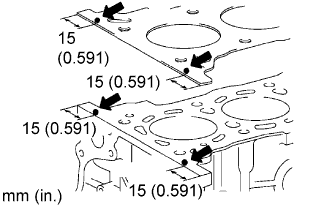
Apply a continuous bead of seal packing to the cylinder block upper side and cylinder head gasket upper side as shown in the illustration.
![]() |
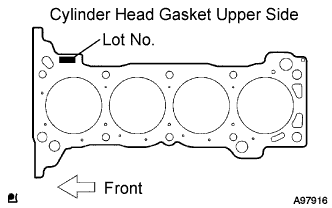
Place a new cylinder head gasket on the cylinder block surface with the Lot No. stamp upper side facing upward.
| 3. INSTALL CYLINDER HEAD SUB-ASSEMBLY |
Place the cylinder head on the cylinder block.
Apply a light coat of engine oil to the threads and under the heads of the cylinder head bolts.
![]() |
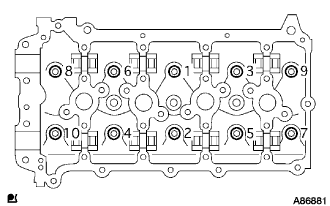
Install and uniformly tighten the 10 cylinder head bolts with the plate washers, in several steps, in the sequence shown.(*1)
![]() |
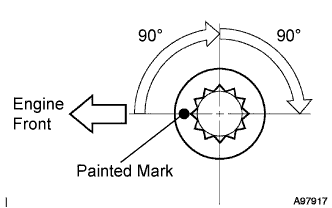
Mark the front of the cylinder head bolt head with paint.
Retighten the cylinder head bolts by 90° in the order shown in step (*1).
Retighten the cylinder head bolts by an additional 90°.
Check that the painted mark is now facing rearward.
![]() |
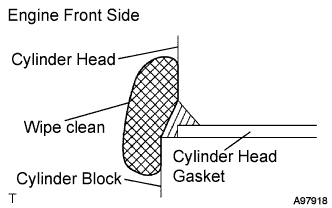
Seal packing will seep out on the engine's front side. Thoroughly wipe clean any seal packing.
| 4. INSTALL VALVE STEM CAP |
Apply clean engine oil to the valve stem tip, and install the valve stem cap.
| 5. INSTALL VALVE LASH ADJUSTER ASSEMBLY |
![]() |
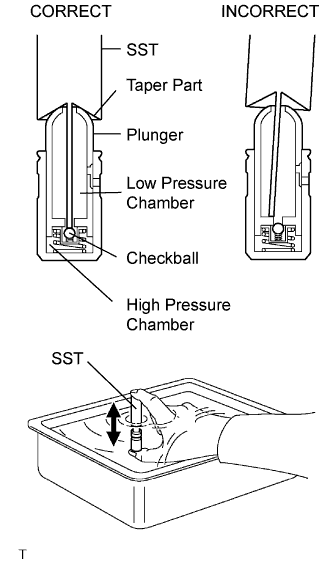
Place the lash adjuster into a container full of engine oil.
Insert the tip of SST into the lash adjuster's plunger and use the tip to press down on the checkball inside the plunger.
Squeeze the SST and lash adjuster together to move the plunger up and down 5 to 6 times.
Check the movement of the plunger and bleed air.
After bleeding air, remove the SST. Then quickly and firmly press the plunger with a finger.
Install the lash adjuster.
| 6. INSTALL VALVE ROCKER ARM SUB-ASSEMBLY NO.1 |
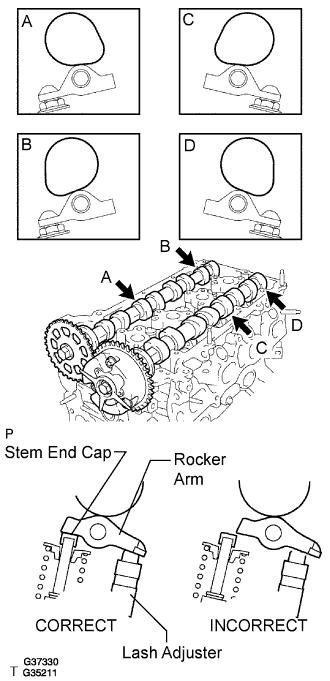
Apply clean engine oil to the valve lash adjuster tip and valve stem cap surface. Then install the valve rocker arm.
| 7. INSTALL CAMSHAFTS |
![]() |
Apply clean engine oil to the camshaft's cam portion and the cylinder head journals.
Set the camshaft and No.2 camshaft as shown in the illustration.
| 8. INSTALL CAMSHAFT BEARING CAP |
![]() |
Temporarily install the camshaft bearing cap No.1.
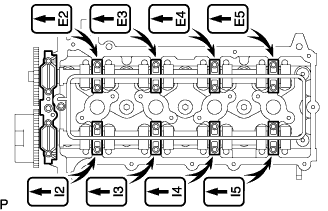
Check the proper location of each camshaft bearing cap No.2 and install them.
![]() |
Install a new O-ring to the camshaft bearing cap No.1.
Temporarily install the oil delivery pipe.
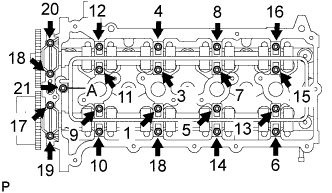
![]() |
Tighten the 21 bolts and 20 washers in the order shown in the illustration.
| 9. INSTALL CHAIN SUB-ASSEMBLY |
| 10. INSTALL MANUAL TRANSMISSION UNIT ASSEMBLY (for Manual Transmission) |
| 11. INSTALL AUTOMATIC TRANSMISSION ASSEMBLY (for Automatic Transmission) |
| 12. CHECK FOR IDLE SPEED AND IGNITION TIMING |
| 13. CHECK FOR CO/HC |
| 14. CHECK FUNCTION OF THROTTLE BODY |
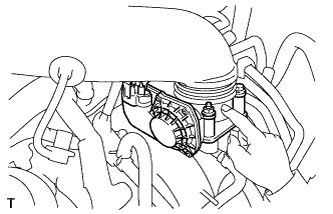
Check the throttle control motor operating sounds.
Turn the ignition switch to the ON position.
![]() |
When pressing the accelerator pedal, listen to the running sounds of the motor. Make sure no friction noise comes from the motor.
If friction noise exists, replace the throttle body.
![]() |
Check the throttle position sensor.
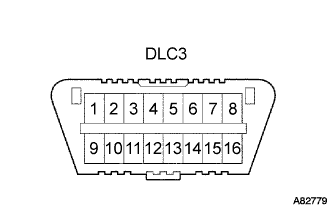
Connect the intelligent tester to the DLC3.
Turn the ignition switch to the ON position.
Turn the intelligent tester main switch on.
Enter the following menus: Power train / Engine / Data List / Throttle Sensor Position and Throttle Position Sensor Position #2.
Depress the accelerator pedal. When the throttle valve is fully opened, check that the value of the "Throttle Sensor Position" is within the specification.
| 15. PERFORM INITIALIZATION |