REMOVAL
Removal / installation · Vehicles built Oct 2014 – Nov 2015
Versions by build date: Oct 2014 – Nov 2015 Dec 2015 – Mar 2016 from Apr 2016
| 1.
DISCONNECT CABLE FROM NEGATIVE BATTERY TERMINAL |
|
| 2.
DRAIN MANUAL TRANSMISSION OIL |
 |
Remove the filler plug and gasket.
Remove the drain plug and gasket, and drain the oil.
Install the drain plug with a new gasket.
-
Torque:
- 37 N*m{
377 kgf*cm
, 27 ft.*lbf
}
| 3.
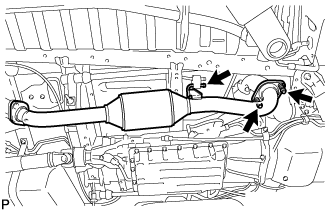
REMOVE FRONT EXHAUST PIPE ASSEMBLY (w/o DPF)
|
|
- Remove the 2 bolts and 2 compression springs.
Disconnect the No. 4 exhaust pipe support and front exhaust pipe.
Remove the gasket.
| 4.
REMOVE FRONT EXHAUST PIPE ASSEMBLY (w/ DPF) |
|
(Click here)
| 5.
REMOVE PROPELLER SHAFT ASSEMBLY (for Long Wheelbase) |
|
(Click here)
| 6.
REMOVE PROPELLER WITH CENTER BEARING SHAFT ASSEMBLY (for Super Long Wheelbase) |
|
(Click here)
| 7.
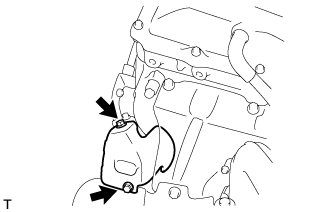
REMOVE NO. 2 EXHAUST MANIFOLD HEAT INSULATOR (w/ DPF)
|
|
- Remove the 2 bolts and No. 2 exhaust manifold heat insulator.
| 8.
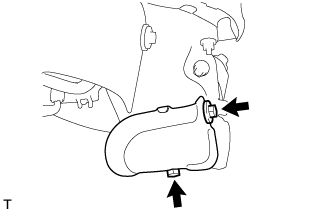
REMOVE NO. 3 EXHAUST MANIFOLD HEAT INSULATOR (w/ DPF)
|
|
- Remove the 2 bolts and No. 3 exhaust manifold heat insulator.
| 9.
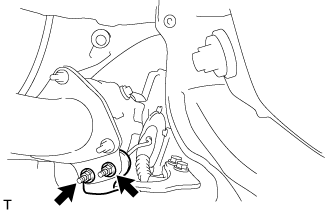
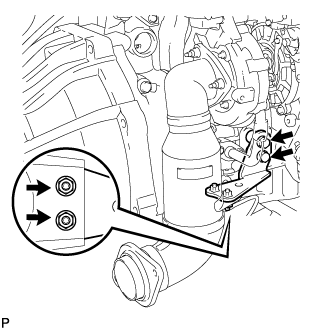
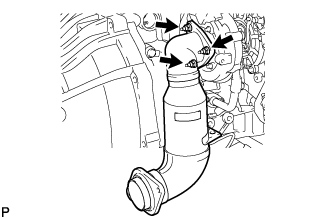
REMOVE CATALYTIC WITH PIPE CONVERTER ASSEMBLY (w/ DPF)
|
|
- Remove the 2 nuts from the catalytic with pipe converter assembly.
- Remove the 3 nuts, catalytic with pipe converter assembly and gasket.
| 10.
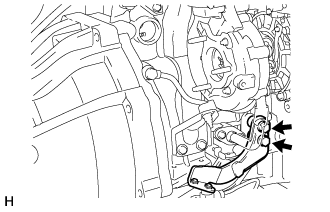
REMOVE TURBINE OUTLET ELBOW STAY
|
|
- w/ DPF:
Remove the 2 bolts and turbine outlet elbow stay.
- w/o DPF:
Remove the 2 bolts, 2 nuts and turbine outlet elbow stay.
| 11.
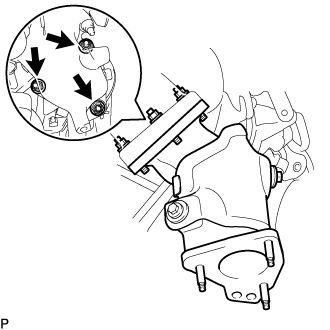
REMOVE EXHAUST MANIFOLD CONVERTER SUB-ASSEMBLY (w/o DPF)
|
|
- Remove the 3 nuts, exhaust manifold converter sub-assembly and gasket.
| 12.
REMOVE TRANSMISSION CONTROL CABLE INSULATOR (for RHD)
|
|
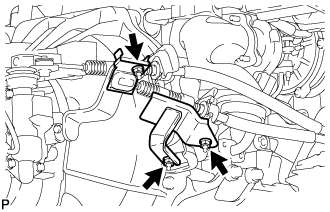
- Remove the nut and No. 1 transmission control cable insulator from the select outer lever.
Remove the 2 nut and No. 2 transmission control cable insulator from the No. 1 transmission control cable bracket.
| 13.
DISCONNECT TRANSMISSION CONTROL CABLE ASSEMBLY |
|
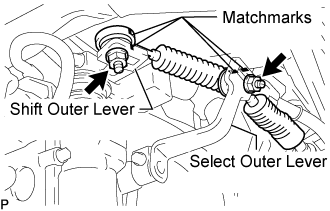
- Put matchmarks on the transmission control cable assembly and the select outer lever.
Put matchmarks on the transmission control cable assembly and the shift outer lever.
Remove the nut and disconnect the transmission control cable assembly from the select outer lever.
Remove the nut and disconnect the transmission control cable assembly from the shift outer lever.
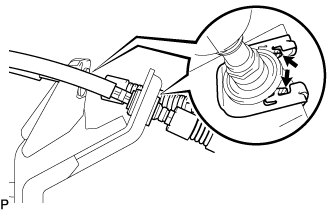
- Using a screwdriver, disengage the claws of the 2 clips.
Remove the 2 transmission control cable assemblies and 2 clips from the No. 1 transmission control cable bracket.
| 14.
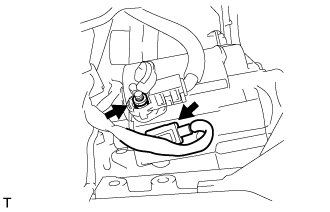
DISCONNECT WIRE HARNESS |
|
Disconnect the back-up light switch connector.
Disconnect the speed sensor connector.
Remove the bolt and separate the ground cable.
| 15.
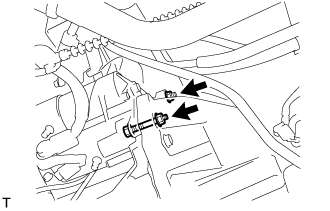
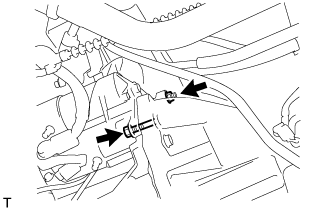
SEPARATE CLUTCH RELEASE CYLINDER ASSEMBLY |
|
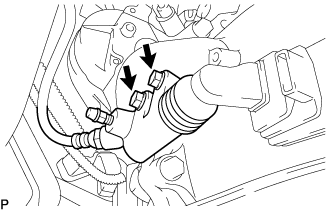
- Remove the 2 bolts and separate the clutch release cylinder assembly.
| 16.
REMOVE STARTER ASSEMBLY (for 2.2 kW Type)
|
|
- for Wide Body:
Remove the bolt and ground cable.
- Open the terminal cap.
Remove the nut and disconnect the wire harness from terminal 30.
Disconnect the terminal 50 connector from the starter.
- for Automatic Transmission:
Remove the bolt, 2 nuts and starter.
- for Manual Transmission:
Remove the bolt, nut and starter.
| 17.
REMOVE STARTER ASSEMBLY (for 2.7 kW Type)
|
|
- for Wide Body:
Remove the bolt, then disconnect the ground cable.
- Open the terminal cap.
Remove the nut and disconnect the wire harness from terminal 30.
Disconnect the terminal 50 connector from the starter.
- for Automatic Transmission:
Remove the bolt and 2 nuts, then remove the starter.
- for Manual Transmission:
Remove the bolt and nut, then remove the starter.
| 18.
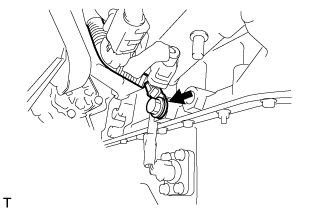
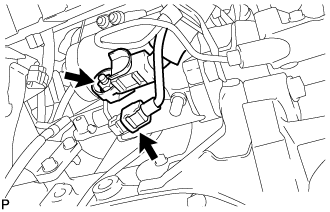
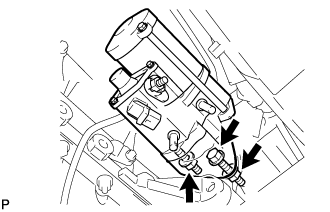
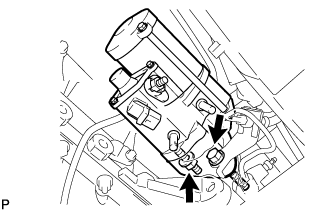
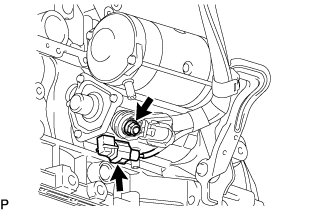
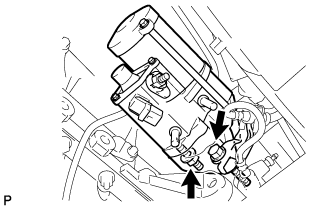
REMOVE STARTER ASSEMBLY (for 3.0 kW Type)
|
|
- Open the terminal cap.
Disconnect the starter connector.
Remove the nut and disconnect the starter wire.
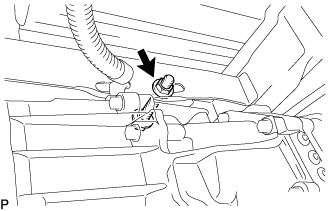
- Remove the bolt and disconnect the wiring harness clamp bracket.
Remove the nut and stater assembly.
| 19.
REMOVE MANUAL TRANSMISSION ASSEMBLY |
|
- Support the manual transmission assembly with a transmission jack.
Remove the bolt, nut, and 2 washers, and then separate the transmission from the frame.
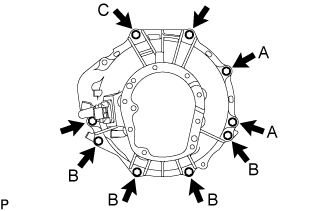
- Remove the 9 bolts, manual transmission unit, No. 1 control cable bracket, rear end plate, and cylinder block insulator.
- HINT:
- The A bolts in the illustration tighten the control cable bracket together.
- The B bolts in the illustration tighten the stiffener plate together.
- Bolt C in the illustration tightens the harness clamp bracket together.
| 20.
REMOVE EXTENSION HOUSING DYNAMIC DAMPER (WITH DYNAMIC DAMPER) |
|
- Remove the 4 bolts and extension housing dynamic damper.
| 21.
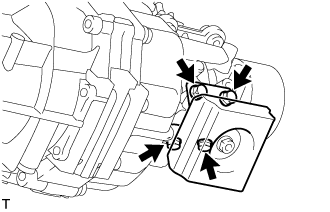
REMOVE REAR ENGINE MOUNTING INSULATOR ASSEMBLY |
|
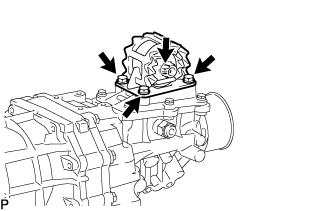
- Remove the 4 bolts and rear engine mounting insulator assembly.