3.
REMOVE ENGINE UNDER COVER NO.1 (w/ Engine Under Cover No.1)
4.
REMOVE ENGINE UNDER COVER NO.2 (w/ Engine Under Cover No.2)
5.
REMOVE ENGINE SIDE UNDER COVER LH (w/ Engine Side Under Cover LH)
6.
REMOVE ENGINE SIDE UNDER COVER RH (w/ Engine Side Under Cover RH)
7.
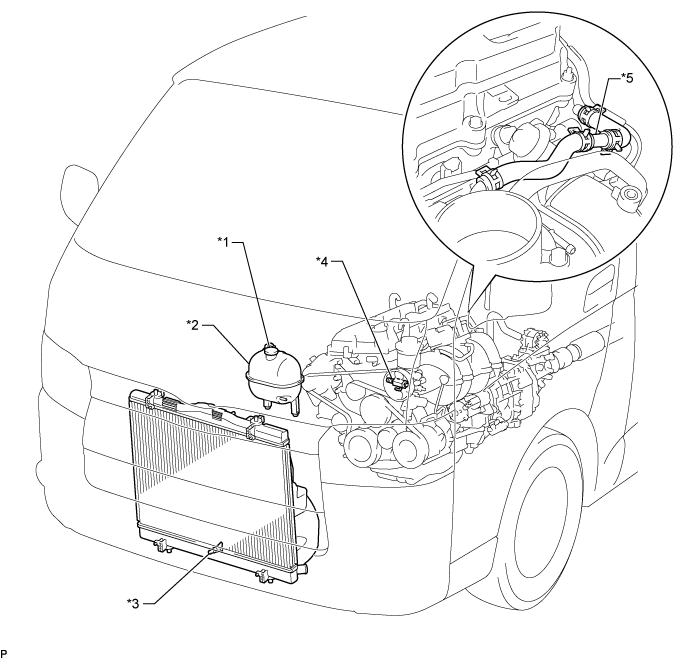
DRAIN ENGINE COOLANT
CAUTION:
Do not remove the radiator reservoir cap sub-assembly while the engine and radiator are still hot. Pressurized, hot engine coolant and steam may be released and cause serious burns.
HINT:
Collect the engine coolant in a container and dispose of it according to local regulations.
Loosen the radiator drain cock plug and drain the engine coolant.
Text in Illustration
*1
Radiator Reservoir Cap Sub-assembly
*2
Radiator Reservoir Assembly
*3
Radiator Drain Cock Plug
*4
Cylinder Block Water Drain Cock Plug
*5
2-Way
-
-
Remove the radiator reservoir cap sub-assembly.
Loosen the cylinder block water drain cock plug and drain the engine coolant from the engine.
8.
DRAIN ENGINE OIL
Remove the oil filler cap.
Remove the oil drain plug and drain the engine oil from the oil pan.
NOTICE:
Collect the oil in a disposable oil container.
Clean the oil pan drain plug and install it with a new gasket.
Torque:
45 N*m{
459 kgf*cm
, 33 ft.*lbf
}
9.
REMOVE FRONT SEAT ASSEMBLY RH (for Hi-back Seat Type)
Perform the same procedure as above on the opposite side. (Click here)
10.
REMOVE FRONT SEAT ASSEMBLY RH (for Low-back Seat Type)
Perform the same procedure as above on the opposite side. (Click here)
11.
REMOVE FRONT DOOR SCUFF PLATE RH
12.
REMOVE ENGINE SERVICE HOLE SUB COVER SUB-ASSEMBLY
Roll up the carpet, and remove the 5 bolts and engine service hole sub cover.
13.
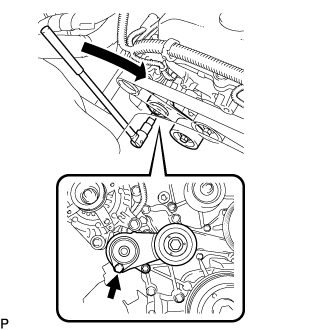
REMOVE FAN & GENERATOR V BELT
Use the hexagon-shaped part indicated by the arrow in the illustration to move the tensioner pulley downward and decrease the tension in the drive belt. Then remove the drive belt.
NOTICE:
When removing the drive belt, do not use the idle pulley's bolt.
HINT:
After removing the drive belt, move the tensioner upward to the maximum amount.
14.
DISCONNECT RADIATOR HOSE INLET
Remove the clamp, and disconnect the radiator hose inlet from the engine.
15.
DISCONNECT RADIATOR HOSE OUTLET
Remove the clamp, and disconnect the radiator hose outlet from the engine.
16.
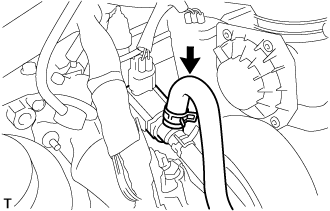
DISCONNECT FUEL VAPOR FEED HOSE ASSEMBLY
Disconnect the fuel vapor feed hose from the VSV.
17.
DISCONNECT UNION TO CONNECTOR TUBE HOSE
Disconnect the union to connector tube hose from the intake manifold.
18.
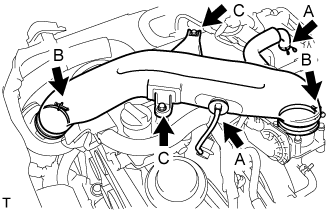
REMOVE INTAKE AIR CONNECTOR
Slide the clamp and disconnect the No. 2 ventilation hose and vacuum hose. (A)
Loosen the 2 hose clamp bolts. (B)
Remove the 2 bolts and intake air connector. (C)
19.
DISCONNECT FUEL HOSE
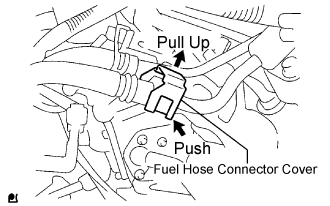
Pull the fuel hose connector cover up to release the lock. (Click here)
Disengage the fuel connector to disconnect the fuel hose. (Click here)
20.
DISCONNECT FUEL HOSE NO.2
Remove the clamp, and disconnect the fuel hose No.2 from the delivery pipe.
21.
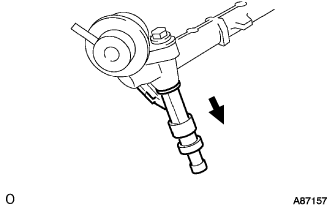
DISCONNECT VANE PUMP ASSEMBLY
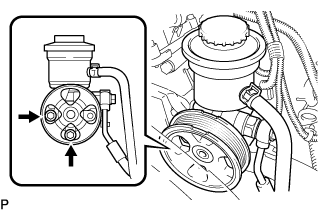
Disconnect the PS fluid pressure switch connector.
Remove the 2 bolts and disconnect the pump from the engine.
Support the vane pump securely.
22.
REMOVE OIL LEVEL GAUGE SUB-ASSEMBLY
23.
REMOVE OIL LEVEL GAUGE GUIDE
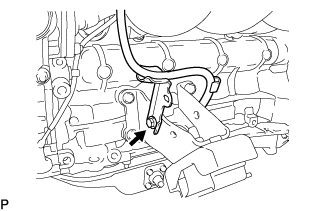
Remove the bolt and gauge guide.
24.
DISCONNECT COMPRESSOR AND MAGNETIC CLUTCH (w/ Air Conditioning System)
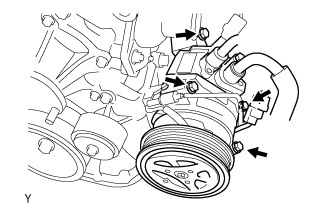
Disconnect the compressor connector.
Remove the 4 bolts and disconnect the compressor from the engine.
HINT:
Disconnect the compressor with the low pressure hose and high pressure hose stuck by suspended from the rope.
Support the cooler compressor securely.
25.
DISCONNECT ENGINE WIRE
26.
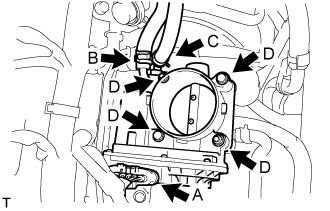
REMOVE THROTTLE WITH MOTOR BODY ASSEMBLY
Disconnect the throttle motor connector. (A)
Slide the clamp and disconnect the water by-pass hose. (B)
Slide the clamp and disconnect the No. 2 water by-pass hose. (C)
for Type A: Remove the 2 bolts and 2 nuts, and then remove the throttle body assembly. (D)
for Type B: Remove the 4 bolts and throttle body assembly. (D)
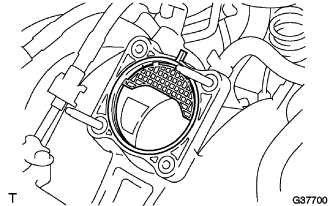
Remove the gasket from the intake manifold.
27.
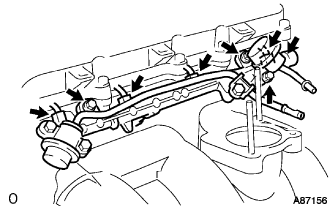
REMOVE FUEL DELIVERY PIPE SUB-ASSEMBLY
NOTICE:
Be careful not to drop the injectors when removing the delivery pipe.
Disconnect the fuel hoses.
Disconnect the 4 injector connectors.
Remove the 2 bolts O-ring and fuel pulsation damper assembly.
Remove the 2 bolts and delivery pipe together with the 4 injectors.
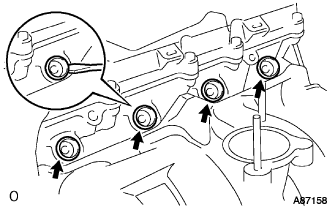
Remove the delivery pipe spacers.
Using a screwdriver, pry out the 4 spacers from the cylinder head.
28.
REMOVE INJECTOR ASSEMBLY
Pull out the 4 injectors from the delivery pipe.
Remove the O-rings from the injectors.
29.
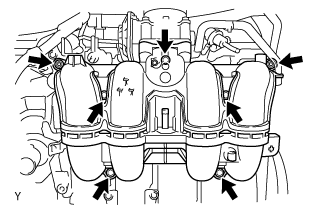
REMOVE INTAKE MANIFOLD
Disconnect the ventilation hose No.3.
Remove the 5 bolts, 2 nuts, intake manifold and gasket.
30.
REMOVE FAN PULLEY
Remove the 4 nuts, fan pulley and fan spacer.
31.
REMOVE WATER BY-PASS PIPE NO.1
Remove the bolt, 2 nuts, water by-pass pipe and gasket.
32.
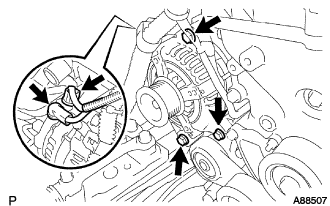
REMOVE GENERATOR ASSEMBLY
Disconnect the generator connector.
Remove the terminal cap.
Remove the nut and disconnect the wire harness from terminal B.
Remove the 3 bolts and generator assembly.
33.
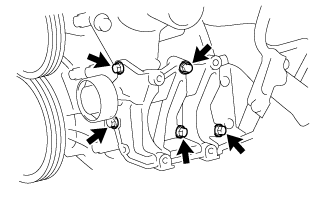
REMOVE COMPRESSOR MOUNTING BRACKET NO.1 (w/ Air Conditioning System)
Remove the 5 bolts and compressor mounting bracket No.1.
34.
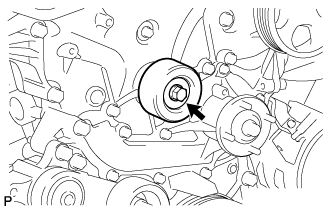
REMOVE IDLER PULLEY SUB-ASSEMBLY NO.1
Remove the bolt, pulley plate, collar, and idler pulley sub-assembly No.1.
35.
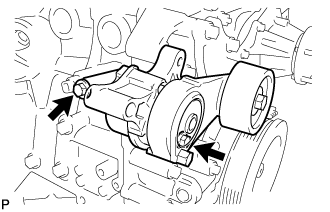
REMOVE V-RIBBED BELT TENSIONER ASSEMBLY
Remove the 2 bolts and belt tensioner.
36.
REMOVE MANUAL TRANSMISSION UNIT ASSEMBLY (for Manual Transmission)
38.
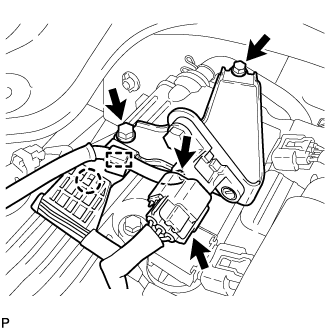
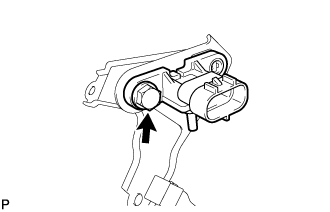
REMOVE AIR PRESSURE SENSOR (w/ Manifold Absolute Pressure Sensor)
Disconnect the connector.
Disconnect the vacuum hose and clamp.
Detach the wire harness clamp
Remove the 2 bolts and air pressure sensor together with the bracket.
Remove the bolt and air pressure sensor.
39.
REMOVE IGNITION COIL ASSEMBLY
Remove the bolts and ignition coil assembly.
40.
REMOVE CYLINDER HEAD COVER SUB-ASSEMBLY
Disconnect the ventilation hose No.1.
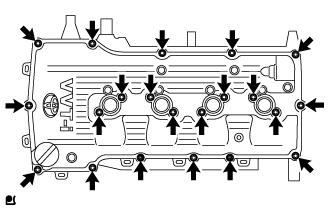
Remove the 19 bolts, 2 nuts, head cover and 2 gaskets.
Remove the cylinder head cover gasket and cylinder head cover No.2 from the cylinder head cover.
41.
REMOVE CRANKSHAFT PULLEY
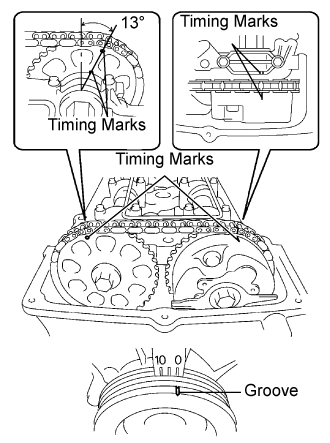
Set No.1 cylinder to TDC/compression.
Turn the crankshaft pulley, and align its groove with timing mark 0 of the timing chain cover.
Check that the timing marks of the camshaft timing gear and sprocket are aligned with the timing marks of bearing cap No.1, as shown in the illustration.
HINT:
If not, turn the crankshaft pulley 1 revolution (360°) and align the marks as shown above.
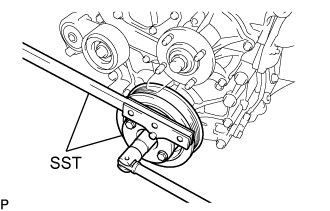
Using SST, loosen the pulley bolt.
SST
09213-54015
(91651-60855)
09330-00021
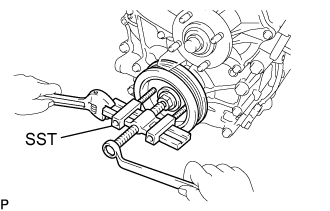
Using SST, remove the pulley bolt and pulley.
HINT:
Apply grease to the thread and tip of the SST (center bolt) prior to use.