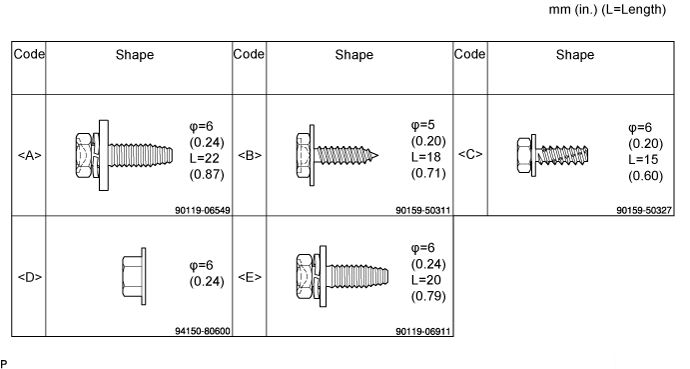
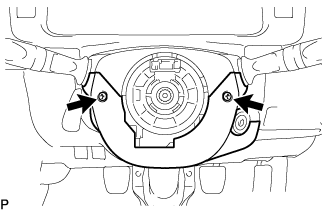
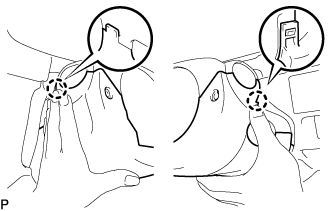
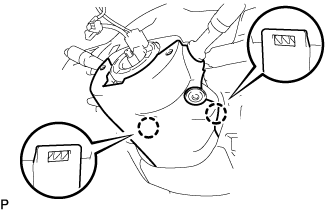
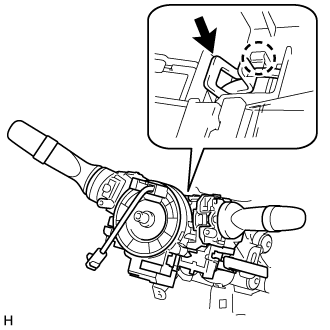
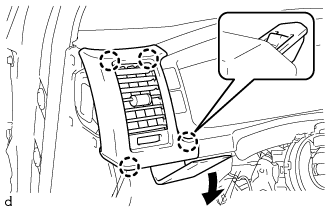
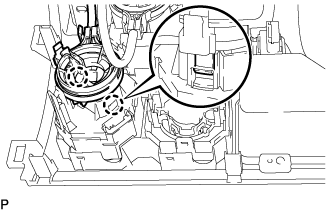
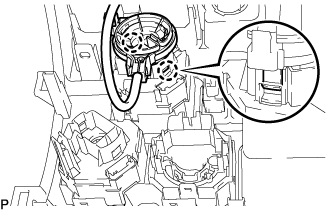
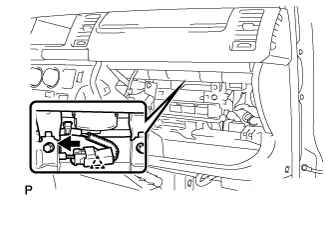
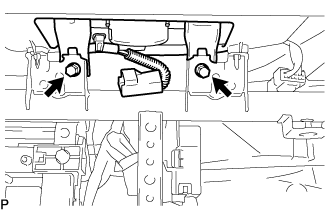
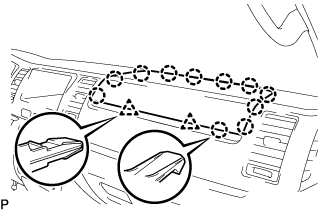
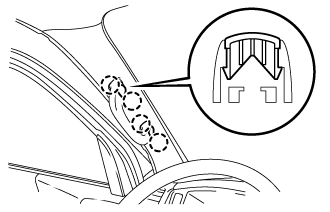
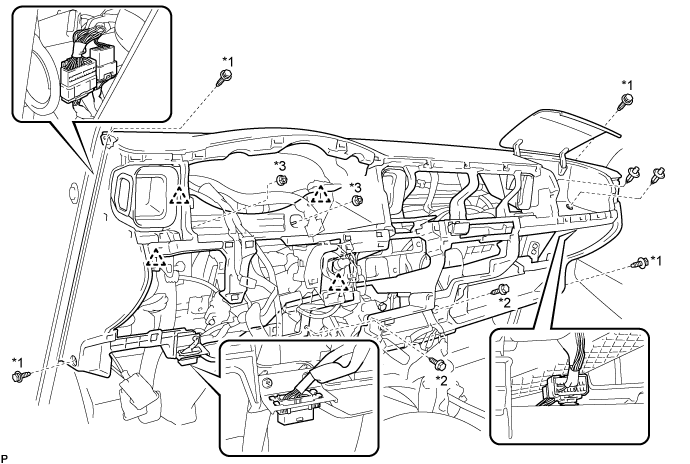
All bolts, screws and nuts relevant to installing and removing the instrument panel are shown along with their alphabet code in the table below.
2.
PRECAUTION
NOTICE:
After turning the ignition switch off, waiting time may be required before disconnecting the cable from the negative (-) battery terminal. Therefore, make sure to read the disconnecting the cable from the negative (- ) battery terminal notices before proceeding with work (Click here).
3.
DISCONNECT CABLE FROM NEGATIVE BATTERY TERMINAL
CAUTION:
w/ Airbag System:
Wait at least 90 seconds after disconnecting the cable from the negative (-) battery terminal to disable the SRS system.
NOTICE:
When disconnecting the cable, some systems need to be initialized after the cable is reconnected (Click here).
4.
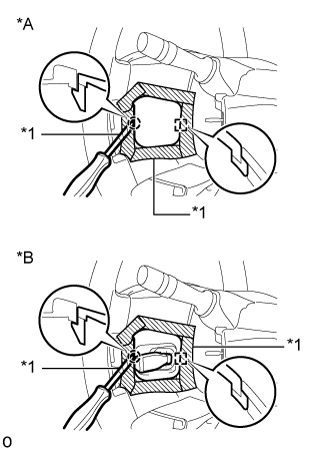
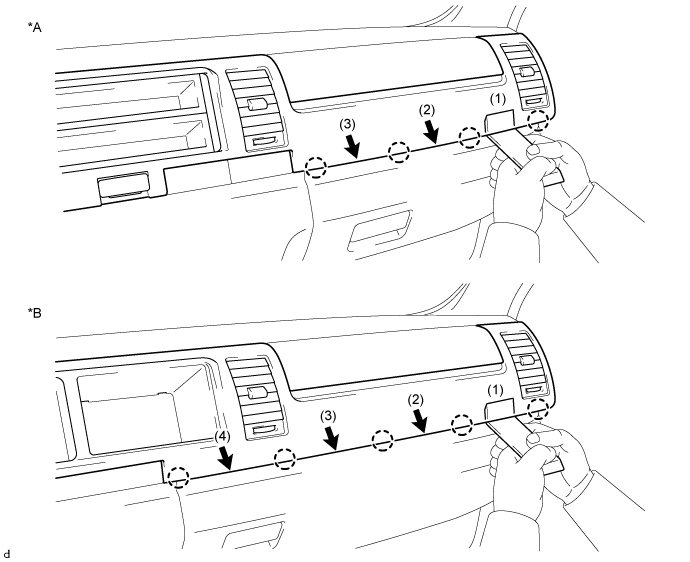
REMOVE STEERING WHEEL COVER LOWER NO. 2
Put protective tape around the lower No. 2 steering wheel cover.
Text in Illustration
*A
w/o Cruise Control System
*B
w/ Cruise Control System
*1
Protective Tape
Using a screwdriver, detach the claw and guide and remove the lower No. 2 steering wheel cover.
HINT:
Tape the screwdriver tip before use.
5.
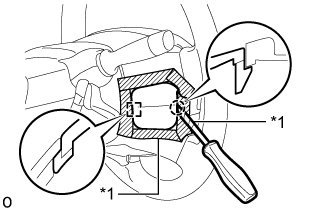
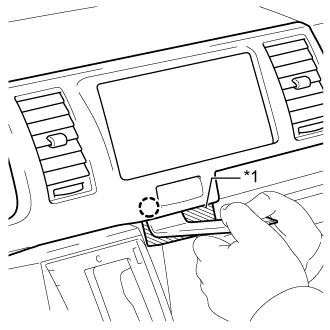
REMOVE STEERING WHEEL COVER LOWER NO. 3
Put protective tape around the lower No. 3 steering wheel cover.
Text in Illustration
*1
Protective Tape
Using a screwdriver, detach the claw and guide and remove the lower No. 3 steering wheel cover.
HINT:
Tape the screwdriver tip before use.
6.
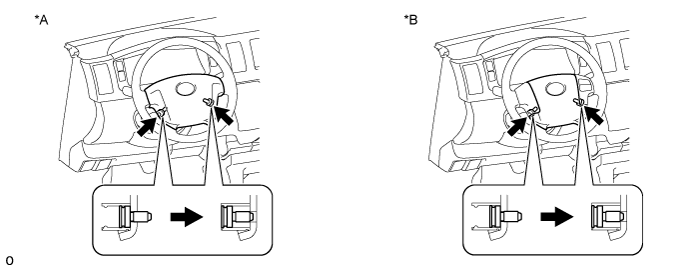
REMOVE STEERING PAD (w/o Airbag System)
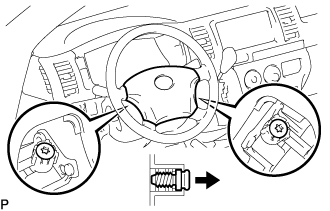
Using a "TORX" socket wrench (T30), loosen the 2 "TORX" screws until the groove along the screw circumference catches on the screw case.
Remove the steering pad.
Disconnect the horn connector.
7.
REMOVE STEERING PAD (w/ Airbag System)
CAUTION:
When storing the steering pad, keep the airbag deployment side facing upward.
Check that the ignition switch is off.
Check that the cable is disconnected from the negative (-) battery terminal.
CAUTION:
Wait at least 90 seconds after disconnecting the cable from the negative (-) battery terminal to disable the SRS system.
Using a T30 "TORX" socket wrench, loosen the 2 "TORX" screws until the groove along the screw circumference catches on the screw case.
Pull the steering pad toward you.
Text in Illustration
*A
w/o Steering Pad Switch
*B
w/ Steering Pad Switch
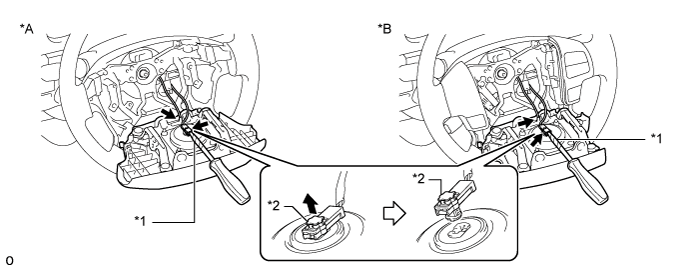
Disconnect the horn connector from the steering pad.
Using a screwdriver, release the airbag connector lock.
HINT:
Tape the screwdriver tip before use.
Disconnect the airbag connector and remove the steering pad as shown in the illustration.
NOTICE:
When disconnecting any airbag connector, take care not to damage the airbag wire harness.
Text in Illustration
*A
w/o Steering Pad Switch
*B
w/ Steering Pad Switch
*1
Protective Tape
*2
Connector Lock
8.
REMOVE STEERING WHEEL ASSEMBLY
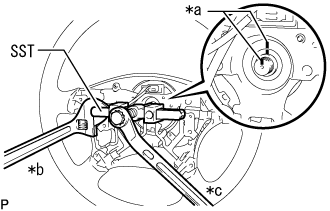
Remove the steering wheel set nut.
Put matchmarks on the steering wheel assembly and steering main shaft assembly.
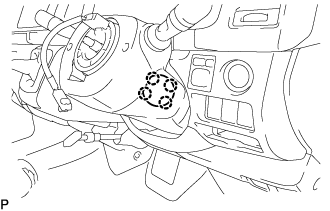
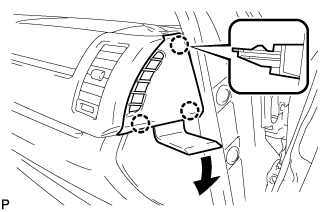
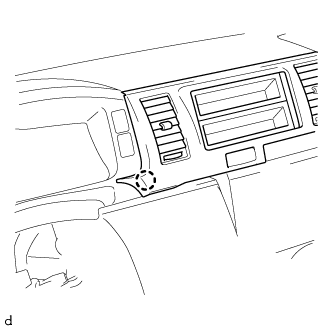
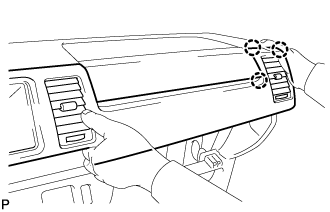
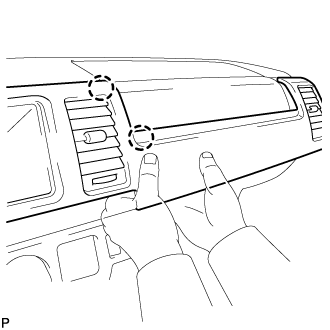
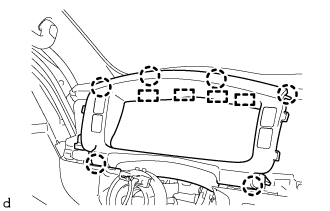
Detach the 6 claws and 4 hooks and remove the instrument cluster finish panel sub-assembly.
20.
REMOVE COMBINATION METER ASSEMBLY
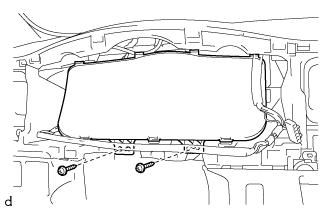
Remove the 2 screws.
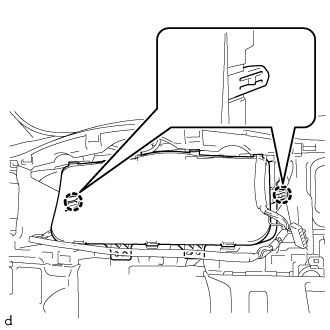
Detach the 2 claws and remove the combination meter assembly.
Disconnect the 2 connectors and detach the wire harness clamp.
21.
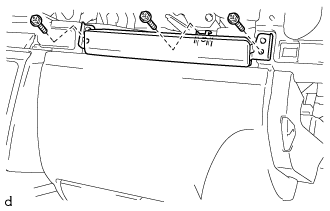
REMOVE INSTRUMENT PANEL CUP HOLDER ASSEMBLY
Remove the 3 screws <C> and instrument panel cup holder assembly.
22.
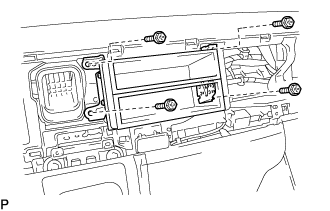
REMOVE STEREO OPENING COVER WITH BRACKET (w/o Audio)
Remove the 4 screws <C> and stereo opening cover with bracket.
23.
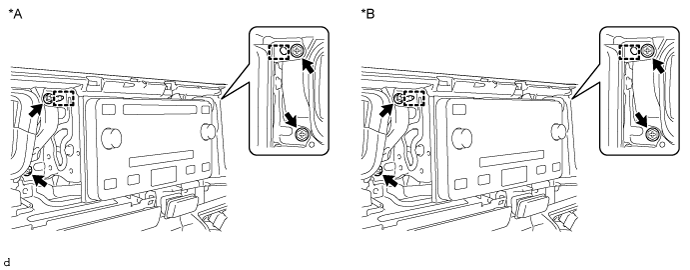
REMOVE RADIO RECEIVER ASSEMBLY WITH BRACKET (w/ Audio)
Remove the 4 screws.
Text in Illustration
*A
w/ CD Player
*B
w/o CD Player
Detach the 2 guides and remove the radio receiver assembly.
Disconnect each connector.
24.
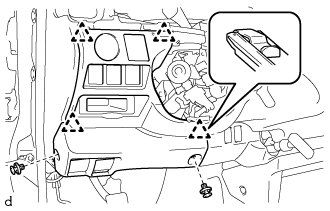
REMOVE INSTRUMENT PANEL FINISH PANEL LOWER
Using a clip remover, remove the 2 clips.
Detach the 4 clips and remove the instrument panel finish lower.
Disconnect each connector.
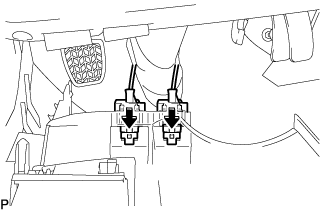
Push the positions indicated by the arrows in the illustration to disconnect the fuel lid lock control cable and bonnet (hood) control cable assembly from the instrument panel finish lower.
25.
REMOVE INSTRUMENT PANEL UNDER COVER SUB-ASSEMBLY NO. 1
Using a clip remover, remove the 2 clips
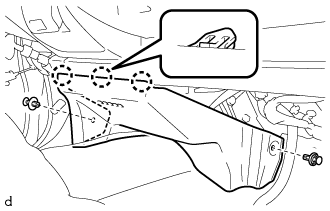
Detach the 3 claws and remove the instrument panel under cover sub-assembly No. 1.
26.
REMOVE PARKING BRAKE HOLE COVER
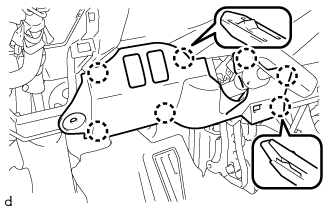
Detach the 6 claws and remove the parking brake hole cover.
Disconnect each connector.
27.
REMOVE SHIFT LEVER KNOB
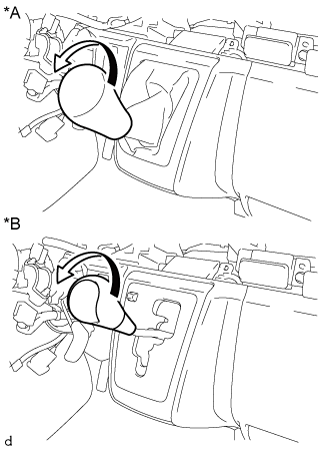
Turn the shift lever knob in the direction indicated by the arrow and remove it.
Text in Illustration
*A
for Manual Transmission
*B
for Automatic Transmission
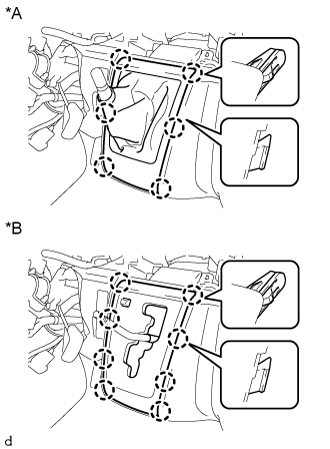
28.
REMOVE SHIFTING HOLE COVER ASSEMBLY
for Manual Transmission: Detach the 6 claws and remove the shifting hole cover assembly.
Text in Illustration
*A
for Manual Transmission
*B
for Automatic Transmission
for Automatic Transmission: Detach the 8 claws and remove the shifting hole cover assembly.
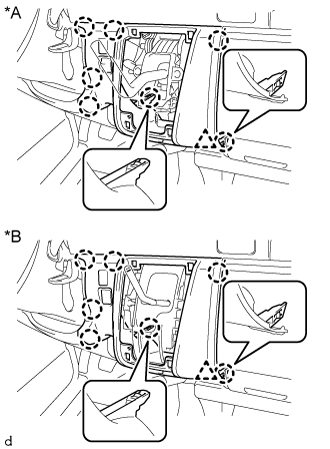
29.
REMOVE INSTRUMENT PANEL FINISH PANEL LOWER CENTER
Detach the 8 claws and remove the instrument panel finish panel lower center.
Text in Illustration
*A
for Manual Transmission
*B
for Automatic Transmission
30.
REMOVE FLOOR SHIFT SHIFT LEVER ASSEMBLY (for Manual Transmission)
32.
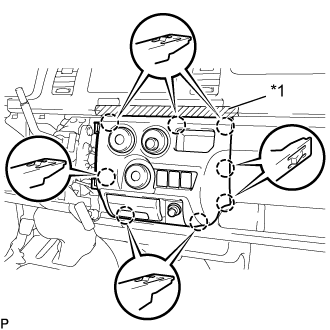
REMOVE INSTRUMENT CLUSTER FINISH PANEL SUB-ASSEMBLY LOWER CENTER
Put protective tape around the instrument cluster finish panel sub-assembly lower center.
Text in Illustration
*1
Protective Tape
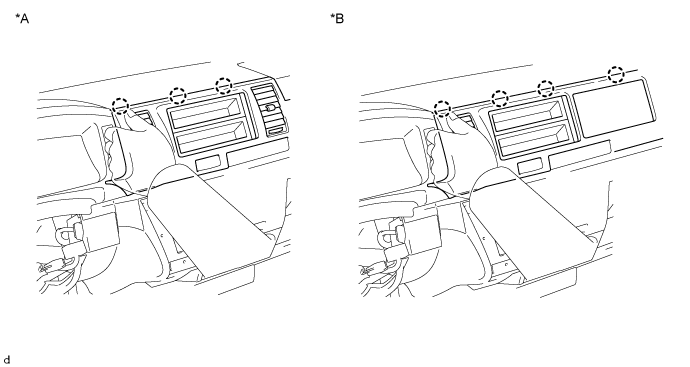
Detach the 8 claws and separate the instrument cluster finish panel sub-assembly lower center (air conditioning control assembly).
Disconnect the connector.
Disconnect the cable from the clamp.
Detach the 2 claws and disconnect the air inlet damper control cable sub-assembly from the No. 2 heater control knob.
Detach the 2 claws and disconnect the heater control cable sub-assembly from the heater control knob.
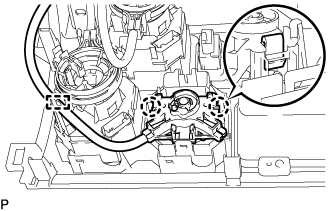
w/ No. 3 Heater Control Knob: Detach the 2 claws and disconnect the air mix damper control cable sub-assembly from the No. 3 heater control knob and remove the instrument cluster finish panel sub-assembly lower center (air conditioning control assembly).
33.
REMOVE GLOVE COMPARTMENT DOOR ASSEMBLY
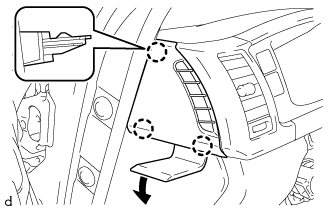
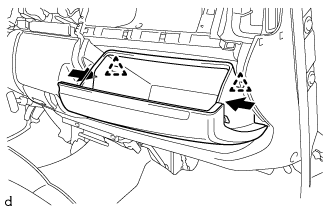
Push the positions indicated by the arrows in the illustration inward to release the 2 stoppers.
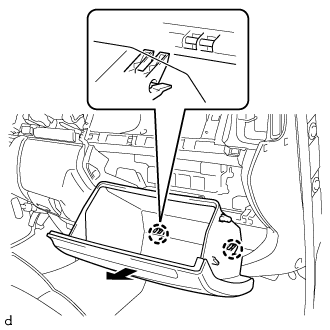
Pull the glove compartment door assembly in the direction indicated by the arrow shown in the illustration and detach the 2 hinges and remove it.
34.
REMOVE FRONT PASSENGER AIRBAG ASSEMBLY (w/ Front Passenger Airbag)
Separate the clamp from the reinforcement.
Disconnect the airbag connector.
Remove the 2 bolts from the reinforcement.
Separate the clip and clamp, and remove the instrument panel passenger airbag assembly.
35.
REMOVE HAZARD WARNING SIGNAL SWITCH ASSEMBLY
Detach the 2 claws and remove the hazard warning signal switch assembly.
Disconnect the connector.
36.
REMOVE FRONT ASSIST GRIP PLUG NO. 1
Using a screwdriver, detach the 4 claws and remove the 2 front assist grip plugs No. 1.
HINT:
Tape the screwdriver tip before use.
Use the same procedures described for the other side.
37.
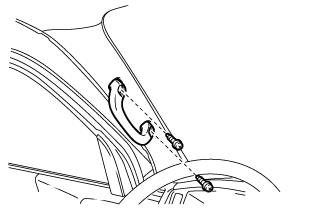
REMOVE ASSIST GRIP ASSEMBLY
Remove the 2 screws and assist grip assembly.
HINT:
Use the same procedures described for the other side.