REMOVAL
Removal / installation · Vehicles built from Jan 2017
| 1. DISCONNECT CABLE FROM NEGATIVE BATTERY TERMINAL |

- NOTICE:
- When disconnecting the cable, some systems need to be initialized after the cable is reconnected (Click here).
| 2. DRAIN ENGINE COOLANT |
- CAUTION:
- Do not remove the radiator cap sub-assembly while the engine assembly and radiator assembly are still hot. Pressurized, hot engine coolant and steam may be released and cause serious burns.
Connect a hose with an inside diameter of 9 mm (0.354 in.) to the radiator drain cock.
Loosen the radiator drain cock plug.
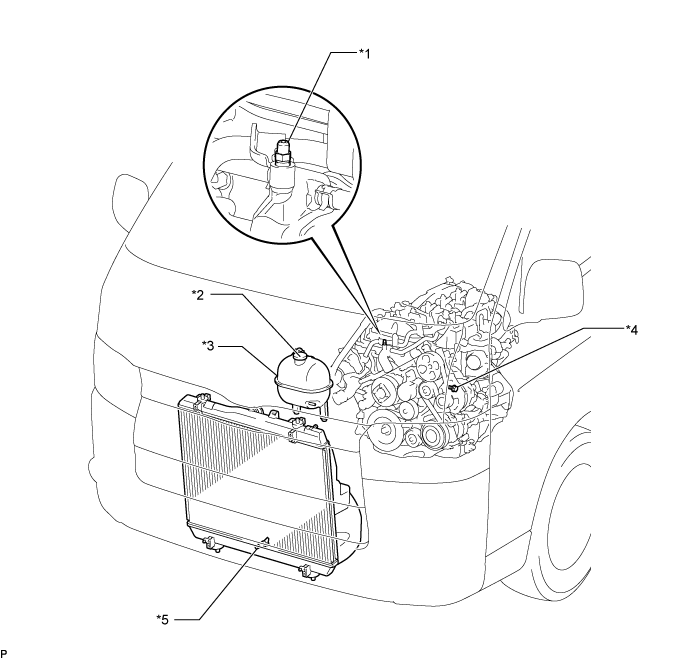

Text in Illustration *1
Bleeder Plug
*2
Radiator Cap Sub-assembly
*3
Radiator Reserve Tank Assembly
*4
Cylinder Block Drain Cock Plug
*5
Radiator Drain Cock Plug
-
-
Remove the radiator cap sub-assembly.
Loosen the cylinder block drain cock plug, and drain the engine coolant.
Tighten the radiator drain cock plug.
Tighten the cylinder block drain cock plug.
- Torque:
- 13 N*m{ 130 kgf*cm , 9 ft.*lbf }
Disconnect the hose from the radiator drain cock.
| 3. DRAIN ENGINE OIL |
Remove the oil filler cap sub-assembly.
Remove the oil pan drain plug and gasket, and then drain the engine oil into a container.
Clean and install a new gasket and the oil pan drain plug.
- Torque:
- 40 N*m{ 408 kgf*cm , 30 ft.*lbf }
| 4. REMOVE EXHAUST MANIFOLD CONVERTER SUB-ASSEMBLY |
| 5. REMOVE PCV HOSE |
Slide the 2 clips, detach the clamp and remove the PCV hose.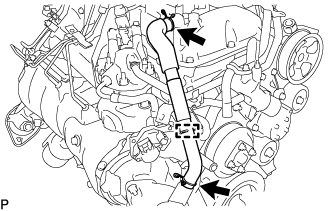
| 6. REMOVE PCV HOSE CLAMP |
Detach the wire harness clamp and disconnect the 2 clamps.
Remove the 2 bolts and PCV hose clamp from the timing chain case assembly.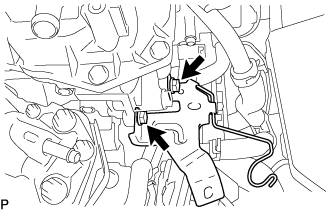
| 7. REMOVE NO. 2 WATER BY-PASS PIPE SUB-ASSEMBLY |
Slide the 2 clips and disconnect the No. 3 water by-pass hose and No. 2 water by-pass hose from the oil cooler assembly and water outlet sub-assembly.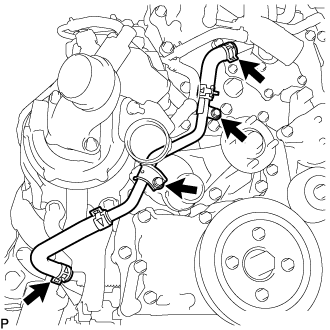
Remove the 2 bolts and No. 2 water by-pass pipe sub-assembly.
| 8. DISCONNECT TURBO WATER HOSE |
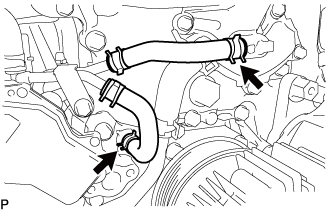 |
Slide the clip and disconnect the No. 1 turbo water hose from the water pump assembly.
Slide the clip and disconnect the No. 2 turbo water hose from the water outlet sub-assembly.
| 9. REMOVE OIL COOLER TUBE BRACKET AND WIRE HARNESS CLAMP BRACKET |
Remove the bolt and disconnect the oil cooler tube bracket.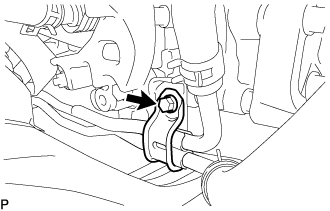
| 10. REMOVE TURBOCHARGER STAY |
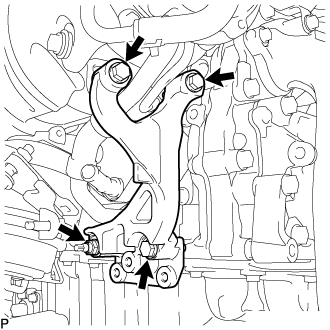 |
Remove the 3 bolts, nut and turbocharger stay.
| 11. REMOVE TURBO OIL OUTLET PIPE |
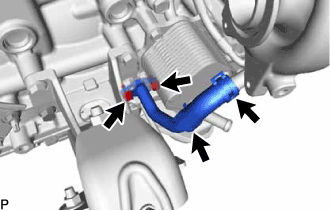 |
Slide the 2 clips and disconnect the turbo oil outlet hose from the turbo oil outlet pipe.
Remove the 2 bolts, turbo oil outlet pipe and gasket.
| 12. REMOVE TURBO OIL INLET PIPE SUB-ASSEMBLY |
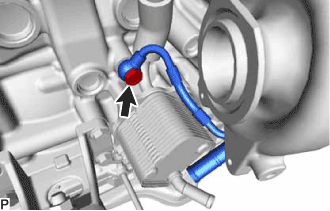 |
Remove the union bolt and gasket.
Remove the 2 nuts and turbo oil inlet pipe sub-assembly.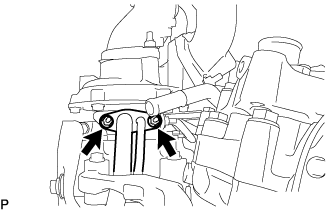
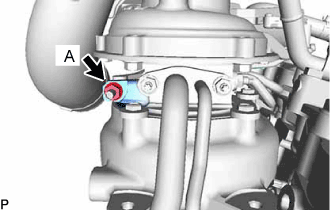
- NOTICE:
- Do not loosen the nut labeled A.
Remove the gasket.
| 13. REMOVE TURBOCHARGER SUB-ASSEMBLY |
Remove the 3 nuts and turbocharger sub-assembly.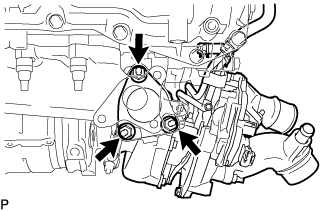
Remove the gasket from the turbocharger sub-assembly.
| 14. REMOVE NO. 1 EGR PIPE SUB-ASSEMBLY |
Remove the 4 nuts, bolt and No. 1 EGR pipe sub-assembly from the exhaust manifold, electric EGR control valve assembly and No. 1 vacuum transmitting pipe sub-assembly.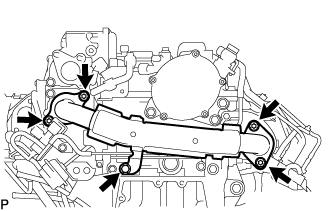
Remove the 2 gaskets from the exhaust manifold and electric EGR control valve assembly.
Using an E8 "TORX" socket wrench, remove the 2 stud bolts from the exhaust manifold.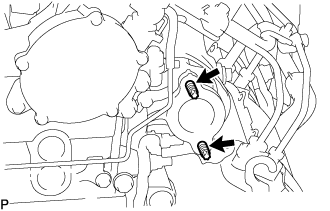
| 15. REMOVE EXHAUST MANIFOLD |
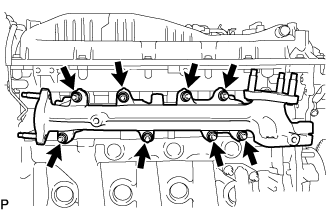 |
Remove the 8 nuts, 8 plate washers, 8 collars and exhaust manifold.
Remove the gasket.
| 16. REMOVE NO. 1 TURBO WATER PIPE SUB-ASSEMBLY |
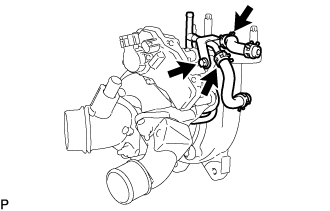 |
Slide the 2 hose clips and disconnect the No. 1 turbo water hose and No. 2 turbo water hose from the turbo water pipe sub-assembly.
Remove the bolt.
Remove the 2 nuts, No. 1 turbo water pipe sub-assembly and gasket.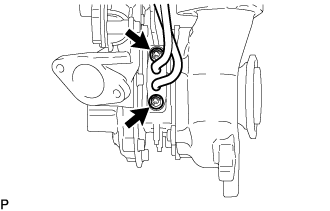
| 17. REMOVE COMPRESSOR INLET ELBOW |
Remove the 2 nuts and compressor inlet elbow from turbocharger sub-assembly.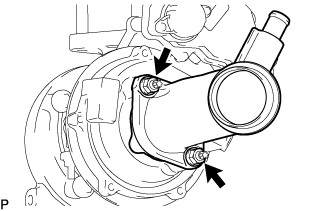
Remove the gasket.
| 18. REMOVE COMPRESSOR OUTLET ELBOW |
Remove the 2 nuts and compressor outlet elbow.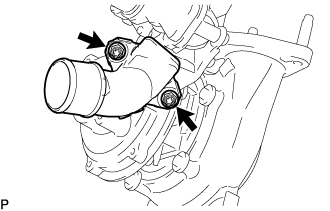
Remove the gasket.
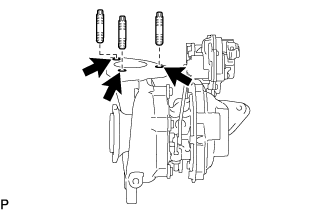
| 19. REMOVE STUD BOLT |
- NOTICE:
- If a stud bolt is deformed or its threads are damaged, replace it.
Using an E5 "TORX" socket wrench, remove the 4 stud bolts shown in the illustration.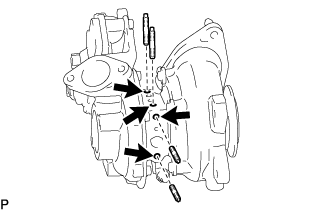
Using an E8 "TORX" socket wrench, remove the 4 stud bolts shown in the illustration.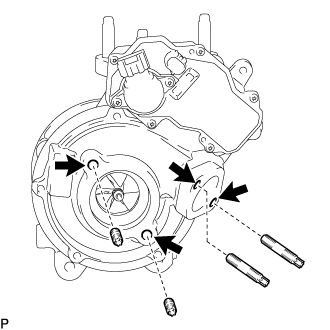
Using an E10 "TORX" socket wrench, remove the 3 stud bolts shown in the illustration.