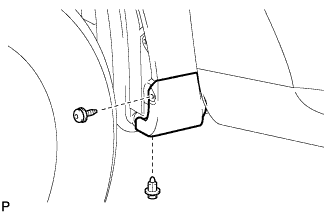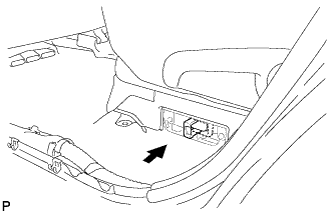
Home › BRAKE › BRAKE CONTROL › FRONT SPEED SENSOR

FRONT SPEED SENSOR > INSTALLATION

for Preparation Click here


HINT:
  1. Use the same procedure for the LH side and RH side.
  2. The following procedure is for the LH side.
  3. If the sensor rotor needs to be replaced, replace it together with the front drive outboard joint shaft assembly (Click here).


1. INSTALL FRONT SPEED SENSOR


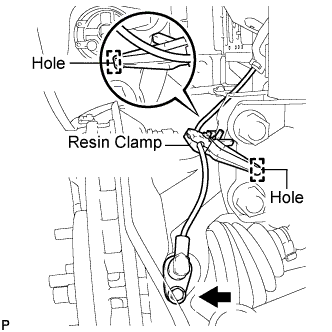
    C165819E01
  1. Install the resin clamp and the front speed sensor with the bolt.

    Torque:
    8.0 N*m{ 82 kgf*cm , 71 in.*lbf }

    NOTICE:
    1. Prevent foreign matter from attaching to the front speed sensor tip.
    2. Firmly insert the front speed sensor body into the knuckle before tightening the bolt.
    3. After installing the front speed sensor to the knuckle, make sure that there is no clearance between the front speed sensor stay and knuckle. Also make sure that no foreign matter is stuck between the parts.
    4. Before installing the clamp, firmly insert the points of the clamp into the installation holes.
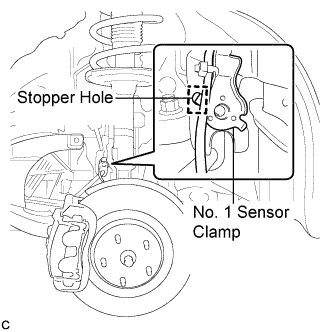


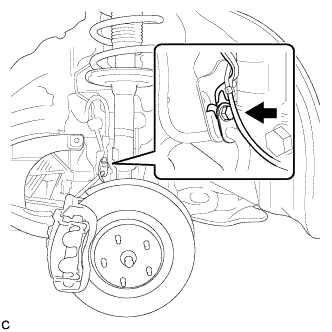
    C165807E01
  1. Temporarily install the No. 1 sensor clamp.

    NOTICE:
    Be sure to insert the No. 1 sensor clamp claw into the stopper hole while installing the No. 1 sensor clamp.


    C165806E02
  1. Install the front flexible hose and the No. 1 sensor clamp as a set to the shock absorber with the bolt.

    Torque:
    19 N*m{ 194 kgf*cm , 14 ft.*lbf }

    NOTICE:
    1. Do not twist the front speed sensor wire harness during installation.
    2. The bolt tightens the brake flexible hose and front speed sensor together. Make sure that the flexible hose is positioned over the front speed sensor.


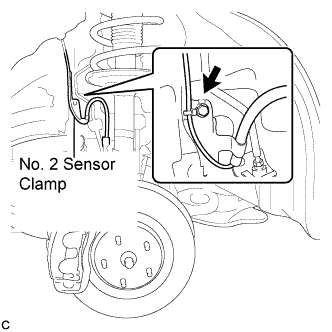
    C165805E02
  1. Install the No. 2 sensor clamp to the body with the bolt.

    Torque:
    5.0 N*m{ 51 kgf*cm , 44 in.*lbf }


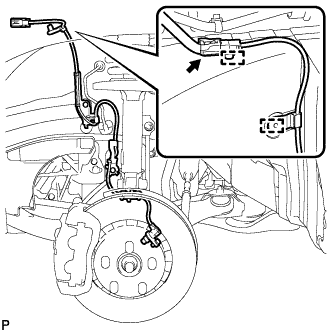
    C165817
  1. Install the 2 clamps and connect the front speed sensor connector.


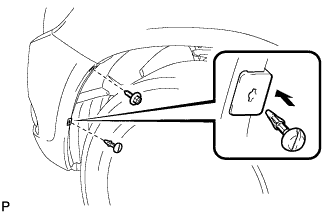
2. INSTALL FRONT FENDER LINER


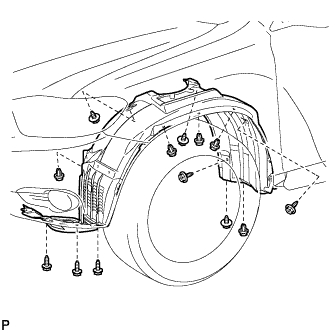
    B174751
  1. Install the front fender liner LH with the 5 clips and 8 screws.


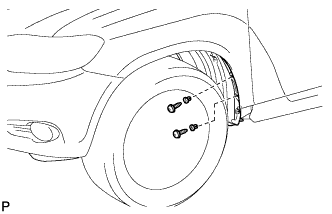
    B174749
  1. Install 2 new grommets.

  1. Using a 4 mm hexagon wrench, install the 2 screws.


    B175997
  1. Install the screw and pin hold clip.

    Torque:
    3.0 N*m{ 31 kgf*cm , 27 in.*lbf }


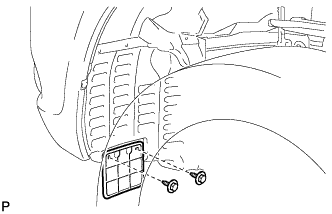
3. INSTALL FRONT WHEEL OPENING EXTENSION PAD


    B174748
  1. Install the front wheel opening extension pad with the 2 screws.


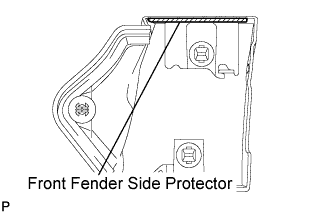
4. INSTALL FRONT FENDER MOULDING SUB-ASSEMBLY LH
  1. Clean the vehicle body surface.

    1. Using a heat light, heat the vehicle body surface.

    2. Remove the front fender side protector from the vehicle body.

    3. Wipe off any tape adhesive residue with cleaner.


    B172797E01
  1. Clean the front fender moulding sub-assembly. (If reusing the front fender moulding sub-assembly)

    1. Using a heat light, heat the front fender moulding sub-assembly.

    2. Remove the front fender side protector from the front fender moulding sub-assembly.

    3. Wipe off any tape adhesive residue with cleaner.

    4. Install a new front fender side protector to the the front fender moulding sub-assembly.

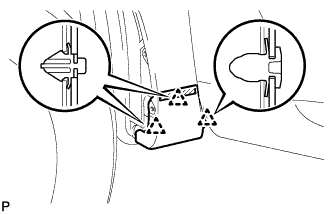
  1. Install 2 new No. 4 clips on the front fender moulding sub-assembly.

  1. Install a new pad on the front fender moulding sub-assembly.


    B172796
  1. Install the front fender moulding sub-assembly.

    1. Using a heat light, heat the vehicle body and the front fender moulding sub-assembly.

    2. Remove the release paper from the front fender moulding sub-assembly.

      HINT:
      After removing the release paper, keep the exposed adhesive free from foreign matter.

    3. Engage the 3 clips and install the front fender moulding sub-assembly.


    B172795
  1. Using a 4 mm hexagon wrench, install the screw.

  1. Install the clip.


5. INSTALL NO. 1 ENGINE UNDER COVER


6. INSTALL FRONT WHEEL

Torque:
103 N*m{ 1050 kgf*cm , 76 ft.*lbf }


7. INSTALL SERVICE PLUG GRIP

NOTICE:
Before connecting the service plug, check that no parts and tools remain and that the high voltage terminals and connectors are connected securely.


    A176049
  1. Wear insulated gloves, then insert the service plug.

  1. Push down on the grip to lock.


    A175635
  1. Close the reclining hinge cover.

    NOTICE:
    Check that the 2 clips are securely connected to the battery carrier bracket (click sound).


    A175634
  1. Close the rear door scuff plate LH.

    NOTICE:
    Check that the 5 clips are securely connected to the battery carrier bracket (click sound).


8. CONNECT CABLE TO NEGATIVE BATTERY TERMINAL

NOTICE:
When disconnecting the cable, some systems need to be initialized after the cable is reconnected (Click here).


9. CHECK FOR SPEED SENSOR SIGNAL

HINT:
(Click here)