A25A-FXS, A25B-FXS FUEL FUEL PUMP(for High Pressure) REMOVAL
CAUTION / NOTICE / HINT
The necessary procedures (adjustment, calibration, initialization or registration) that must be performed after parts are removed and installed, or replaced during fuel pump assembly removal/installation are shown below.
| Replaced Part or Performed Procedure | Necessary Procedure | Effect/Inoperative Function when Necessary Procedure not Performed | Link |
|---|---|---|---|
|
*1: Learning can also be performed using the GTS. Click here( |
|||
| Auxiliary battery terminal is disconnected/reconnected | Perform steering sensor zero point calibration | Lane Control System | ( ) |
| Parking Support Brake System*1 | |||
| Pre-collision System | |||
| Memorize steering angle neutral point | Parking Assist Monitor System | ()
|
|
| Panoramic View Monitor System | ()
|
||
| Initialize back door lock | Power Door Lock Control System | ()
|
|
| Reset back door close position | Power Back Door System | ()
|
|
·
Replacement of fuel pump assembly ·
Replacement of throttle body with motor assembly ·
Cleaning the deposits from the throttle body with motor assembly |
Perform Inspection After Repair | ·
Poor idle, etc. ·
Engine start function, etc. |
()
|
- CAUTION:
- ·
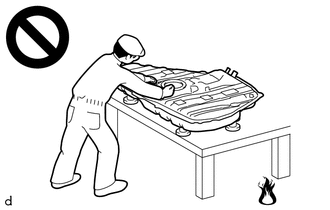
Never perform work on fuel system components near any possible ignition sources.
·Vaporized fuel could ignite, resulting in a serious accident.
·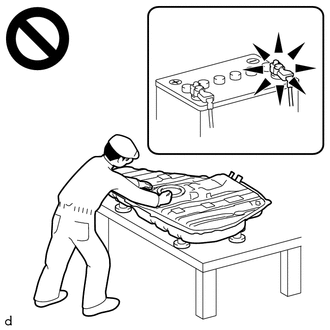
Do not perform work on fuel system components without first disconnecting the cable from the negative (-) auxiliary battery terminal.
·Sparks could cause vaporized fuel to ignite, resulting in a serious accident.
·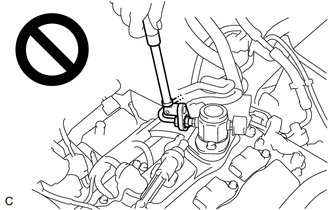
To prevent serious injury due to fuel spray from the high-pressure fuel lines, always discharge fuel system pressure before removing any fuel system components.
- NOTICE:
- ·
After the ignition switch is turned off, the radio and display receiver assembly or the radio receiver assembly records various types of memory and settings. As a result, after turning the ignition switch off, make sure to wait at least 120 seconds before disconnecting the cable from the negative (-) auxiliary battery terminal.
·This procedure includes the removal of small-head bolts. Refer to Small-Head Bolts of Basic Repair Hint to identify the small-head bolts.
Click hereGeneral>INTRODUCTION>REPAIR INSTRUCTION>PRECAUTION
PROCEDURE

 1. PRECAUTION
- NOTICE:
-
After turning the ignition switch off, waiting time may be required before disconnecting the cable from the negative (-) auxiliary battery terminal. Therefore, make sure to read the disconnecting the cable from the negative (-) auxiliary battery terminal notices before proceeding with work.
2. DISCHARGE FUEL SYSTEM PRESSURE
58441L
3.REMOVE BATTERY SERVICE HOLE COVER
4.DISCONNECT CABLE FROM NEGATIVE AUXILIARY BATTERY TERMINAL
22030
5.REMOVE THROTTLE BODY WITH MOTOR ASSEMBLY
23910A
6.DISCONNECT FUEL TUBE SUB-ASSEMBLY
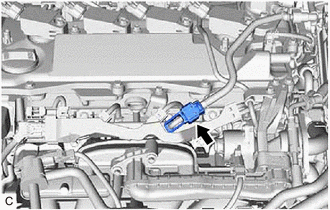
Remove the fuel pipe clamp from the fuel tube connector.
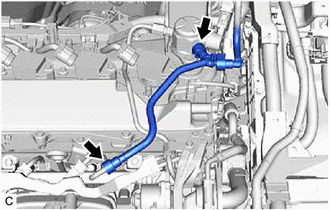
Disconnect the fuel tube sub-assembly from the fuel pump assembly and fuel delivery pipe sub-assembly.
Click hereEngine / Hybrid System>A25A-FXS, A25B-FXS (FUEL)>FUEL SYSTEM>PRECAUTION
16278
7.REMOVE NO. 2 WATER BY-PASS PIPE
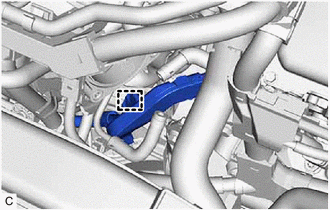
Disengage the clamp to disconnect the HV air conditioning wire.
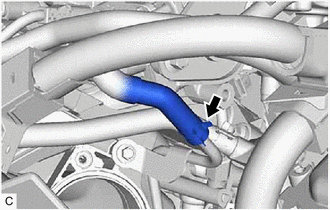
Slide the clip and disconnect the No. 8 water by-pass hose from the No. 2 water by-pass pipe.
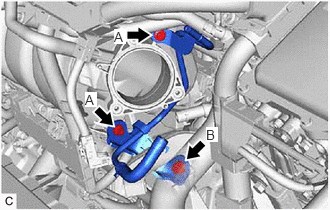
Using an 8 mm socket wrench, remove the 2 bolts (A) and separate the No. 2 water by-pass pipe from the intake manifold.
Remove the bolt (B) and No. 2 water by-pass pipe from the cylinder block sub-assembly.
23801P
8.REMOVE NO. 1 FUEL PIPE SUB-ASSEMBLY
- CAUTION:
-
To prevent serious injury due to fuel spray from the high-pressure fuel lines, always discharge fuel system pressure before removing any fuel system components.
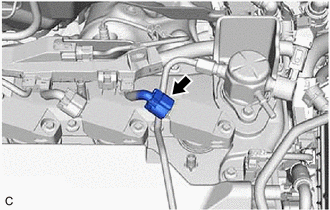
Disconnect the ignition coil connector.
for EGR Valve Bracket Connection Type:
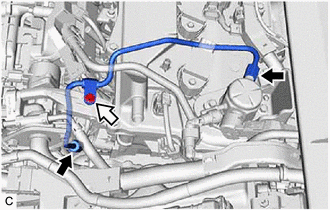

|
Union Nut |

|
Bolt |
Using a 17 mm union nut wrench, loosen the 2 union nuts of the No. 1 fuel pipe sub-assembly.
Using an 8 mm socket wrench, remove the bolt.
for Cylinder Head Cover Sub-assembly Connection Type:
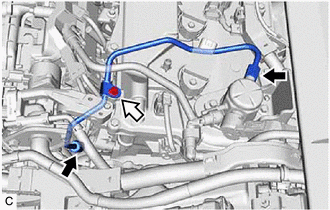
|
|
Union Nut |
|
|
Bolt |
Using a 17 mm union nut wrench, loosen the 2 union nuts of the No. 1 fuel pipe sub-assembly.
Using an 8 mm socket wrench, remove the bolt.
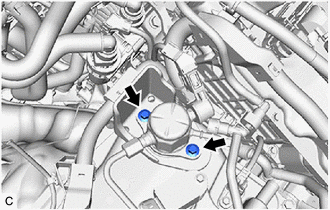
Loosen the 2 bolts of the fuel pump assembly.
Remove the No. 1 fuel pipe sub-assembly from the fuel delivery pipe and fuel pump assembly.
23100X
9.REMOVE FUEL (ENGINE ROOM SIDE) PUMP ASSEMBLY
- NOTICE:
-
When replacing the fuel pump assembly, it is necessary to replace the No. 1 fuel pipe sub-assembly with a new one.
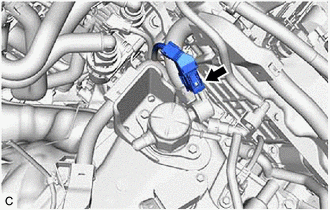
Disconnect the fuel pump assembly connector.
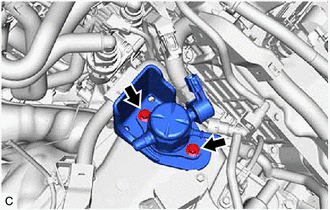
Remove the 2 bolts, fuel pump assembly and fuel pump flange from the No. 4 camshaft bearing cap.
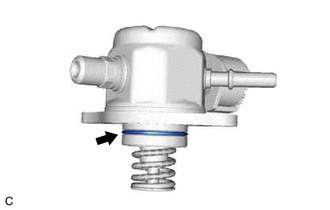
Remove the O-ring from the fuel pump assembly.
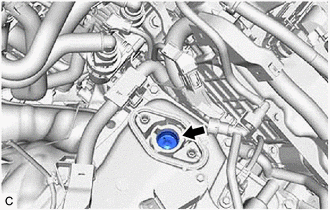
Remove the fuel pump lifter assembly from the fuel pump lifter guide.
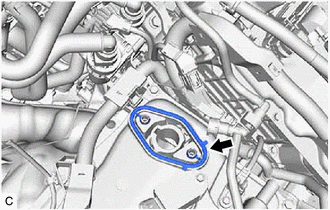
Remove the fuel pump spacer gasket from the cylinder head cover sub-assembly and No. 4 camshaft bearing cap.