DOOR / HATCH KICK SENSOR INSTALLATION
PROCEDURE

 891B2
1.INSTALL KICK DOOR CONTROL SENSOR
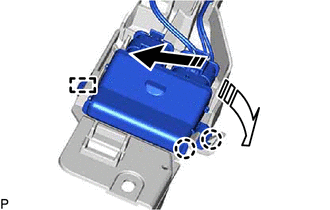

|
Install in this Direction (1) |

|
Install in this Direction (2) |
Engage the guide and 2 claws as shown in the illustration.
- NOTICE:
- ·
Do not subject the kick door control sensor to a strong impact or drop it.
·Do not reuse a kick door control sensor which has been subjected to a strong impact or dropped.
·Be careful not to pull the wire harness.
·Be careful not to twist the wire harness.
Engage the guide and 16 claws as shown in the illustration.
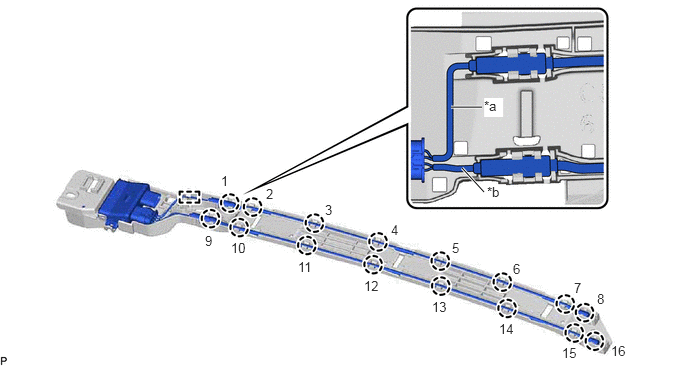
| *a | Wire (Red) | *b | Wire (Black) |
- NOTICE:
-
Fully insert the kick door control sensor into the kick door control bracket.
- HINT:
-
Engage each claw in the order shown in the illustration.
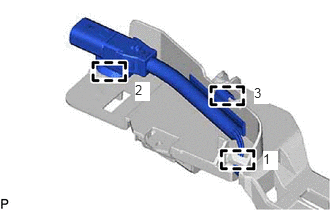
Engage the 3 clamps to install the kick door control sensor.
- HINT:
-
Engage each clamp in the order shown in the illustration.
2.INSTALL KICK DOOR CONTROL SENSOR WITH BRACKET
Engage the 4 guides as shown in the illustration.
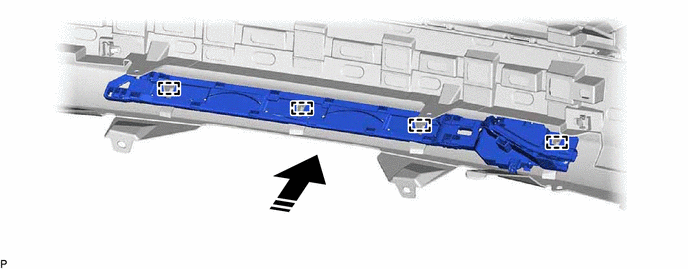
|
|
Install in this Direction | - | - |
Install the kick door control sensor with bracket with the 4 clips.
Connect the connector.
- NOTICE:
-
Do not touch the terminals of the kick door control sensor connector.
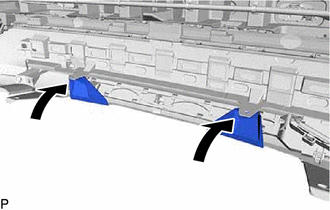
Install the rear bumper assembly to its original position as shown in the illustration.
Install the 2 clips.
3.INSTALL REAR BUMPER ASSEMBLY
4.CONNECT CABLE TO NEGATIVE AUXILIARY BATTERY TERMINAL
for 2GR-FKS:
Click hereGeneral>MAINTENANCE>2GR-FKS BATTERY>INSTALLATION
for A25A-FXS, A25B-FXS:
Click hereGeneral>MAINTENANCE>A25A-FXS, A25B-FXS AUXILIARY BATTERY>INSTALLATION
58441L
5.INSTALL BATTERY SERVICE HOLE COVER (for HV Model)
891B2
6.INSPECT KICK DOOR CONTROL SENSOR