Home › RESTRAINTS › SEAT BELT › FRONT SEAT OUTER BELT ASSEMBLY (for Power Seat)REMOVAL
Removal / installation · Vehicles built Aug 2012 – Jul 2013
Versions by build date: Jun 2011 – Jul 2012 Aug 2012 – Jul 2013 from Aug 2013
HINT:
Use the same procedures for the LH side and RH side.
The procedures listed below are for the LH side.
A bolt without a torque specification is shown in the standard bolt chart (Click here ).
1.
PRECAUTION
NOTICE:
After turning the ignition switch off, waiting time may be required before disconnecting the cable from the battery terminal. Therefore, make sure to read the disconnecting the cable from the battery terminal notice before proceeding with work (Click here ).
2.
DISCONNECT CABLE FROM NEGATIVE BATTERY TERMINAL
NOTICE:
When disconnecting the cable, some systems need to be initialized after the cable is reconnected (Click here ).
3.
REMOVE FRONT SEAT ASSEMBLY LH
Remove the front seat assembly LH (Click here )
4.
REMOVE FRONT SEAT ASSEMBLY RH
Remove the front seat assembly RH (Click here ).
5.
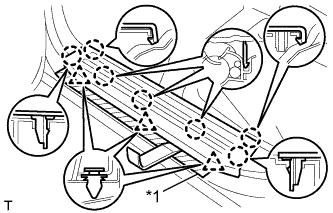
REMOVE FRONT DOOR SCUFF PLATE LH
Put protective tape around the front door scuff plate.
Text in Illustration
*1
Protective Tape
Using a moulding remover, detach the 7 claws and 3 clips, and remove the front door scuff plate.
6.
REMOVE FRONT DOOR OPENING TRIM LH
7.
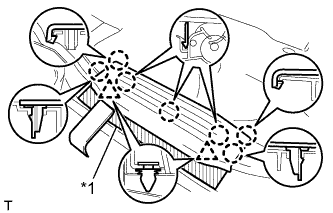
REMOVE REAR DOOR SCUFF PLATE LH
Put protective tape around the rear door scuff plate.
Text in Illustration
*1
Protective Tape
Using a moulding remover, detach the 7 claws and 2 clips, and remove the rear door scuff plate.
8.
REMOVE REAR DOOR OPENING TRIM WEATHERSTRIP LH
9.
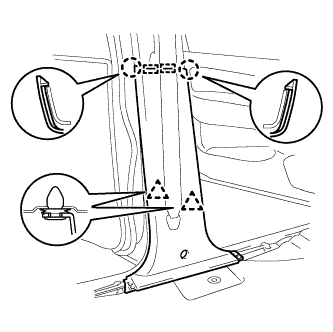
REMOVE CENTER PILLAR GARNISH LOWER LH
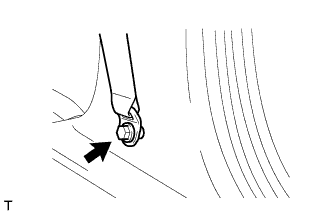
Remove the bolt and disconnect the front seat outer belt floor anchor.
Detach the 2 claws, 2 guides and 2 clips and remove the lower center pillar garnish.
10.
REMOVE FRONT SEAT OUTER BELT ASSEMBLY LH
Remove the outer belt shoulder anchor.
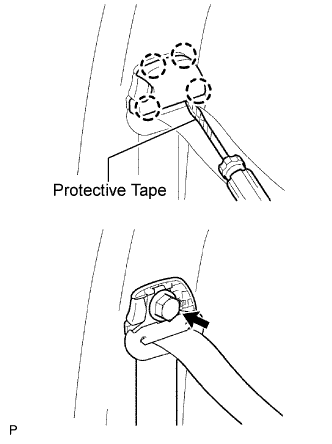
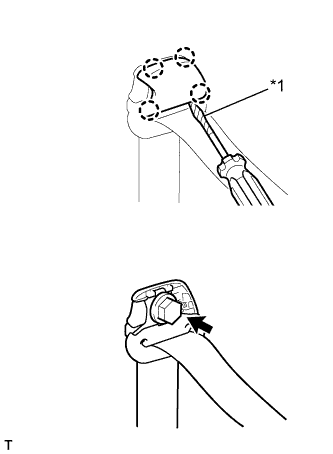
Using a screwdriver, detach the 4 claws and remove the seat belt anchor cover cap.
HINT:
Tape the screwdriver tip before use.
Remove the bolt and shoulder anchor.
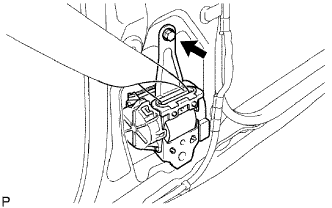
Remove the bolt and seat belt.
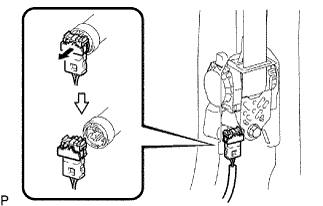
w/ Pretensioner:
Disconnect the pretensioner connector as shown in the illustration.
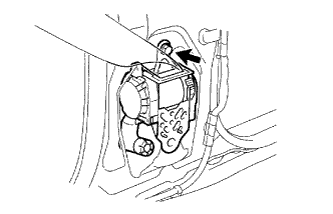
Remove the bolt and seat belt.
11.
REMOVE CENTER PILLAR GARNISH LH
Using a screwdriver, detach the 4 claws and remove the front seat belt shoulder anchor cover.
HINT:
Tape the screwdriver tip before use.
Text in Illustration
*1
Protective Tape
Remove the bolt and disconnect the front seat belt shoulder anchor.
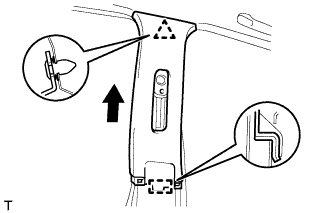
Detach the clip. Pull the center pillar garnish in the direction indicated by the arrow in the illustration to detach the guide and remove the center pillar garnish.
12.
REMOVE FRONT SHOULDER BELT ANCHOR ADJUSTER ASSEMBLY
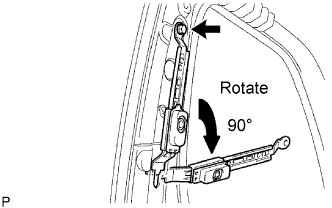
Remove the bolt.
Rotate the adjuster approximately 90° , and then pull and remove it.
13.
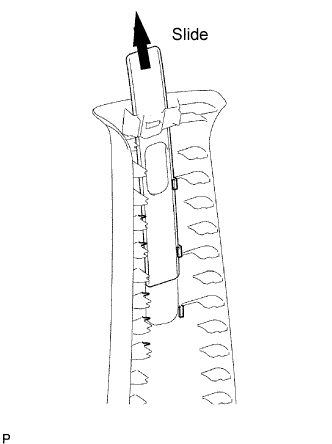
REMOVE SHOULDER BELT ANCHORAGE PLATE COVER
Remove the plate cover.