12.
REMOVE FRONT ASSIST GRIP SUB-ASSEMBLY (w/ Assist Grip)
HINT:
Use the same procedure for both front assist grip sub-assemblies.
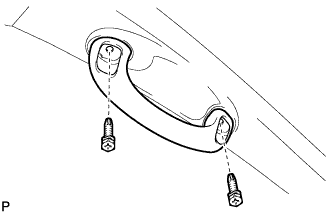
Remove the 2 screws and front assist grip sub-assembly.
13.
REMOVE FRONT PILLAR GARNISH LH
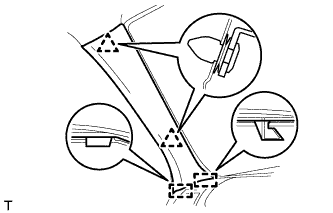
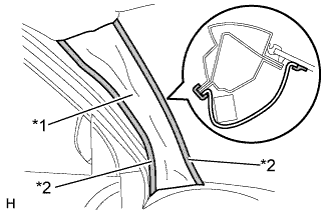
Detach the 2 clips and 2 guides and remove the front pillar garnish LH.
w/ Curtain Shield Airbag: Protect the curtain shield airbag assembly.
Thoroughly cover the airbag with a cloth or nylon sheet and fix the ends of the cover with adhesive tape as shown in the illustration.
NOTICE:
Cover the curtain shield airbag with a protective cover as soon as the front pillar garnish LH is removed.
Text in Illustration
*1
Protective Cover
*2
Adhesive Tape
14.
REMOVE FRONT PILLAR GARNISH RH
HINT:
Use the same procedure described for the LH side.
15.
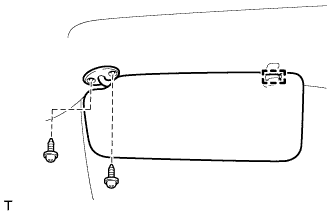
REMOVE VISOR ASSEMBLY LH
Detach the guide.
Remove the 2 screws and visor assembly LH.
16.
REMOVE VISOR ASSEMBLY RH
HINT:
Use the same procedure described for the LH side.
17.
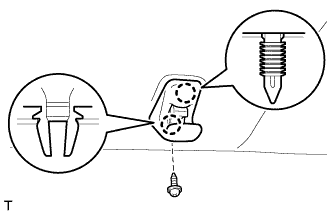
REMOVE VISOR HOLDER LH
Remove the screw.
Detach the 2 claws and remove the visor holder LH.
18.
REMOVE VISOR HOLDER RH
HINT:
Use the same procedure described for the LH side.
19.
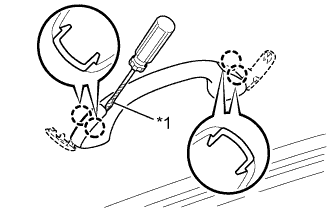
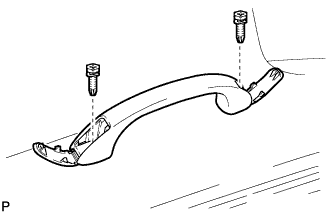
REMOVE ASSIST GRIP (w/ Assist Grip)
HINT:
Use the same procedure for all assist grips.
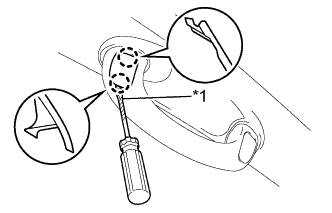
Using a screwdriver, detach the 4 claws and open the 2 covers.
HINT:
Tape the screwdriver tip before use.
Text in Illustration
*1
Tape
Remove the 2 screws and assist grip.
20.
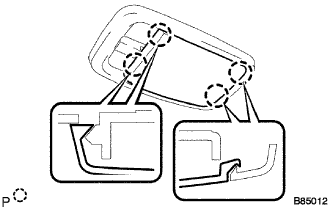
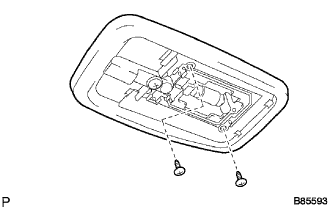
REMOVE NO. 1 ROOM LIGHT ASSEMBLY
Using a screwdriver, detach the 4 claws and remove the lens.
HINT:
Tape the screwdriver tip before use.
Remove the 2 screws and room light.
Disconnect the lamp connector.
21.
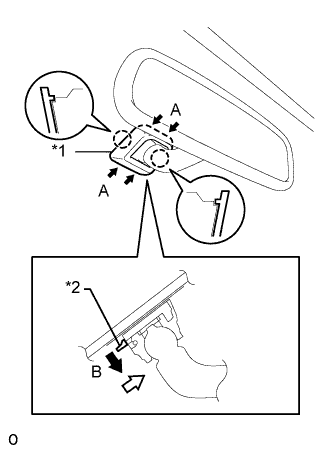
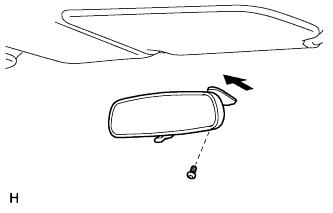
REMOVE INNER REAR VIEW MIRROR ASSEMBLY
w/o Screw:
Push the cover in the direction indicated by the arrows labeled A and remove it.
While holding down the claw in the direction of the black arrow labeled B, slide the inner rear view mirror assembly in the direction of the white arrow and remove it.
Text in Illustration
*1
Cover
*2
Claw
w/ Screw:
Using a T20 "TORX" socket wrench, remove the screw.
Slide the inner rear view mirror assembly in the direction of the arrow and remove it.
22.
REMOVE ROOF HEADLINING ASSEMBLY
HINT:
It is not necessary to completely remove the roof headlining. Slightly lower the front section of the roof headlining.