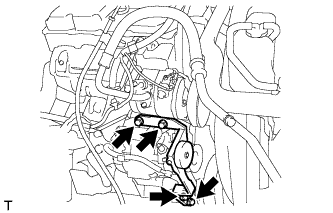
Remove the 3 bolts and disconnect the cooler compressor.
HINT:
It is not necessary to completely remove the cooler compressor. With the hoses connected to the compressor, hang the compressor on the vehicle body with a rope.
5.
REMOVE NO. 1 COMPRESSOR MOUNTING BRACKET
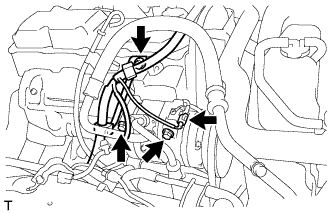
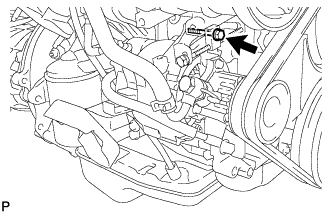
Remove the bolt and disconnect the generator.
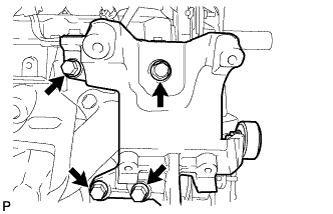
Remove the 4 bolts and No. 1 compressor mounting bracket.
6.
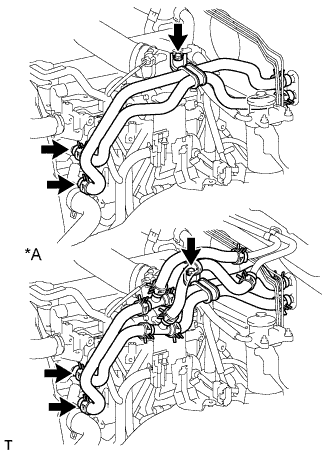
DISCONNECT HEATER WATER HOSE SUB-ASSEMBLY
Remove the bolt and disconnect the heater water hoses.
Text in Illustration
*A
for Rear Heater
7.
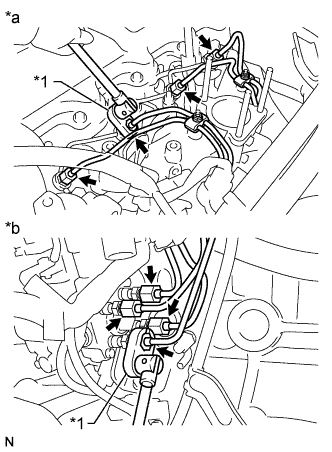
REMOVE INJECTION PIPE SET
Using a union nut wrench, loosen the 8 union nuts of the 4 injection pipes.
Text in Illustration
*1
Union Nut Wrench
*a
for Injection Nozzle Side
*b
for Injection Pump Side
Remove the 2 nuts, 2 upper pipe clamps and 4 injection pipes with 2 lower pipe clamps.
8.
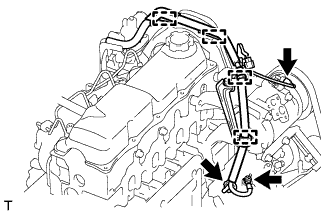
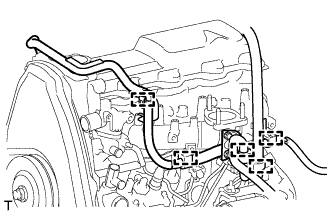
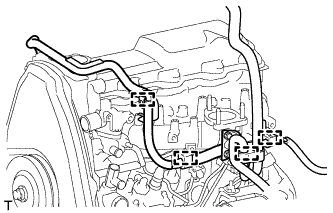
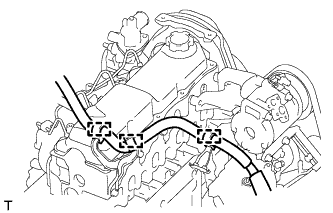
DISCONNECT WIRE HARNESS
Remove the terminal cap.
Remove the nut and generator wire.
Disconnect the generator connector and cooler compressor connector.
Detach the 4 wire harness clamps.
for RHD:
Detach the 5 wire harness clamps.
for LHD:
Detach the 4 wire harness clamps.
Detach the 3 wire harness clamps.
9.
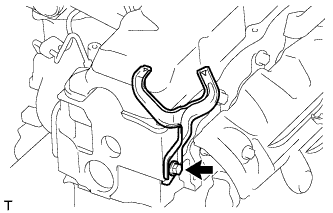
REMOVE WIRING HARNESS CLAMP BRACKET (for LHD)
Remove the bolt and wiring harness clamp bracket.
10.
REMOVE CYLINDER HEAD COVER SUB-ASSEMBLY
Remove the 9 bolts, nut, cylinder head cover and gasket.
11.
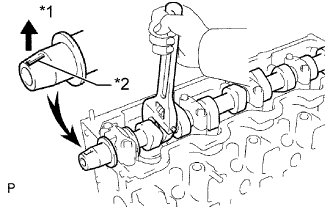
REMOVE CAMSHAFT
Turn the camshaft with a wrench so that the key groove faces upward.
Text in Illustration
*1
Upward
*2
Key Groove
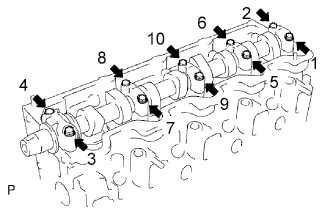
Uniformly loosen and remove the 10 bearing cap bolts in several steps in the sequence shown in the illustration.
Remove the 5 bearing caps and camshaft.
HINT:
Arrange the bearing caps in the correct order.
12.
REMOVE CYLINDER HEAD SUB-ASSEMBLY
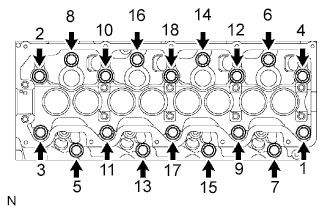
Uniformly loosen and remove the 18 cylinder head bolts in several steps in the sequence shown.
NOTICE:
Head warpage or cracking could result from removing bolts in an incorrect order.
Lift the cylinder head from the dowels on the cylinder block to remove it, and place the cylinder head on wooden blocks on a workbench.
NOTICE:
Do not damage the contact surfaces of the cylinder head and cylinder block.
HINT:
If the cylinder head is difficult to lift off, pry between the cylinder head and block with a screwdriver.
13.
INSPECT CYLINDER HEAD SET BOLT
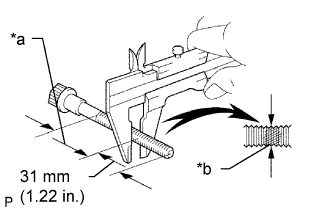
Using a vernier caliper, measure the minimum outer diameter of the elongated thread at the measuring point.
Standard outer diameter:
11.80 to 12.00 mm (0.465 to 0.472 in.)
Minimum outer diameter:
11.60 mm (0.457 in.)
Text in Illustration
*a
Measuring Point
*b
Elongated Thread
If the diameter is less than the minimum, replace the cylinder head set bolt.