2013-2015 Land Cruiser Prado · Service Manual Engine / Hybrid System

REMOVAL

Removal / installation · Vehicles built from Aug 2014

Versions by build date: Aug 2013 – Jul 2014 from Aug 2014


1. DISCONNECT CABLE FROM NEGATIVE BATTERY TERMINAL (for Cold Area Specification Vehicles)

NOTICE:
  1. After turning the ignition switch off, waiting time may be required before disconnecting the cable from the battery terminal. Therefore, make sure to read the disconnecting the cable from the battery terminal notice before proceeding with work (Click here).
  2. When disconnecting the cable, some systems need to be initialized after the cable is reconnected (Click here).


2. REMOVE UPPER RADIATOR SUPPORT SEAL
  1. Remove the 13 clips and upper radiator support seal.


3. REMOVE FRONT BUMPER LOWER COVER
  1. Remove the clip, 5 bolts and front bumper lower cover.


4. REMOVE NO. 1 ENGINE UNDER COVER SUB-ASSEMBLY
  1. Remove the 4 bolts and No. 1 engine under cover.


5. DRAIN ENGINE COOLANT

CAUTION:
Do not remove the radiator cap while the engine and radiator are still hot. Pressurized, hot engine coolant and steam may be released and cause serious burns.

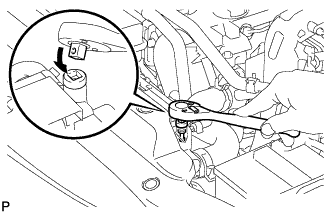
  1. Loosen the radiator drain cock plug.

    HINT:
    Collect the coolant in a container and dispose of it according to the regulations in your area.

  1. A218364
    Drain the coolant by removing the reservoir cap and, using a wrench, remove the vent plug.

  1. Loosen the cylinder block drain cock plug.

    A218365E01

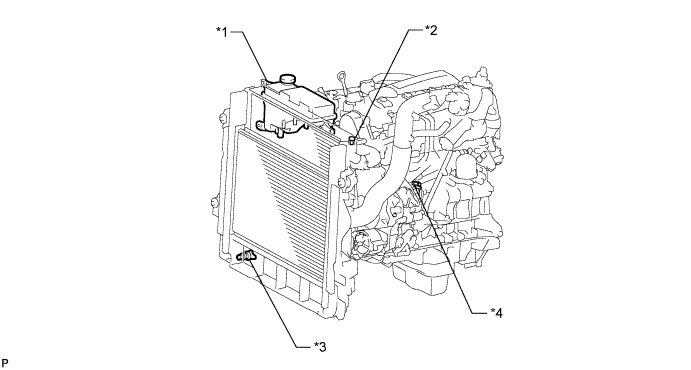
    Text in Illustration 
    *1
    Radiator Reservoir
    *2
    Vent Plug
    *3
    Radiator Drain Cock Plug
    *4
    Cylinder Block Drain Cock Plug


6. REMOVE FRONT BUMPER COVER
(Click here)

7. REMOVE FRONT BUMPER UPPER RETAINER

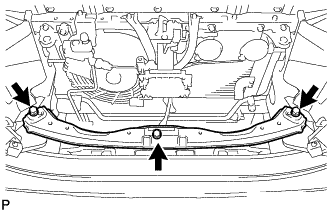
  1. A308006
    Remove the 3 bolts and front bumper upper retainer.


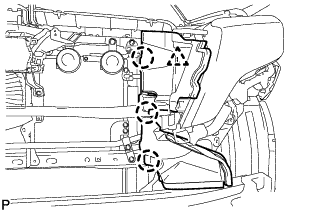
8. REMOVE RADIATOR SIDE DEFLECTOR RH

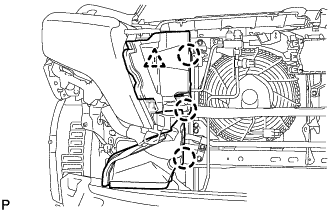
  1. A308007
    Using a clip remover, detach the 3 claws and remove the clip. Then move the radiator side deflector RH so that the radiator can be removed in the step below.


9. REMOVE RADIATOR SIDE DEFLECTOR LH

  1. A308731
    Using a clip remover, detach the 3 claws and remove the clip. Then move the radiator side deflector LH so that the radiator can be removed in the step below.


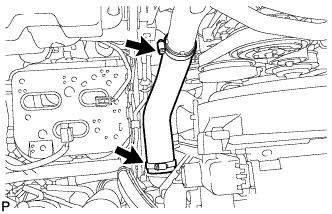
10. REMOVE NO. 1 AIR HOSE

  1. A218373
    Loosen the 2 clamps.

  1. Remove the No. 1 air hose from the inlet pipe and intercooler.


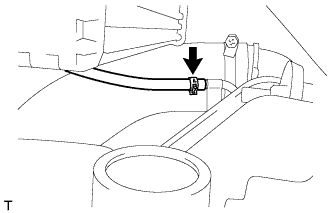
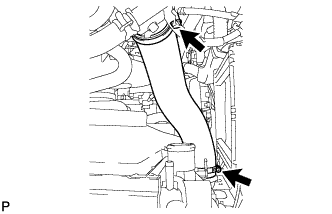
11. REMOVE INTERCOOLER AIR HOSE

  1. A224948
    Disconnect the No. 2 vacuum transmitting hose from the intercooler.

  1. A218374
    Loosen the 2 clamps.

  1. Remove the intercooler hose from the intake pipe and intercooler.


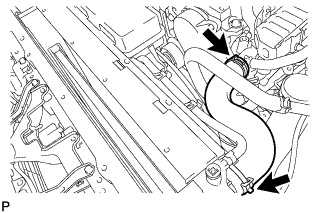
12. REMOVE NO. 1 RADIATOR HOSE

A218372

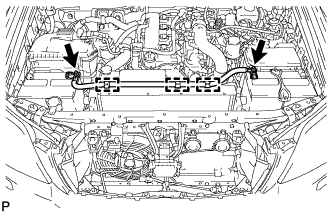
13. REMOVE NO. 3 ENGINE WIRE (for Cold Area Specification Vehicles)

  1. A218418
    Remove the 2 nuts from the battery terminal.

  1. Detach the 3 wire harness clamps.

  1. Remove the No. 3 engine wire from the fan shroud.


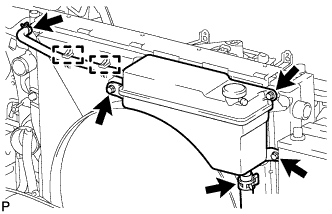
14. REMOVE FAN SHROUD

  1. A218371
    Disconnect the No. 1 water by-pass hose and detach the 2 clamps from the fan shroud.

  1. Disconnect the No. 2 water by-pass hose from the radiator reservoir.

  1. Remove the 3 bolts and radiator reservoir.

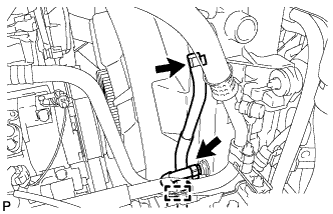
  1. for Automatic Transmission:

    1. Remove the inlet and outlet oil cooler hoses and detach the clamp from the fan shroud.

    2. A218382
      Disconnect the 2 oil cooler hoses from the radiator.

  1. A224959
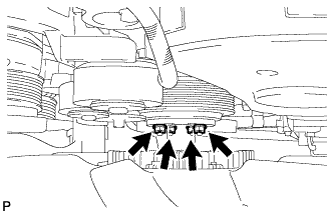
    Loosen the 4 nuts holding the fluid coupling and fan.

  1. Remove the fan and generator V belt (Click here).

  1. A218369
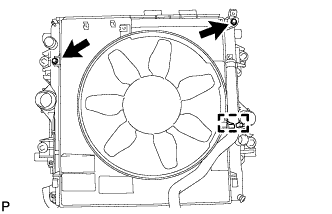
    Remove the 2 bolts holding the fan shroud.

  1. Remove the 4 nuts for the fan with fluid coupling fan, and then remove the shroud together with the coupling fan.

    NOTICE:
    Be careful not to damage the radiator core.

  1. Detach the No. 2 water by-pass hose from the hose clamp on the fan shroud.

  1. A224943
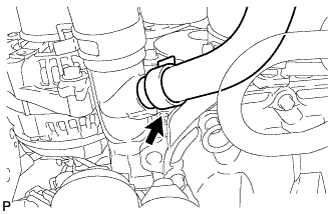
    Remove the No. 2 water by-pass hose from the water inlet.

  1. Remove the fan pulley from the water pump.


15. DISCONNECT NO. 2 RADIATOR HOSE

  1. A218378
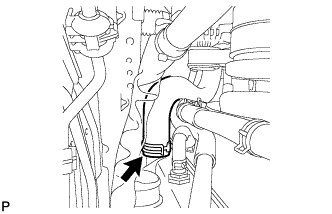
    Slide the clamp and disconnect the No. 2 radiator hose.


16. REMOVE RADIATOR ASSEMBLY WITH INTERCOOLER ASSEMBLY

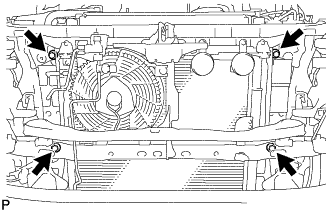
  1. A308732
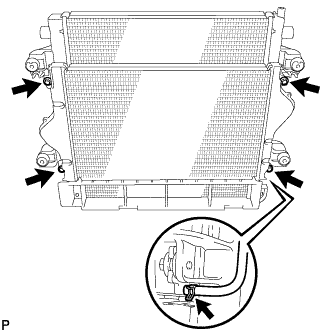
    Remove the 4 bolts and radiator assembly with intercooler assembly from the radiator support.

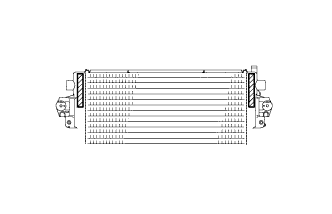
  1. A224941
    Remove the 2 No. 1 radiator support seals from the radiator assembly.


17. REMOVE NO. 1 RADIATOR AIR GUIDE

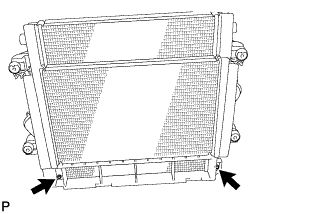
  1. A218376
    Remove the 2 bolts and the No. 1 radiator air guide from the radiator assembly with intercooler assembly.

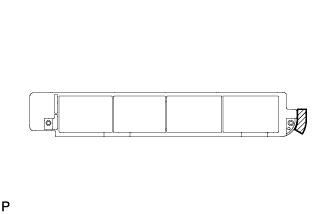
  1. A224942
    Remove the No. 3 radiator support seal from the No. 1 radiator air guide.


18. REMOVE NO. 2 RADIATOR TO SUPPORT SEAL

  1. A224940
    Remove the 2 No. 2 radiator to support seals from the intercooler.


19. REMOVE INTERCOOLER ASSEMBLY

  1. A218377
    Disconnect the vacuum hose from the intercooler.

  1. Remove the 4 bolts and intercooler from the radiator.


20. REMOVE VACUUM TRANSMITTING PIPE SUB-ASSEMBLY

  1. A218375
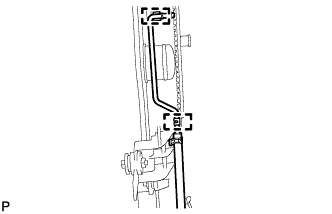
    Detach the 2 clamps and remove the vacuum transmitting pipe sub-assembly from the radiator assembly.


21. REMOVE NO. 1 RADIATOR SUPPORT
  1. Remove the 2 No. 1 radiator supports from the radiator assembly.


22. REMOVE NO. 2 RADIATOR SUPPORT
  1. Remove the 2 No. 2 radiator supports from the radiator assembly.


23. REMOVE NO. 1 RADIATOR SUPPORT BUSH
  1. Remove the 4 No. 1 radiator support bushes from the radiator assembly.

← REMOVAL (Aug 2013 – Jul 2014)INSTALLATION (Aug 2013 – Jul 2014) →