WIPER / WASHER WIPER AND WASHER SYSTEM Washer Nozzle Heater Circuit
DESCRIPTION
The main body ECU (multiplex network body ECU) receives ambient air temperature information from the air conditioning amplifier assembly via CAN communication.
The washer nozzle heater assembly controls the main body ECU (multiplex network body ECU) and operates the washer nozzle heater assembly according to the ambient temperature.
WIRING DIAGRAM
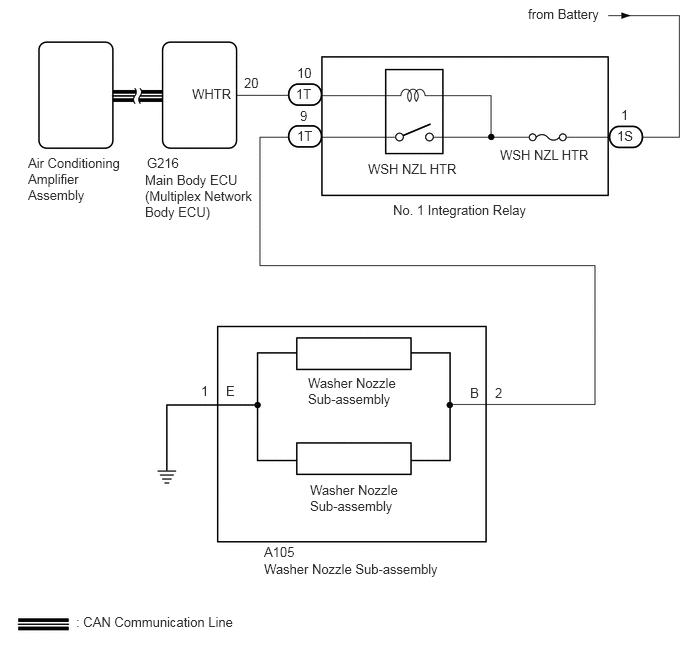
CAUTION / NOTICE / HINT
- NOTICE:
-
Inspect the fuses for circuits related to this system before performing the following inspection procedure.
PROCEDURE
Using the GTS, perform the Active Test.
Click hereVehicle Exterior>WIPER / WASHER>WIPER AND WASHER SYSTEM>DATA LIST / ACTIVE TEST
| Tester Display | Test Part | Control Range | Diagnostic Note |
|---|---|---|---|
| Washer Nozzle Heater | Washer nozzle heater operation | ON/OFF | - |
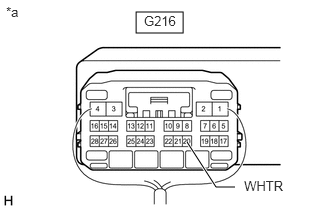
| *a | Componet with harness connected
Main Body ECU (Multiplex Network Body ECU) |
Measure the voltage according to the value(s) in the table below.
- Standard Voltage:
Tester Connection Switch Condition Specified Condition G216-20 (WHTR) - Body ground Ignition switch ON, Active Test is not performed 11 to 14 V Ignition switch ON, Active Test is performed Below 1 V
- Result:
Proceed to OK NG
OK
NG
Remove the washer nozzle sub-assembly.
Click hereVehicle Exterior>WIPER / WASHER>WASHER NOZZLE (for Front Side)>REMOVAL
Inspect the washer nozzle sub-assembly.
Click hereVehicle Exterior>WIPER / WASHER>WASHER NOZZLE (for Front Side)>INSPECTION
- Result:
Proceed to OK NG
OK
NG
Remove the No. 1 integration relay.
Click herePower Source / Network>POWER DISTRIBUTION>INTEGRATION RELAY>REMOVAL
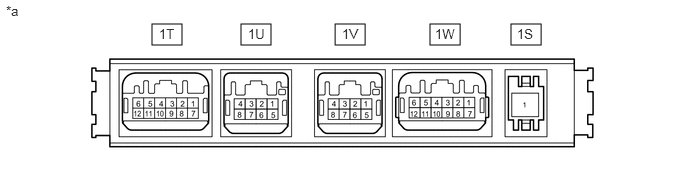
| *a | Component without harness connected
(No. 1 Integration Relay) |
- | - |
Measure the voltage according to the value(s) in the table below.
- Standard Voltage:
Tester Connection Condition Specified Condition 1T-9 - Battery negative (-) Battery not connected to 1S-1 and 1T-10 Below 1 V Battery positive (+) → 1S-1
Battery negative (-) → 1T-1011 to 14 V
- Result:
Proceed to OK NG
OK
NG
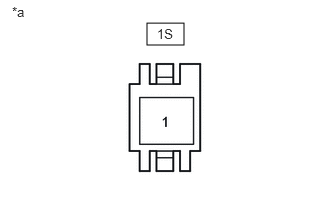
| *a | Front view of wire harness connector
(to No. 1 Integration Relay) |
Disconnect the No. 1 integration relay connector.
Measure the voltage according to the value(s) in the table below.
- Standard Voltage:
Tester Connection Condition Specified Condition 1S-1 - Body ground Always 11 to 14 V
- Result:
Proceed to OK NG
OK
NG
Disconnect the G216 main body ECU (multiplex network body ECU) connector.
Disconnect the 1T No. 1 integration relay connector.
Measure the resistance according to the value(s) in the table below.
- Standard Resistance:
Tester Connection Condition Specified Condition G216-20 (WHTR) - 1T-10 Always Below 1 Ω G216-20 (WHTR) - Body ground Always 10 kΩ or higher
- Result:
Proceed to OK NG
OK
NG
Remove the No. 1 integration relay.
Click herePower Source / Network>POWER DISTRIBUTION>INTEGRATION RELAY>REMOVAL
| *a | Component without harness connected
(No. 1 Integration Relay) |
- | - |
Measure the voltage according to the value(s) in the table below.
- Standard Voltage:
Tester Connection Condition Specified Condition 1T-9 - Battery negative (-) Battery not connected to 1S-1 and 1T-10 Below 1 V Battery positive (+) → 1S-1
Battery negative (-) → 1T-1011 to 14 V
- Result:
Proceed to OK NG
OK
NG