2TR-FE INTAKE / EXHAUST INTAKE MANIFOLD REMOVAL
CAUTION / NOTICE / HINT
The necessary procedures (adjustment, calibration, initialization, or registration) that must be performed after parts are removed, installed, or replaced during the fuel pressure regulator assembly removal/installation are shown below.
| Replaced Part or Performed Procedure | Necessary Procedure | Effect/Inoperative Function when Necessary Procedure not Performed | Link |
|---|---|---|---|
| Battery terminal is disconnected/reconnected | Correction of steering angle neutral point | Multi-terrain monitor system | ( ) |
- HINT:
-
When the cable is disconnected/reconnected to the battery terminal, systems temporarily stop operating. However, each system has a function that completes learning the first time the system is used.
- ·
Learning completes when vehicle is driven
Effect/Inoperative Function When Necessary Procedures are not Performed Necessary Procedures Link Lane departure alert system Drive the vehicle straight ahead at 40 km/h (25 mph) or more for 10 seconds or more. ( )
Pre-collision system Lighting system (EXT) (for LED Headlight) Vehicle stability control system (for Hydraulic brake booster) Drive the vehicle straight ahead at 40 km/h (25 mph) or more for at least 10 seconds. ( )
PROCEDURE

 1. PRECAUTION
- NOTICE:
-
After turning the ignition switch off, waiting time may be required before disconnecting the cable from the battery terminal.
-
Click hereGeneral>INTRODUCTION>REPAIR INSTRUCTION>PRECAUTION
2.DISCONNECT CABLE FROM NEGATIVE BATTERY TERMINAL
53737B
3.REMOVE FRONT FENDER APRON SEAL LH
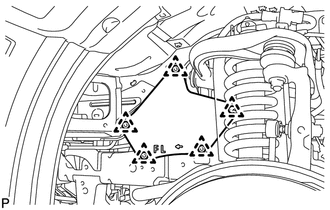
Remove the 5 clips and front fender apron seal LH.
53737A
4.REMOVE FRONT NO. 1 FENDER APRON TO FRAME SEAL LH
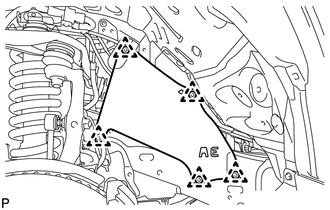
Remove the 5 clips and front No. 1 fender apron to frame seal LH.
28100
5.REMOVE STARTER ASSEMBLY
for 1.4 kW Type: (See page Engine / Hybrid System>2TR-FE (STARTING)>STARTER (for 1.4 kW Type)>REMOVAL)
for 2.0 kW Type: (See page Engine / Hybrid System>2TR-FE (STARTING)>STARTER (for 2.0 kW Type)>REMOVAL)
22030
6.REMOVE THROTTLE WITH MOTOR BODY ASSEMBLY
23250
7.REMOVE FUEL DELIVERY PIPE WITH FUEL INJECTOR
17650G
8.REMOVE PURGE VSV
17111
9.REMOVE INTAKE MANIFOLD
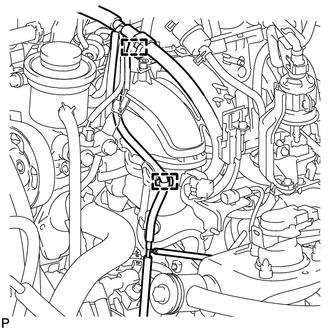
Detach the 2 wire harness clamps from the 2 wire harness clamp brackets.
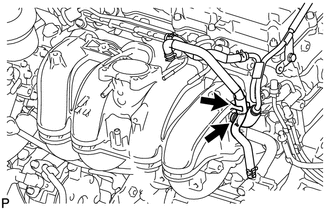
Detach the No. 2 water by-pass hose from the intake manifold.
Slide the clip and disconnect the No. 3 ventilation hose from the intake manifold.
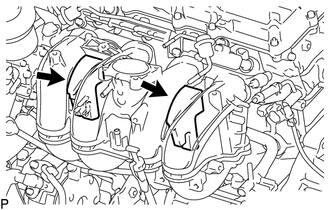
Remove the 2 No. 2 intake manifold insulators from the intake manifold.
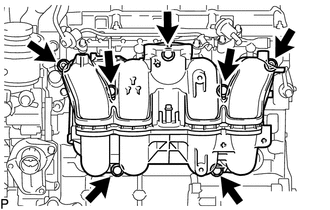
Remove the 5 bolts, 2 nuts and intake manifold.
Remove the gasket from the intake manifold.
Remove the intake manifold insulator from the intake manifold.
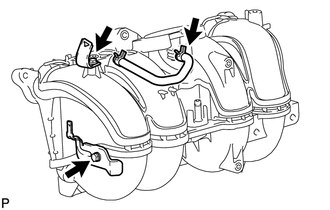
Remove the 2 bolts, 2 wire harness clamp brackets from the intake manifold.
Slide the clip and remove the purge line hose from the intake manifold.