1GR-FE LUBRICATION OIL PUMP REMOVAL
PROCEDURE

 1.REMOVE ENGINE ASSEMBLY
Remove the engine assembly (See page Engine / Hybrid System>1GR-FE (ENGINE MECHANICAL)>ENGINE ASSEMBLY>REMOVAL).
25701
2.REMOVE EMISSION CONTROL VALVE SET (w/ Secondary Air Injection System)
25702
3.REMOVE NO. 2 EMISSION CONTROL VALVE SET (w/ Secondary Air Injection System)
19500
4.REMOVE IGNITION COIL ASSEMBLY
11452
5.REMOVE ENGINE OIL LEVEL DIPSTICK GUIDE
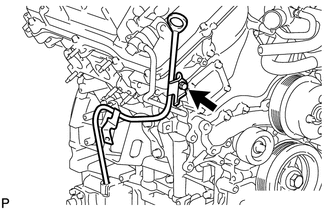
Remove the dipstick.
Remove the bolt and dipstick guide.
Remove the O-ring from the dipstick guide.
16206
6.REMOVE WATER BY-PASS PIPE SUB-ASSEMBLY (w/ Oil Cooler)
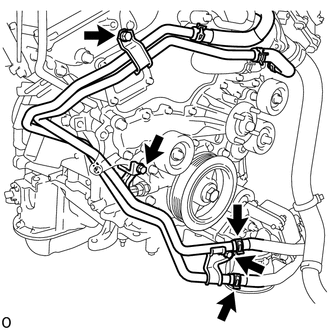
Disconnect the 2 hoses.
Remove the 3 bolts and water by-pass pipe.
16323
7.REMOVE WATER INLET HOUSING
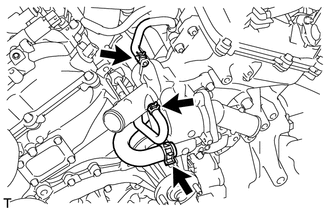
Disconnect the 3 water by-pass hoses.
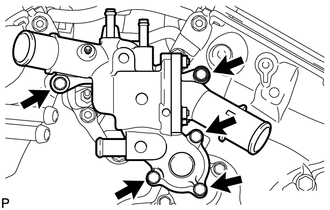
Remove the 5 bolts and water inlet housing.
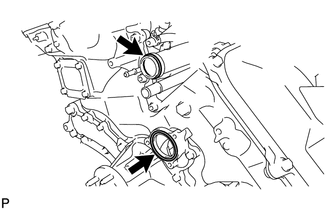
Remove the O-ring and gasket from the water outlet pipe and water pump.
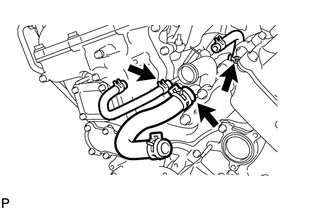
Remove the 3 water by-pass hoses.
16603A
8.REMOVE NO. 1 IDLER PULLEY SUB-ASSEMBLY
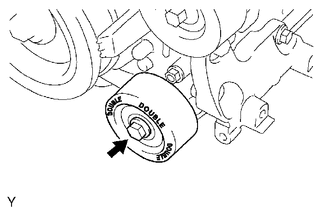
Remove the bolt and No. 1 idler pulley.
16604
9.REMOVE NO. 2 IDLER PULLEY SUB-ASSEMBLY
16620
10.REMOVE V-RIBBED BELT TENSIONER ASSEMBLY
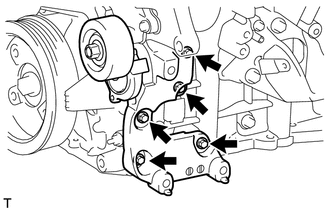
Remove the 5 bolts and V-ribbed belt tensioner.
15671
11.REMOVE OIL FILTER BRACKET
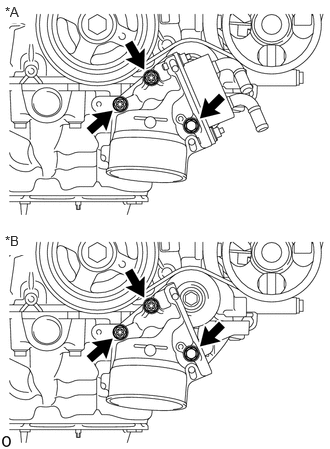
Remove the 2 nuts, bolt, oil filter bracket and gasket.
| *A | w/ Oil Cooler |
| *B | w/o Oil Cooler |
13471
12.REMOVE CRANKSHAFT PULLEY
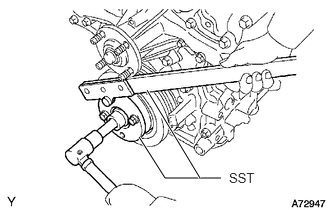
Using SST, hold the crankshaft pulley and loosen the pulley bolt. Continue to loosen the bolt until only 2 or 3 threads are screwed into the crankshaft.
- SST
- 09213-54015 (91651-60855)
09330-00021
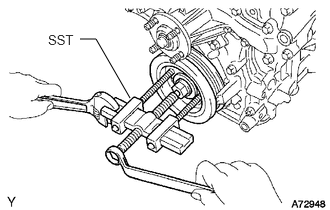
Using the pulley set bolt and SST, remove the crankshaft pulley and pulley bolt.
- SST
- 09950-50013 (09951-05010, 09952-05010, 09953-05020, 09954-05031)
15771
13.REMOVE NO. 1 OIL PIPE
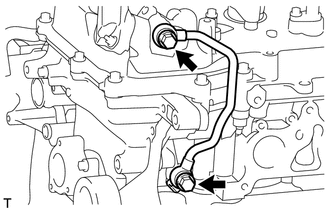
Remove the 2 oil pipe unions, oil control valve filter LH, 3 gaskets and No. 1 oil pipe.
- NOTICE:
-
Do not touch the mesh when removing the oil control valve filter.
15772
14.REMOVE NO. 2 OIL PIPE
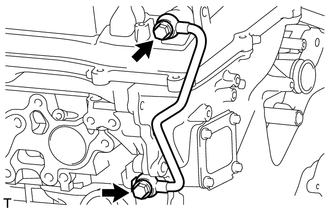
Remove the 2 oil pipe unions, oil control valve filter RH, 3 gaskets and No. 2 oil pipe.
- NOTICE:
-
Do not touch the mesh when removing the oil control valve filter.
11181A
15.REMOVE REAR CYLINDER HEAD COVER
16.DISCONNECT FUEL PIPE SUB-ASSEMBLY
Remove the 2 bolts and disconnect the fuel pipe.
11202
17.REMOVE CYLINDER HEAD COVER SUB-ASSEMBLY LH
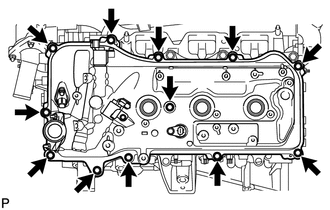
Remove the 12 bolts, seal washer, cylinder head cover and gasket.
- HINT:
-
Make sure the removed parts are returned to the same places they were removed from.
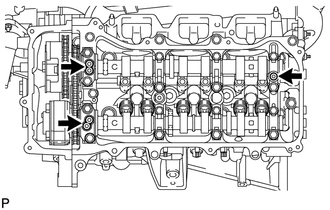
Remove the 3 gaskets.
11201
18.REMOVE CYLINDER HEAD COVER SUB-ASSEMBLY
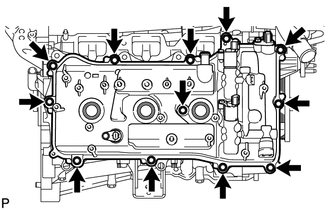
Remove the 12 bolts, seal washer, cylinder head cover and gasket.
- HINT:
-
Make sure the removed parts are returned to the same places they were removed from.
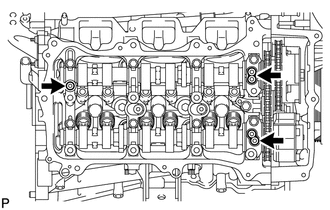
Remove the 3 gaskets.
12102A
19.REMOVE NO. 2 OIL PAN SUB-ASSEMBLY
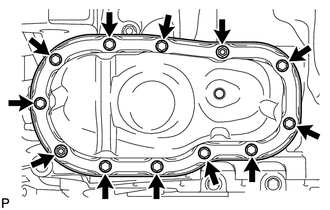
Remove the 10 bolts and 2 nuts.
- HINT:
-
Make sure the removed parts are returned to the same places they were removed from.
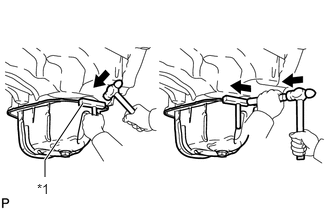
Insert the blade of an oil pan seal cutter between the oil pans. Cut through the applied sealer and remove the No. 2 oil pan.
| *1 | Oil Pan Seal Cutter |
- NOTICE:
-
Be careful not to damage the contact surfaces of the oil pans.
15104
20.REMOVE OIL STRAINER SUB-ASSEMBLY
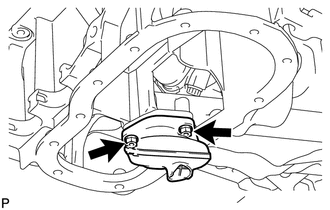
Remove the 2 nuts, oil strainer and gasket.
12101
21.REMOVE OIL PAN SUB-ASSEMBLY
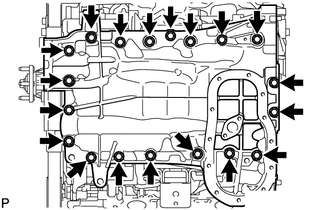
Remove the 17 bolts and 2 nuts.
- HINT:
-
Make sure the removed parts are returned to the same places they were removed from.
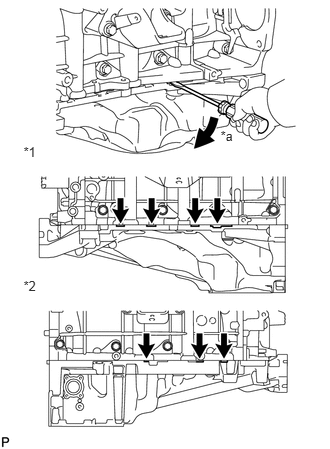
Using a screwdriver, remove the oil pan by prying between the oil pan and cylinder block as shown in the illustration.
| *1 | LH Side |
| *2 | RH Side |
| *a | Pry |
- HINT:
-
Tape the screwdriver tip before use.
- NOTICE:
-
Be careful not to damage the contact surfaces of the cylinder block and oil pan.
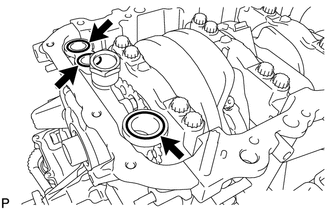
Remove the 3 O-rings from the timing chain cover.
11302
22.REMOVE TIMING CHAIN COVER SUB-ASSEMBLY
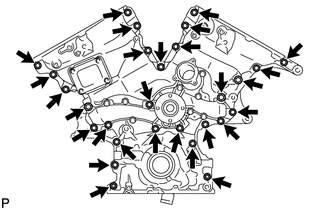
Remove the 26 bolts and the 2 nuts.
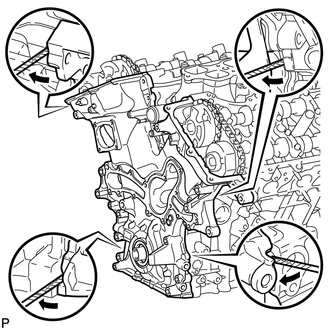
Remove the timing chain cover by prying between the timing chain cover and cylinder head or cylinder block with a screwdriver.
- HINT:
-
Tape the screwdriver tip before use.
- NOTICE:
-
Be careful not to damage the contact surfaces of the timing chain cover, cylinder block and cylinder head.
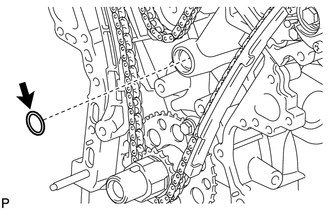
Remove the oil pump gasket from the cylinder block.
11301C
23.REMOVE FRONT CRANKSHAFT OIL SEAL
Using a screwdriver and wooden block, pry out the oil seal.
- HINT:
-
Tape the screwdriver tip before use.
- NOTICE:
-
Do not damage the surface of the oil seal press fit hole.