INSTALLATION
Removal / installation · Vehicles built from Jan 2012
Versions by build date: Sep 2011 – Dec 2011 from Jan 2012
| 1. INSTALL DECELERATION SENSOR (for Automatic Transmission) |

Connect the sensor connector, and then attach the clamp to the hole of the sensor bracket.
- NOTICE:
- Securely connect the connector.
Install the sensor with the 2 bolts.
- Torque:
- 15 N*m{ 148 kgf*cm , 11 ft.*lbf }
- NOTICE:
- Make sure that the sensor is oriented correctly.
- If the sensor is dropped, replace it.
- When installing the sensor, make sure to avoid impacts to the sensor.
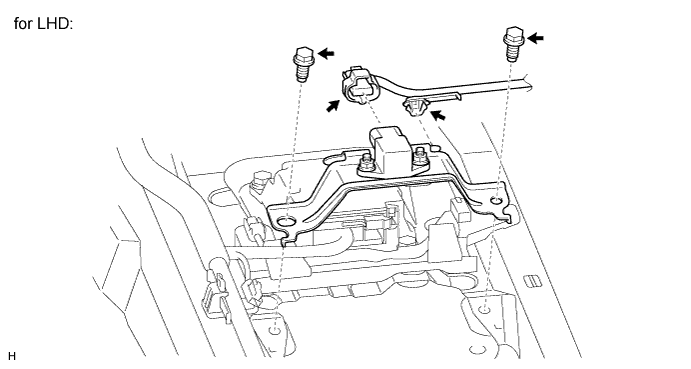

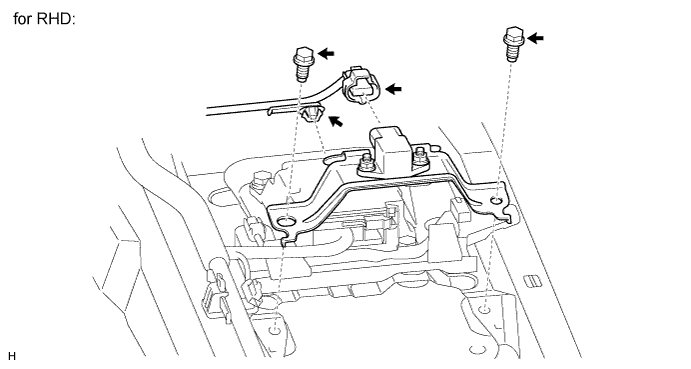
- Make sure that the sensor is oriented correctly.
| 2. INSTALL DECELERATION SENSOR (for Manual Transmission) |
Connect the sensor connector, and then attach the clamp to the hole of the sensor bracket.
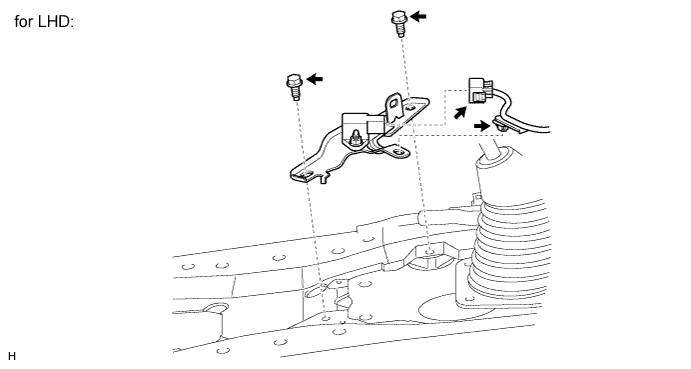
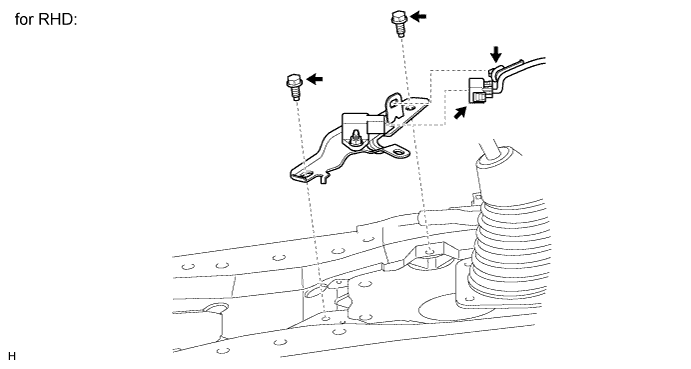
Install the sensor with the 2 bolts.
- Torque:
- 15 N*m{ 148 kgf*cm , 11 ft.*lbf }
- NOTICE:
- Make sure that the sensor is oriented correctly.
- If the sensor is dropped, replace it.
- Securely connect the connector.
- When installing the sensor, make sure to avoid impacts to the sensor.
- Make sure that the sensor is oriented correctly.
| 3. INSTALL LOWER CONSOLE BOX (w/o Console Box Lid) |
| 4. INSTALL COOLING BOX ASSEMBLY (w/ Cool Box) |
| 5. INSTALL REAR CONSOLE BOX SUB-ASSEMBLY (w/o Cool Box) |
| 6. CONNECT CABLE TO NEGATIVE BATTERY TERMINAL |
- NOTICE:
- When disconnecting the cable, some systems need to be initialized after the cable is reconnected (Click here).
| 7. PERFORM G SENSOR ZERO POINT CALIBRATION |
Perform the G sensor zero point calibration (Click here).
| 8. CHECK G SENSOR SIGNAL |
Check the G sensor signal (Click here).