Home › Vehicle Exterior › DOOR / HATCH › BACK DOORREASSEMBLY
Removal / installation · Vehicles built Sep 2011 – Dec 2011
Versions by build date: Sep 2011 – Dec 2011 from Jan 2012
1.
INSTALL TAIL GATE STAY SUB-ASSEMBLY LH
Clean the threaded surface on the vehicle body with a non-residue solvent.
Apply adhesive to the threads of the screws.
Adhesive:
Toyota Genuine Adhesive 1324, Three Bond 1324 or equivalent
Using a T40 "TORX" wrench, install the 2 screws and tail gate stay.
2.
INSTALL TAIL GATE STAY SUB-ASSEMBLY RH
HINT:
Use the same procedures described for the LH side.
3.
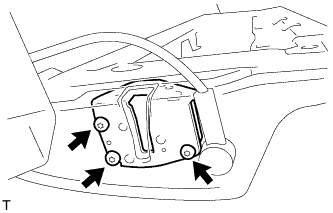
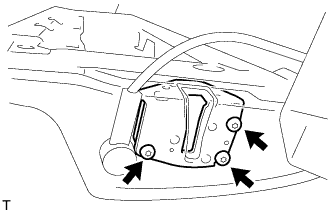
INSTALL LOWER TAIL GATE LOCK ASSEMBLY LH
Using a T30 "TORX" wrench, install the 3 screws and lower tail gate lock.
Torque:
5.0 N*m{
51 kgf*cm
, 44 in.*lbf
}
4.
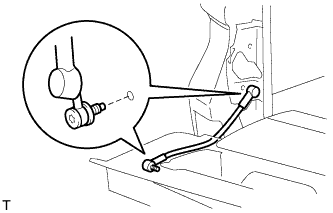
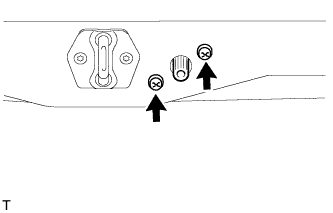
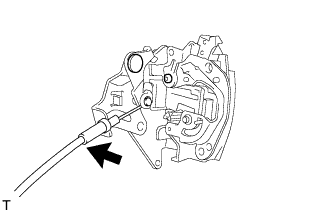
INSTALL BACK DOOR REMOTE CONTROL ASSEMBLY
Connect the left side cable.
Install the 2 screws.
Torque:
5.0 N*m{
51 kgf*cm
, 44 in.*lbf
}
5.
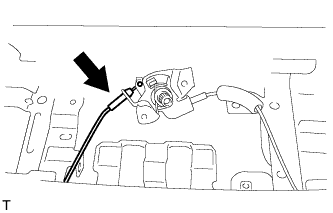
INSTALL LOWER TAIL GATE LOCK ASSEMBLY RH
Connect the cable to the lower tail gate lock.
Using a T30 "TORX" wrench, install the 3 screws and lower tail gate lock.
Torque:
5.0 N*m{
51 kgf*cm
, 44 in.*lbf
}
6.
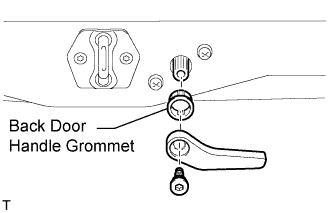
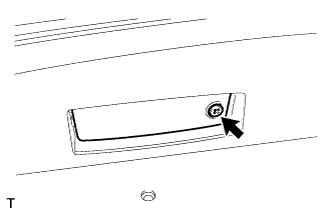
INSTALL BACK DOOR INSIDE HANDLE ASSEMBLY
Install the back door handle grommet.
Torque:
5.0 N*m{
51 kgf*cm
, 44 in.*lbf
}
Install the screw and back door inside handle.
7.
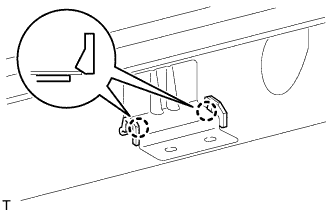
INSTALL BACK DOOR TORSION BAR GUIDE
Attach the 2 claws to install the back door torsion bar guide.
8.
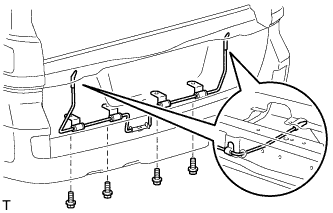
INSTALL LOWER BACK DOOR TORSION BAR ASSEMBLY
Install the 4 bolts and lower back door torsion bar.
Torque:
7.5 N*m{
76 kgf*cm
, 66 in.*lbf
}
10.
INSTALL REAR BUMPER COVER
for Standard:
Install the rear bumper cover (Click here ).
w/ Towing Hitch:
Install the rear bumper cover (Click here ).
w/ Pintle Hook:
Install the rear bumper cover (Click here ).
11.
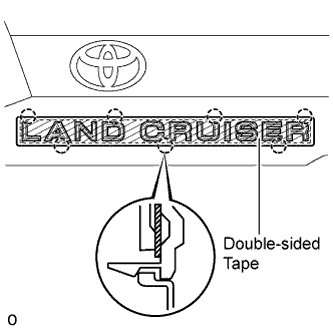
INSTALL REAR LICENSE LIGHT COVER (w/ Tire Carrier)
Clean the vehicle body surface.
Using a heat light, heat the vehicle body surface.
Remove the double-sided tape from the vehicle body.
Wipe off any tape adhesive residue with cleaner.
Install a new rear license light cover.
Using a heat light, heat the vehicle body and a new rear license light cover.
Remove the peeling paper from the face of the emblem.
HINT:
After removing the peeling paper, keep the exposed adhesive free from foreign matter.
Attach the 7 claws to install the rear license light cover.
HINT:
Press the rear license light cover firmly to install it.
12.
INSTALL LICENSE PLATE LIGHT ASSEMBLY (w/ Tire Carrier)
Install the 2 license plate lights with the 2 screws.
13.
INSTALL NO. 2 BACK DOOR GARNISH SUB-ASSEMBLY OUTSIDE (w/ Tire Carrier)
Pass the wire harness of the license plate light through the tail gate, and install the wire harness.
Attach the 7 clips to install the No. 2 back door garnish.
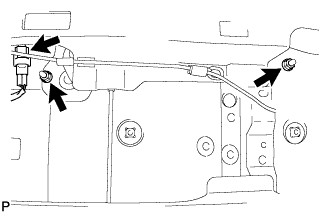
Install the 2 nuts and connect the connector.
14.
INSTALL BACK DOOR TRIM PANEL ASSEMBLY
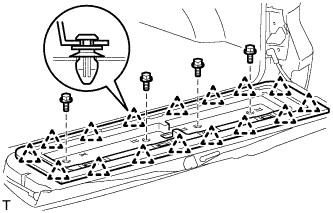
Attach the 16 clips to install the back door trim panel. Install the 4 bolts.
15.
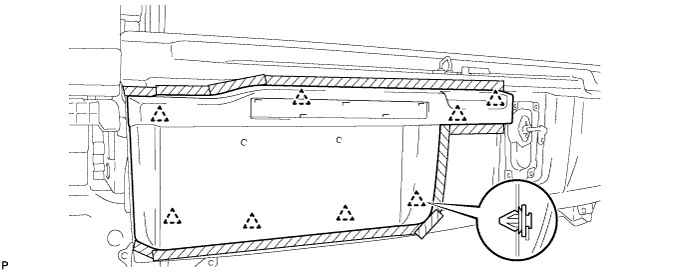
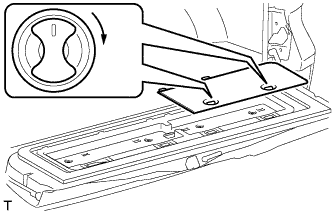
INSTALL BACK DOOR TRIM COVER RH
Install the back door trim cover RH as shown in the illustration.
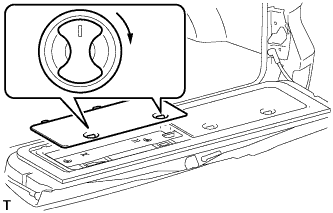
16.
INSTALL BACK DOOR TRIM COVER LH
Install the back door trim cover LH as shown in the illustration.
17.
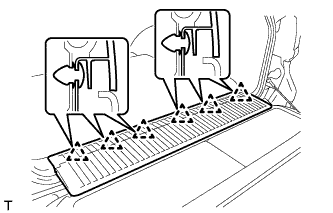
INSTALL REAR FLOOR MAT REAR SUPPORT PLATE
Attach the 6 clips to install the support plate.
18.
INSTALL BACK DOOR STAY ASSEMBLY LH
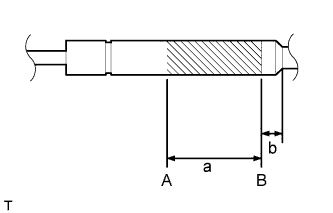
Horizontally fix the stay in a vise with the piston-rod pulled out. Using a metal saw, gradually cut any area between A and B to release the gas.
Standard Measurement:
Area
Specified Condition
a
150 mm (5.91 in.)
b
20 mm (0.787 in.)
CAUTION:
As metal debris may be blown outward by the gas, you must:
Wear protective glasses.
Cover the area being cut.
NOTICE:
The gas inside the hood support is colorless, odorless and harmless. As there is a possibility that metal debris could scatter, cover the back door stay with a piece of cloth or other material.
19.
INSTALL BACK DOOR STAY ASSEMBLY RH
HINT:
Use the same procedures described for the LH side.
20.
INSTALL REAR WASHER NOZZLE (w/ Rear Wiper)
Attach the hose.
Attach the 2 claws to install the washer nozzle.
21.
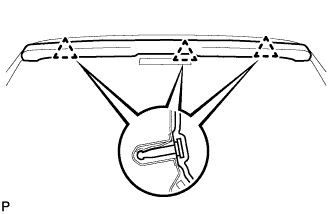
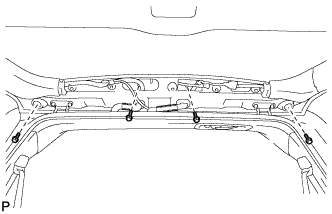
INSTALL REAR SPOILER SUB-ASSEMBLY (w/ Rear Spoiler)
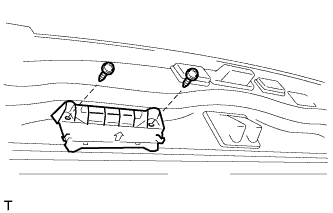
Attach the 3 clips to install the rear spoiler.
Install the 4 bolts.
22.
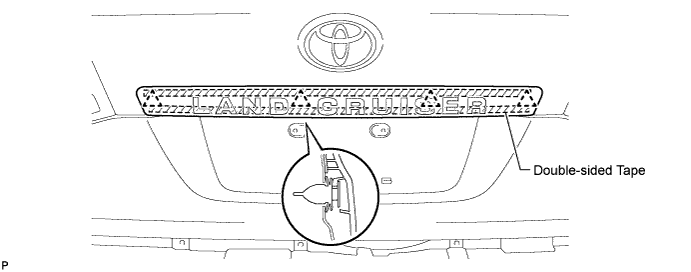
INSTALL BACK DOOR GARNISH SUB-ASSEMBLY OUTSIDE
Clean the vehicle body surface.
Using a heat light, heat the vehicle body surface.
Remove the double-sided tape from the vehicle body surface.
Wipe off any tape adhesive residue with cleaner.
Install a new back door garnish.
Using a heat light, heat a new back door garnish and the vehicle body surface.
Remove the peeling paper from the face of the back door garnish.
HINT:
After removing the peeling paper, keep the exposed adhesive free from foreign matter.
Attach the 4 clips and double-sided tape to install the back door garnish.
HINT:
Press the back door garnish firmly to install it.
23.
INSTALL LOWER BACK DOOR STOPPER
Install the bolt and lower back door stopper.
24.
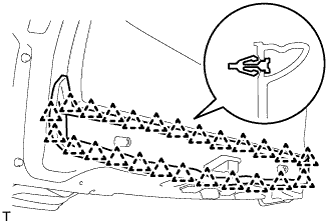
INSTALL LIFT GATE WEATHERSTRIP
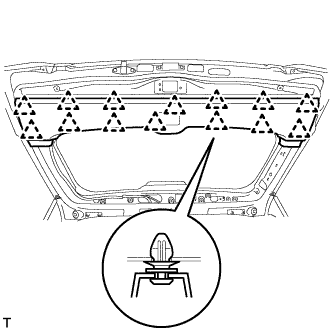
Attach the 25 clips to install the lift gate weatherstrip.
NOTICE:
Do not pull strongly on the weatherstrip as it may tear.
25.
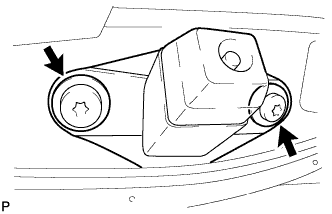
INSTALL REAR TELEVISION CAMERA ASSEMBLY (w/ Parking Assist Monitor System or Rear View Monitor System)
Connect the connector.
Attach the 4 claws to install the rear television camera assembly.
Using a T30 "TORX" socket wrench, install the rear television camera with the 2 screws.
26.
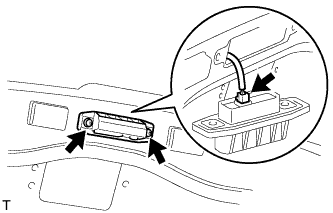
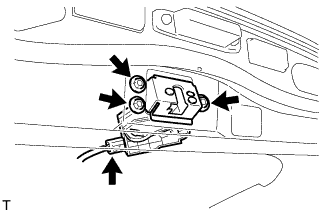
INSTALL BACK DOOR OPENER SWITCH ASSEMBLY
Connect the connector and then install the back door opener switch. Install the 2 screws.
Torque:
5.0 N*m{
51 kgf*cm
, 44 in.*lbf
}
27.
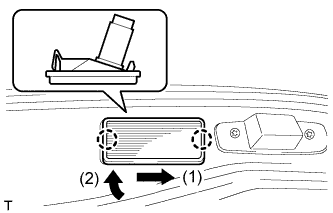
INSTALL LICENSE PLATE LIGHT LENS (for Standard)
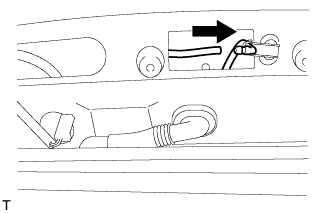
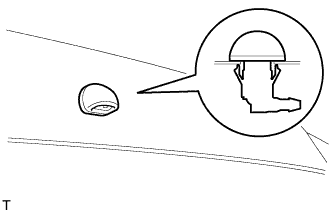
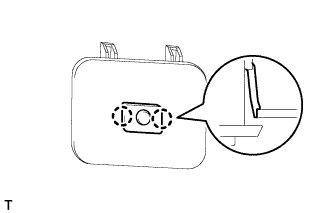
Connect the connector. Attach the 2 claws in the order shown in the illustration to install the license plate light.
28.
INSTALL BACK DOOR LOCK ASSEMBLY
Install the 3 bolts and back door lock.
Torque:
13 N*m{
133 kgf*cm
, 10 ft.*lbf
}
Connect the connector.
29.
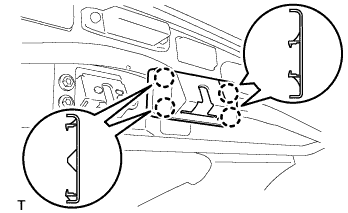
INSTALL BACK DOOR LOCK COVER
Attach the 4 claws to install the back door lock cover.
30.
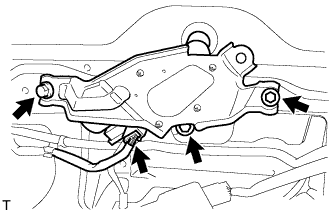
INSTALL REAR WIPER MOTOR ASSEMBLY (w/ Rear Wiper)
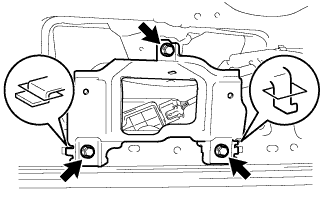
Temporarily install the rear wiper motor assembly with the 3 bolts. Tighten the 3 bolts.
Torque:
5.5 N*m{
56 kgf*cm
, 49 in.*lbf
}
Connect the connector.
31.
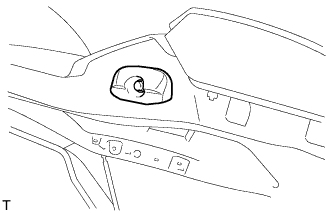
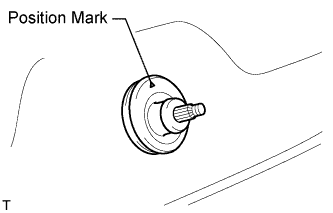
INSTALL REAR WIPER MOTOR GROMMET (w/ Rear Wiper)
Install the rear wiper motor grommet with the position mark facing upward as shown in the illustration.
32.
INSTALL REAR WIPER ARM (w/ Rear Wiper)
Operate the rear wiper, and stop the rear wiper motor at the automatic stop position.
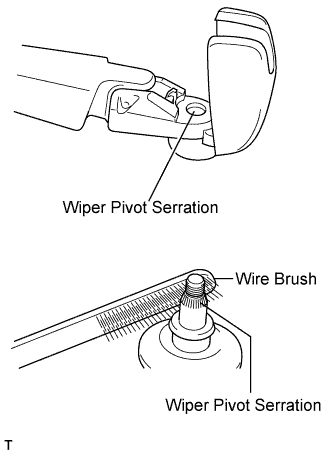
Clean the wiper pivot serration with a wire brush.
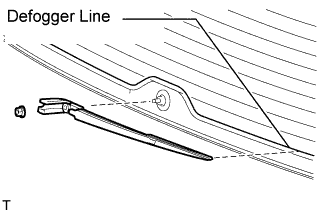
Set the head of the blade on the defogger line. Install the nut and rear wiper arm.
Torque:
5.5 N*m{
56 kgf*cm
, 49 in.*lbf
}
Close the cover.
33.
INSTALL REAR ASSIST GRIP REINFORCEMENT (for Face to Face Seat Type)
Attach the 2 claws to install the rear assist grip reinforcement. Install the 3 bolts.
34.
INSTALL REAR HEADER SPEAKER ASSEMBLY (for 14 Speakers)
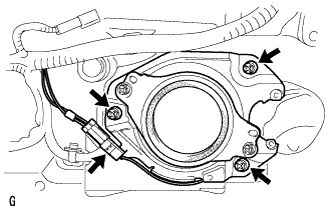
Connect the connector. Install the rear header speaker assembly with the 3 screws.
35.
INSTALL BACK DOOR GARNISH
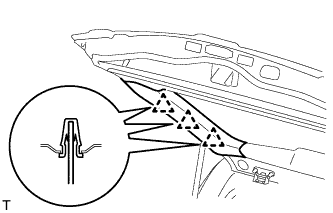
Attach the 14 clips to install the back door garnish.
36.
INSTALL POWER BACK DOOR MAIN SWITCH (for Face to Face Seat Type)
Attach the 2 claws to install the power back door main switch.
37.
INSTALL NO. 2 BACK DOOR SERVICE HOLE COVER (for Face to Face Seat Type)
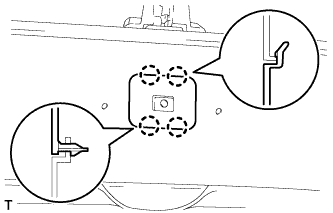
Connect the connector. Attach the 4 claws to install service hole cover.
38.
INSTALL ASSIST GRIP (for Face to Face Seat Type)
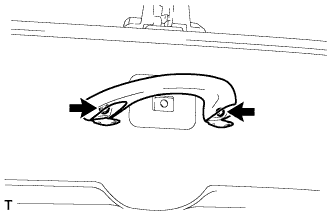
Install the assist grip with the 2 screws.
39.
INSTALL BACK DOOR SIDE GARNISH LH
Attach the 3 clips to install the back door side garnish.
40.
INSTALL BACK DOOR SIDE GARNISH RH
HINT:
Use the same procedures described for the LH side.
41.
INSTALL CENTER STOP LIGHT ASSEMBLY
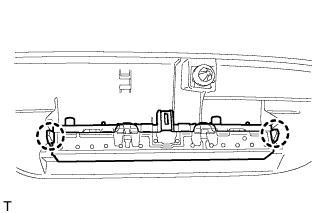
Attach the 2 claws to install the stop light.
42.
INSTALL CENTER BACK DOOR GARNISH
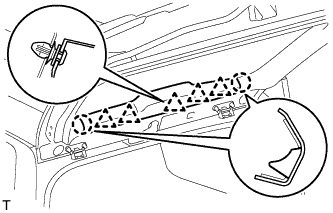
Attach the 5 clips and 2 claws to install the back door garnish.
43.
INSTALL BACK DOOR LOWER STOPPER CUSHION
Install the 2 lower back door stopper cushions with the 4 bolts.
44.
INSTALL BACK DOOR GRIP
Install the back door grip with the 2 screws.
45.
CONNECT CABLE TO NEGATIVE BATTERY TERMINAL
NOTICE:
When disconnecting the cable, some systems need to be initialized after the cable is reconnected (Click here ).