REMOVAL
Removal / installation · Vehicles built Sep 2011 – Dec 2011
| 1. REMOVE FRONT FENDER SPLASH SHIELD SUB-ASSEMBLY RH |

- HINT:
- Use the same procedures described for the LH side.
| 2. REMOVE FRONT FENDER SPLASH SHIELD SUB-ASSEMBLY LH |
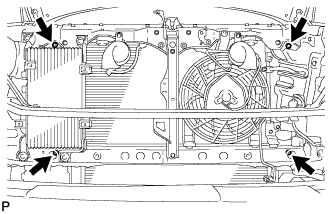
  |
Remove the 3 bolts and screw.
Turn the clip indicated by the arrow in the illustration to remove the fender splash shield.
| 3. REMOVE NO. 1 ENGINE UNDER COVER SUB-ASSEMBLY |
Remove the 10 bolts and No. 1 engine under cover.
| 4. DRAIN ENGINE COOLANT |
- CAUTION:
- Do not remove the radiator cap while the engine and radiator are still hot. Pressurized, hot engine coolant and steam may be released and cause serious burns.
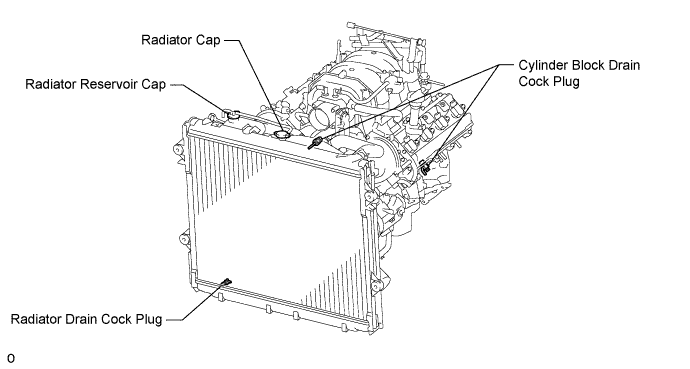
Loosen the radiator drain cock plug.
Remove the radiator cap. Then drain the coolant.
- HINT:
- Collect the coolant in a container and dispose of it according to the regulations in your area.
Loosen the 2 cylinder block drain cock plugs. Then drain the coolant from the engine.
Tighten the 2 cylinder block drain cock plugs.
- Torque:
- 13 N*m{ 130 kgf*cm , 9 ft.*lbf }
Tighten the radiator drain cock plug by hand.
| 5. REMOVE UPPER RADIATOR SUPPORT SEAL |
Remove the 7 clips and radiator support seal.
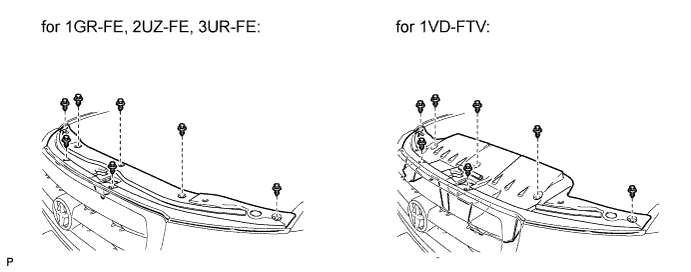
| 6. REMOVE FRONT BUMPER WINCH COVER SUB-ASSEMBLY (w/ Winch) |
| 7. REMOVE RADIATOR GRILLE |
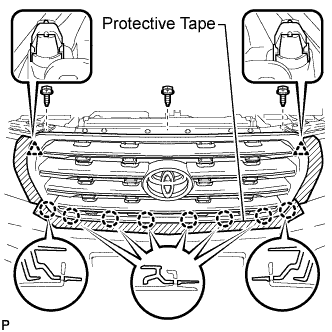 |
Put protective tape around the radiator grille.
Remove the 3 screws.
Detach the 2 clips and 8 claws, and remove the radiator grille.
| 8. REMOVE FRONT BUMPER COVER |
for Standard Type:
Refer to the following procedures (Click here).
w/ Winch Type:
Refer to the following procedures (Click here).
| 9. DISCONNECT RADIATOR SIDE DEFLECTOR LH |
Using a clip remover, remove the 4 clips and disconnect the side deflector.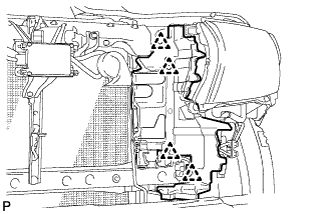
| 10. DISCONNECT RADIATOR SIDE DEFLECTOR RH (w/o Air Cooled Transmission Oil Cooler) |
Using a clip remover, remove the 4 clips and disconnect the side deflector.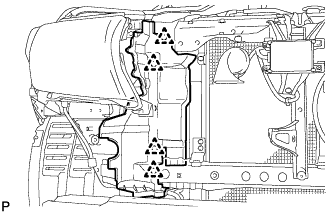
| 11. REMOVE TRANSMISSION OIL COOLER AIR DUCT (w/ Air Cooled Transmission Oil Cooler) |
Remove the 4 bolts and oil cooler air duct.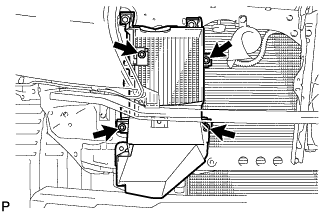
| 12. REMOVE V-BANK COVER SUB-ASSEMBLY |
Remove the 2 nuts and V-bank cover.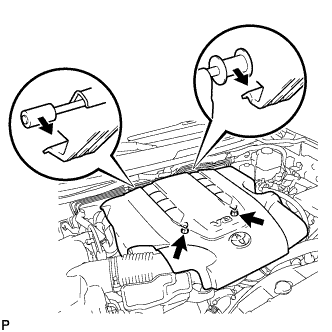
| 13. REMOVE AIR CLEANER HOSE ASSEMBLY |
Disconnect the vacuum transmitting hose and No. 2 ventilation hose.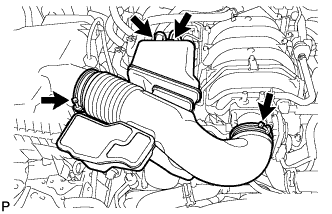
Loosen the 2 hose clamps.
Remove the air cleaner hose.
| 14. REMOVE FAN & GENERATOR V BELT |
Loosen the belt tension by turning the belt tensioner counterclockwise, and then remove the fan and generator V belt.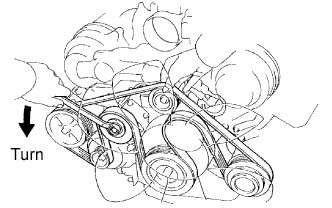
- HINT:
- The pulley bolt for the belt tensioner has left-hand thread.
| 15. REMOVE NO. 1 RADIATOR HOSE |
Using needle-nose pliers, grip the claws of the clamps and slide the clamps to remove the radiator hose.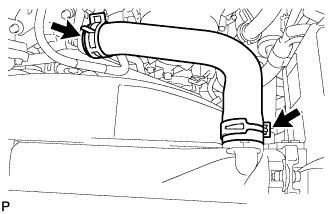
| 16. REMOVE NO. 2 RADIATOR HOSE |
Using needle-nose pliers, grip the claws of the clamps and slide the clamps to remove the radiator hose.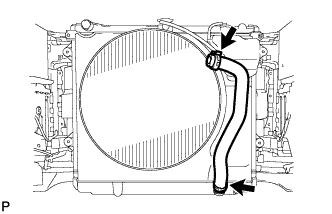
| 17. REMOVE FAN SHROUD |
Loosen the 4 nuts holding the cooling fan.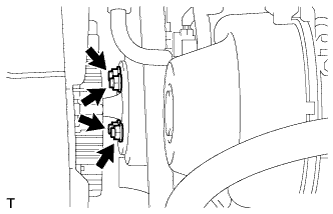
Disconnect the reservoir hose from the upper side of the radiator tank.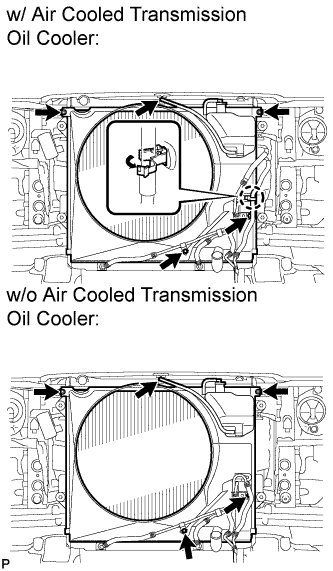
w/ Air Cooled Transmission Oil Cooler:
Detach the claw to open the flexible hose clamp.
Remove the 2 bolts and disconnect the oil cooler tube from the fan shroud.
Remove the 2 bolts holding the fan shroud.
Remove the 4 nuts of the cooling fan, and then remove the shroud together with the cooling fan.
- NOTICE:
- Be careful not to damage the radiator core.
Remove the fan pulley from the water pump.
| 18. REMOVE RADIATOR ASSEMBLY |
Using needle-nose pliers, grip the claws of the clamps and slide the clamps to disconnect the 2 oil cooler hoses.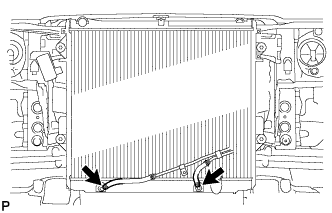
Remove the 4 bolts and radiator.